P1 Install marketplace
In this phase 1 you install the marketplace (if not already installed) app for this demo. This is basically a short cut, installing the data, pipeline, ontology, and UI for this demo for you. You can then concentrate your efforts on the agentic AI part of the demo.
Original install instructions are at:
- Speedrun (the original demo documentation)
- Section “Install the Marketplace Product” See also:
- #614_.docx
Note: The ZAI version of this part of the demo is much easier to read than the original and includes key missing concepts. This section is a rough draft. When I installed the marketplace for this demo, the instructions were incomplete and I was unable to document the process in detail. And I could not reinstall the marketplace unless I first uninstalled the existing marketplace installation (and that is not a simple process as I understand). So this document guesses at some some steps of the installation process. I might reinstall and document this later.
TOC
1 Install
- 1.1 Create a Course-Specific Training Folder
- 1.2 Open marketplace and start the install process
- 1.3 Set up a Language Model
- 1.4 Set up an organization for action submission
- 1.5 Customize Ontology Content (Set your username as the ontology prefix)
- 1.6 Install
- 1.7 View installation folder
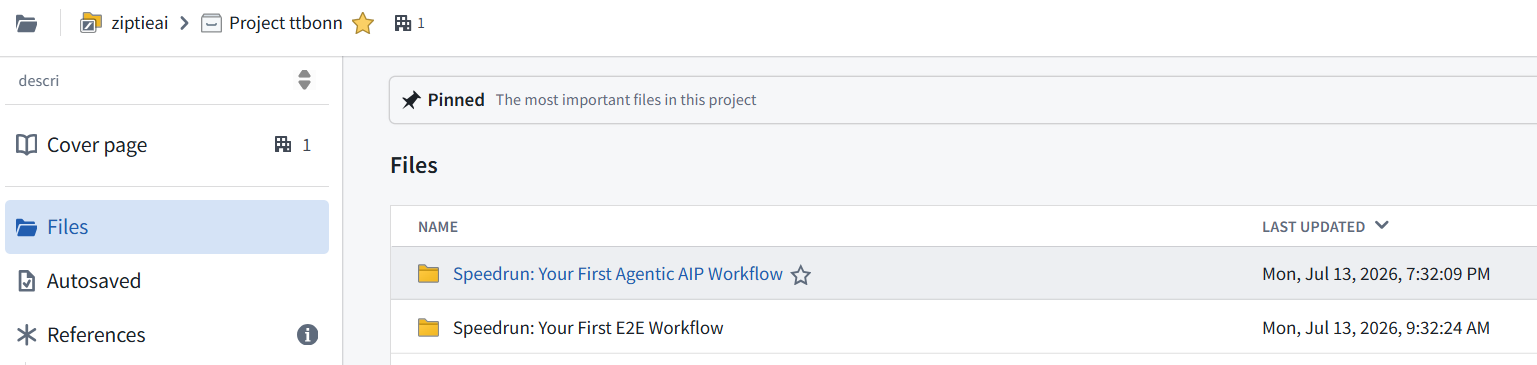
1.1 Create a Course-Specific Training Folder
1.2 Open marketplace and start the install process
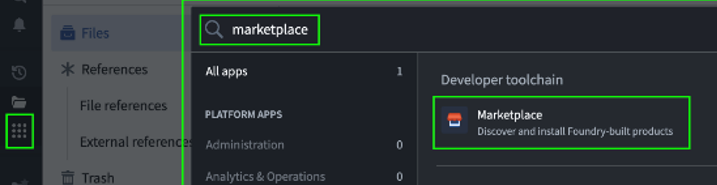
1 Click on Applications on the left side of the screen.
2 Search for Marketplace and open it.
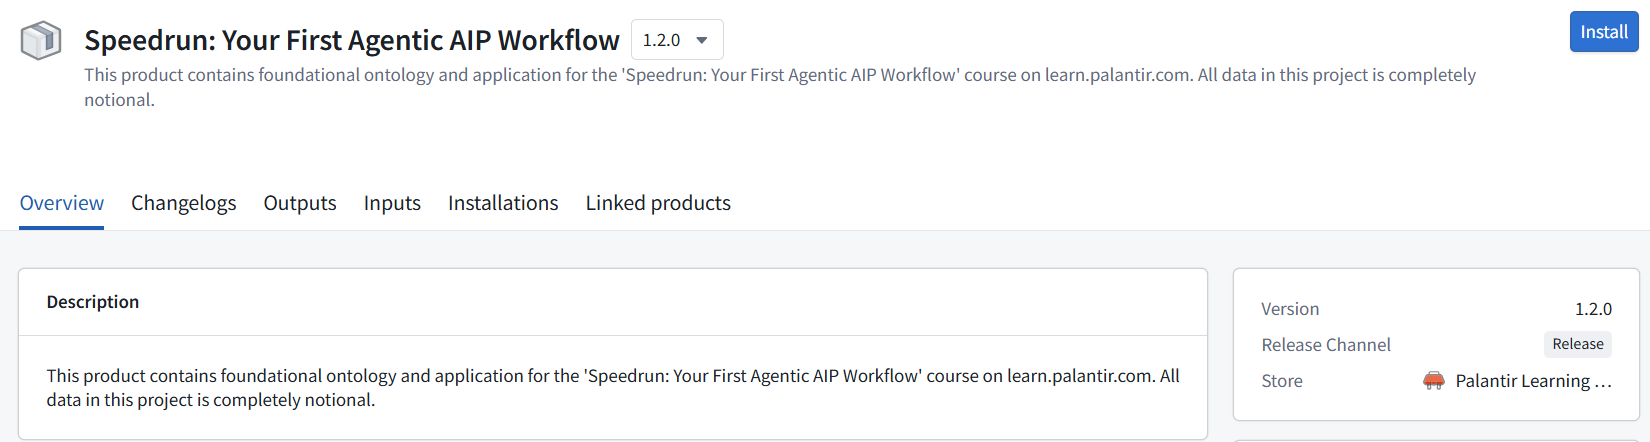
3 Search for the Speedrun: Your First Agentic AIP Workflow product.
4 Click into the corresponding product.

5 Click Install or Install again in the top right corner (make sure to always pick the latest version on the package).
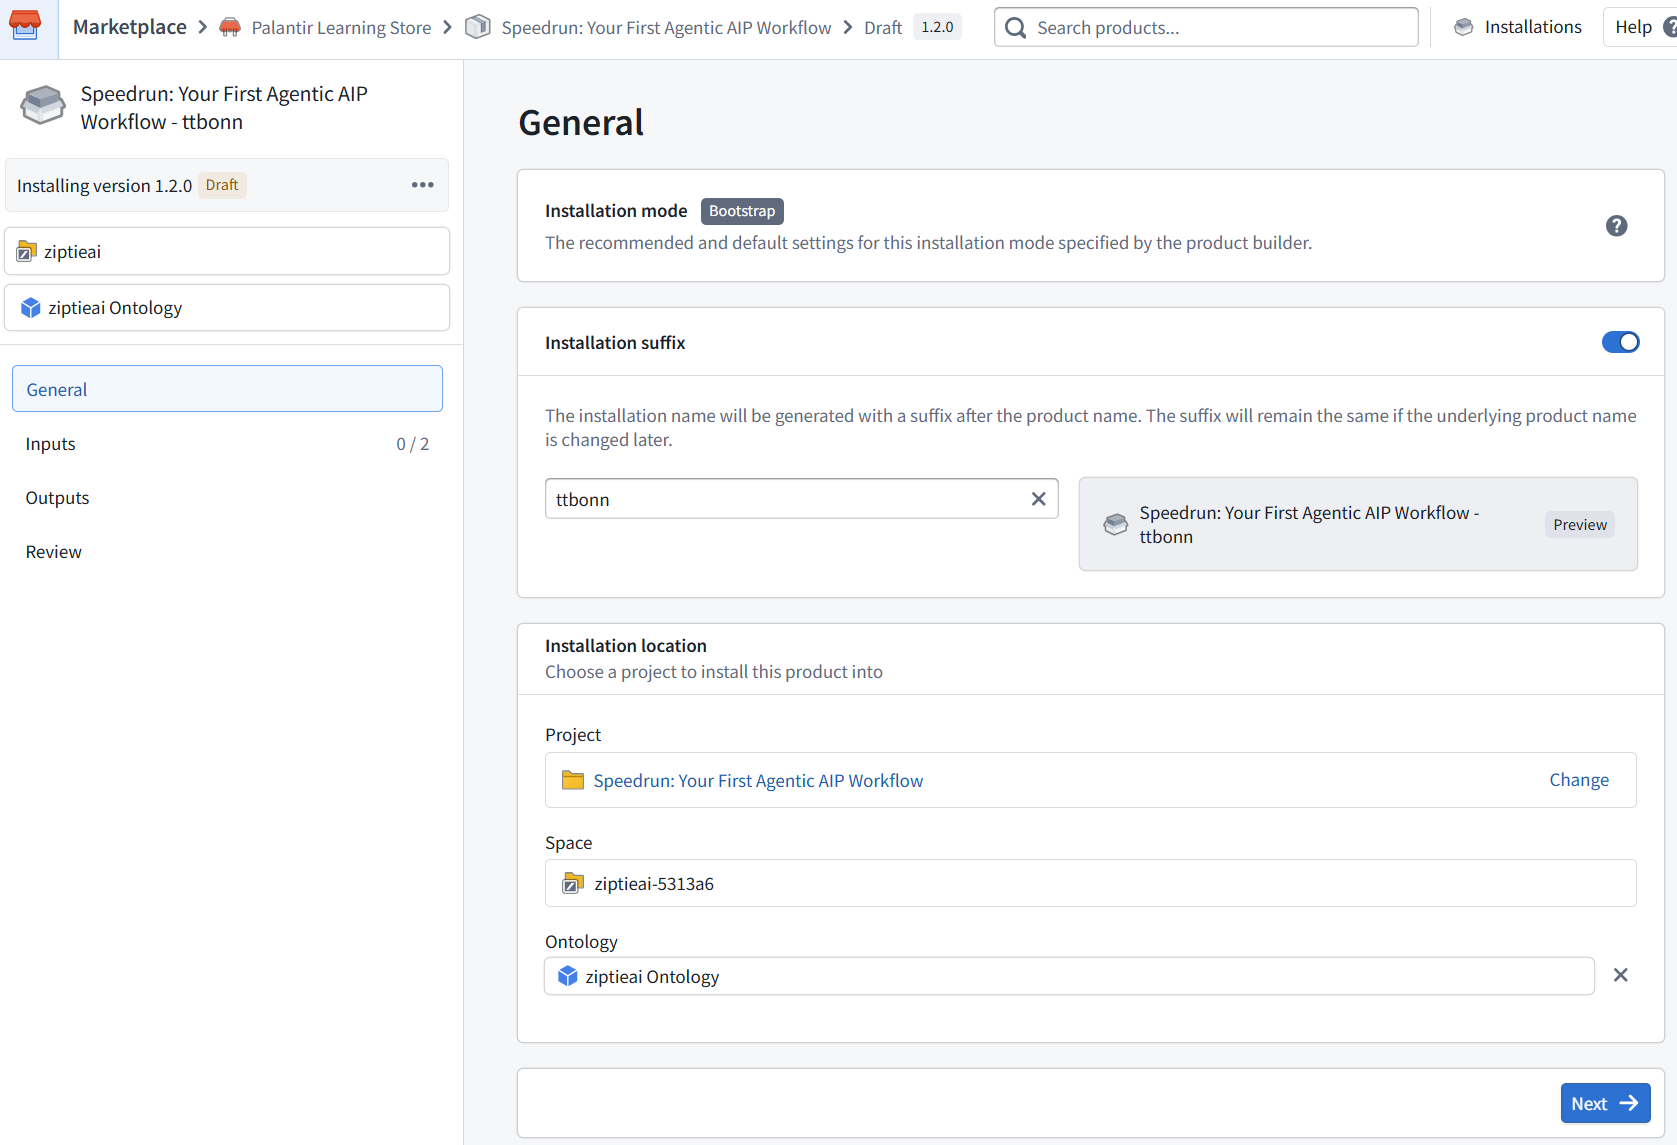
6 Set the installation suffix.
7 Change the installation location.
8 Select a valid namespace.
9 Select a valid ontology that you have permission to edit.
1.3 Set up a Language Model
Configure inputs for the installation.
1 Click Next.
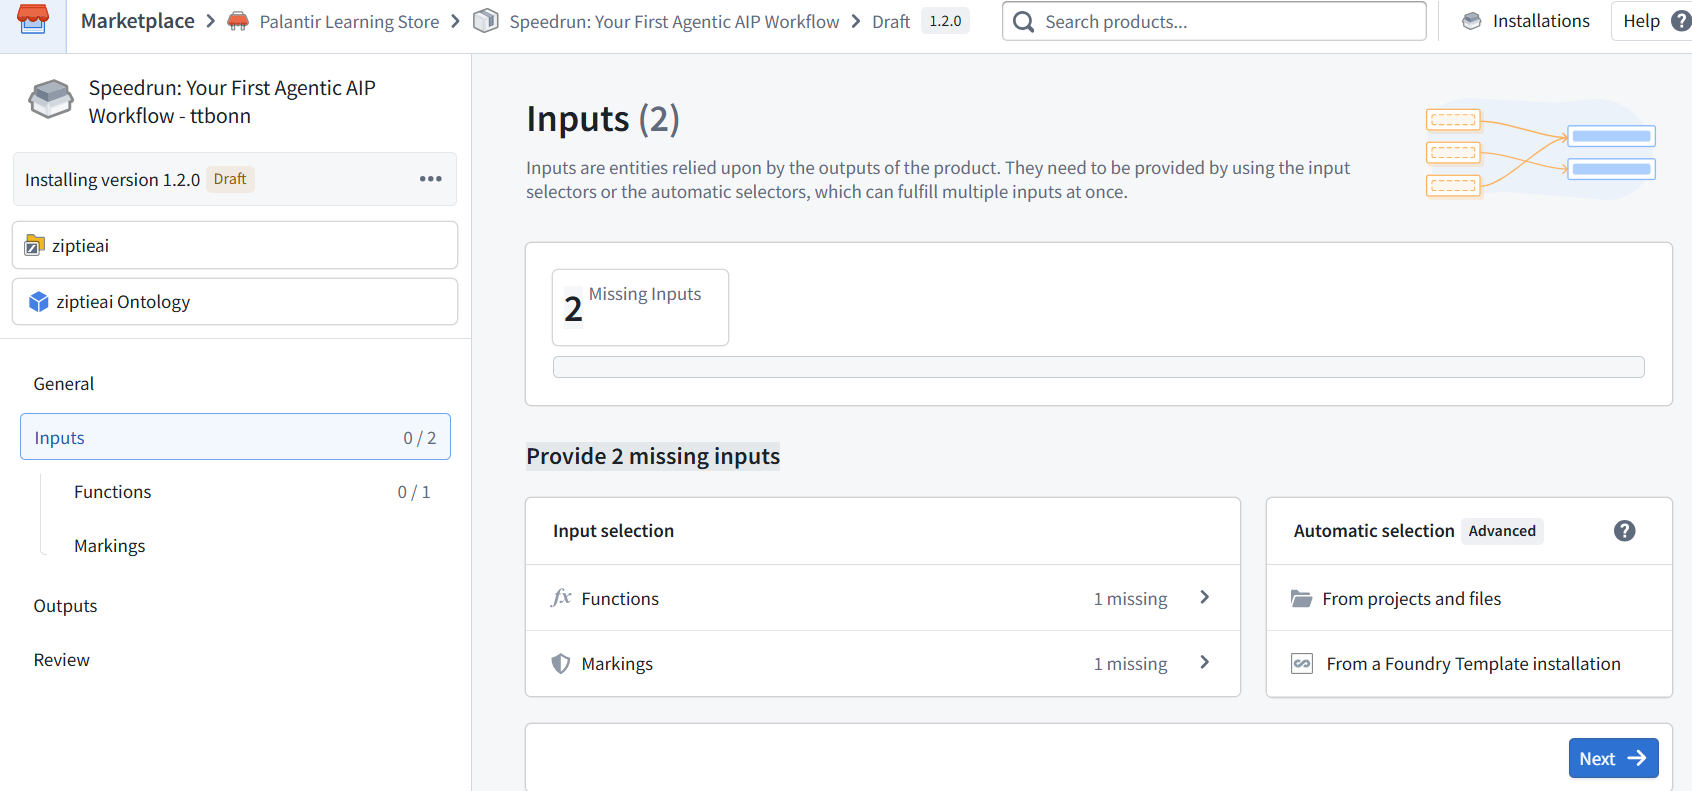
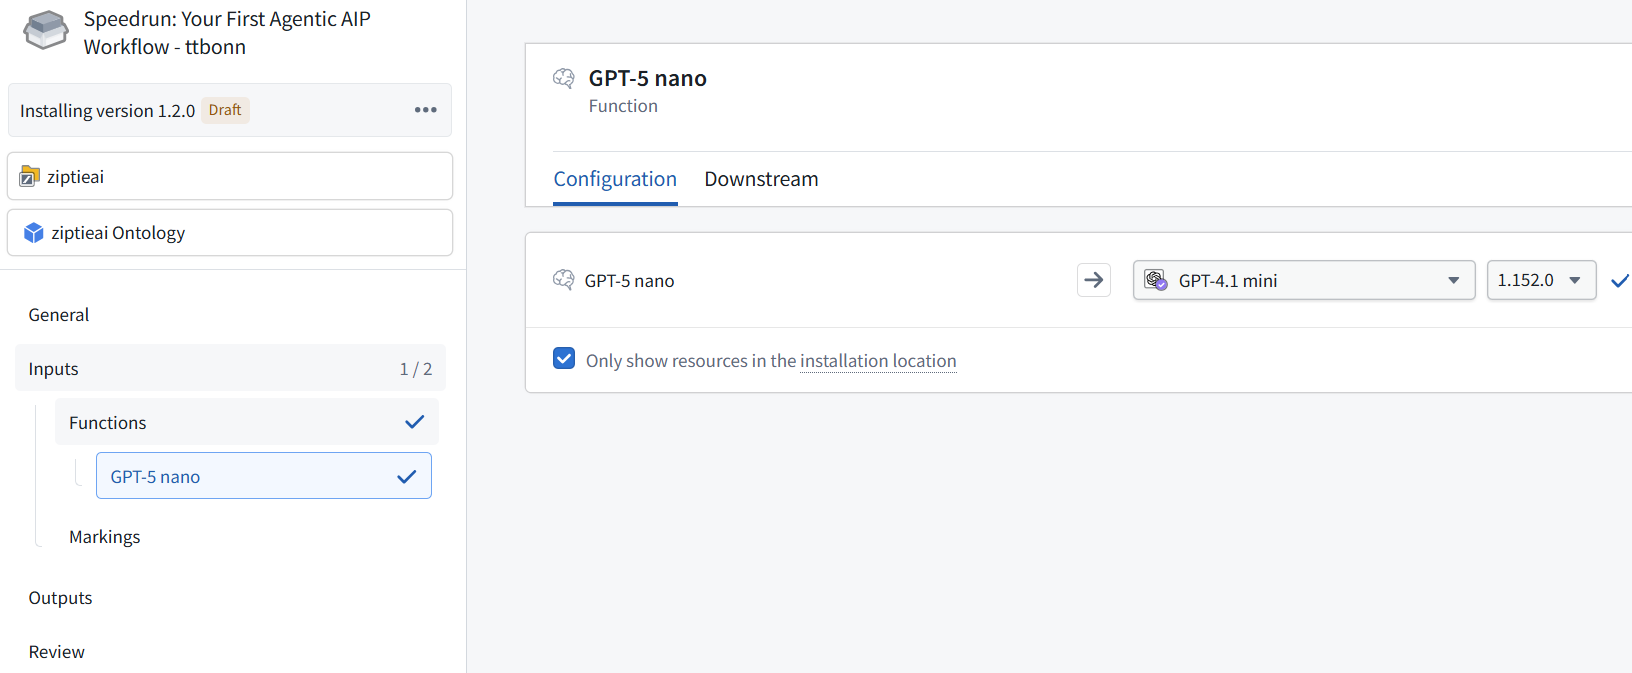
2 Click on 1 missing next to the Functions input selection. Choose a language model which will be used in one part of the product pipeline. For example, you may choose GPT-4.1 mini, and leave the version of the model to the one selected by default. If you don’t have access to this model, you may choose any other.
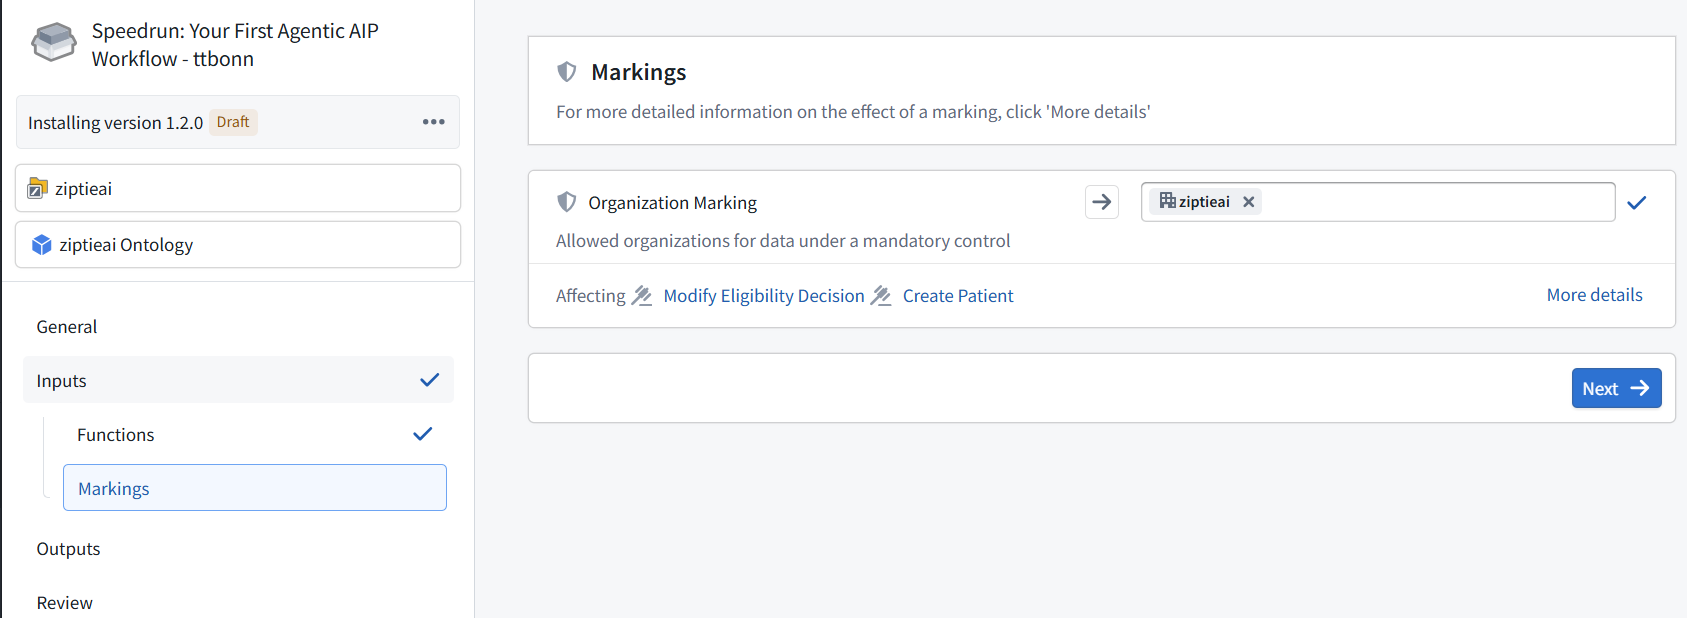
1.4 Set up an organization for action submission
1 Click Next.
2 Choose your organization in the drop-down many. Note: If you see more than one option in the drop-down menu, choose any of them.
1.5 Customize Ontology Content (Set your username as the ontology prefix)
1 Click Next.
2 Set your username as the ontology prefix. Toggle on Prefix ontology entities. Enter your own
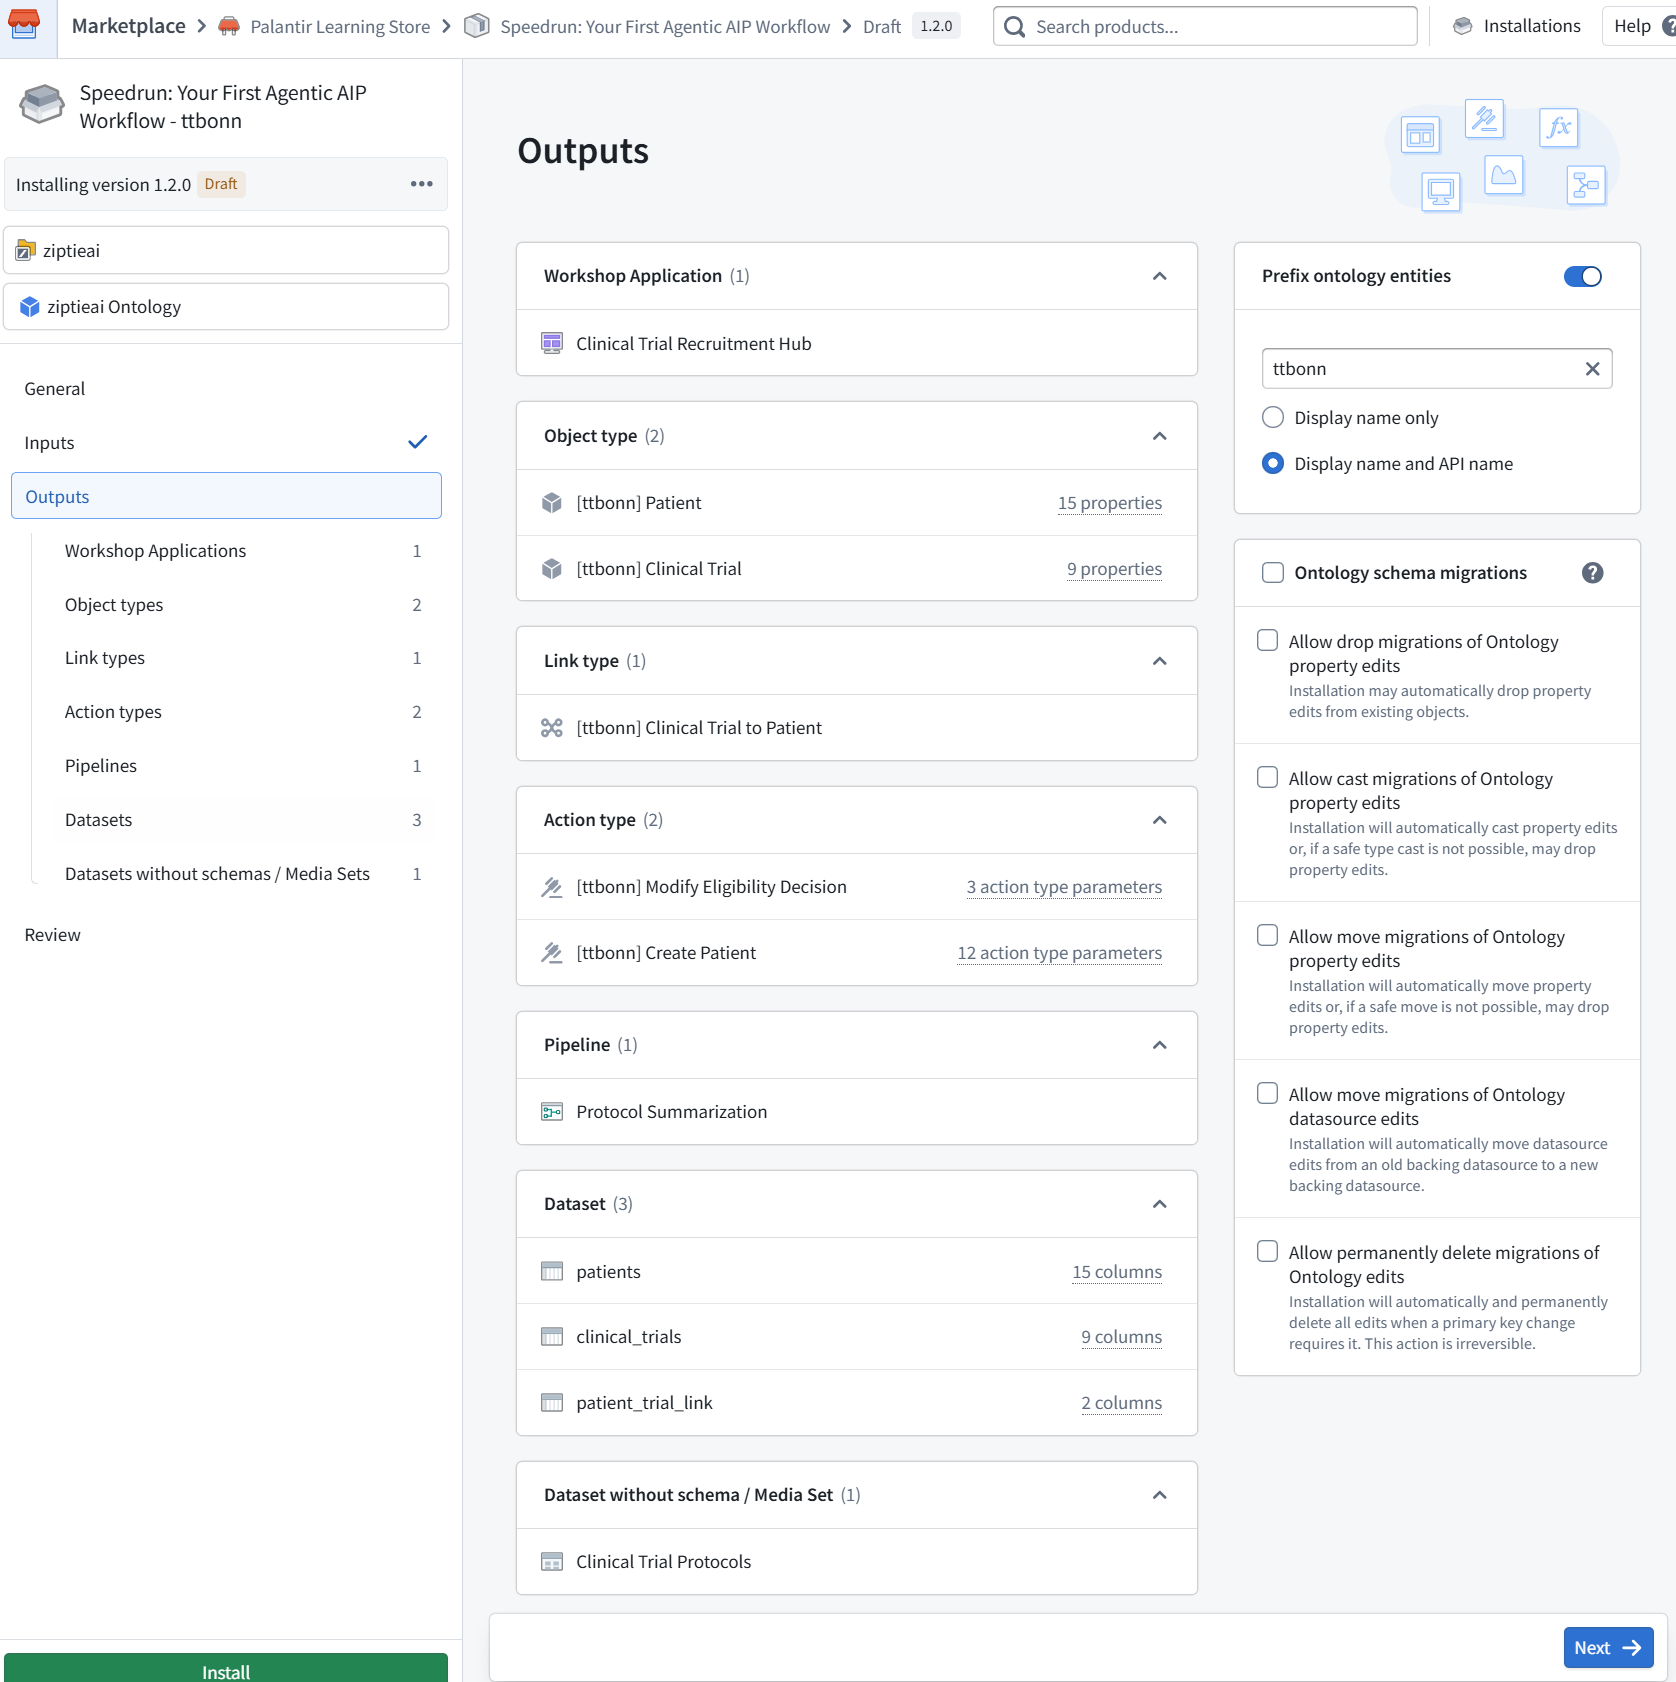
3 Click Next.
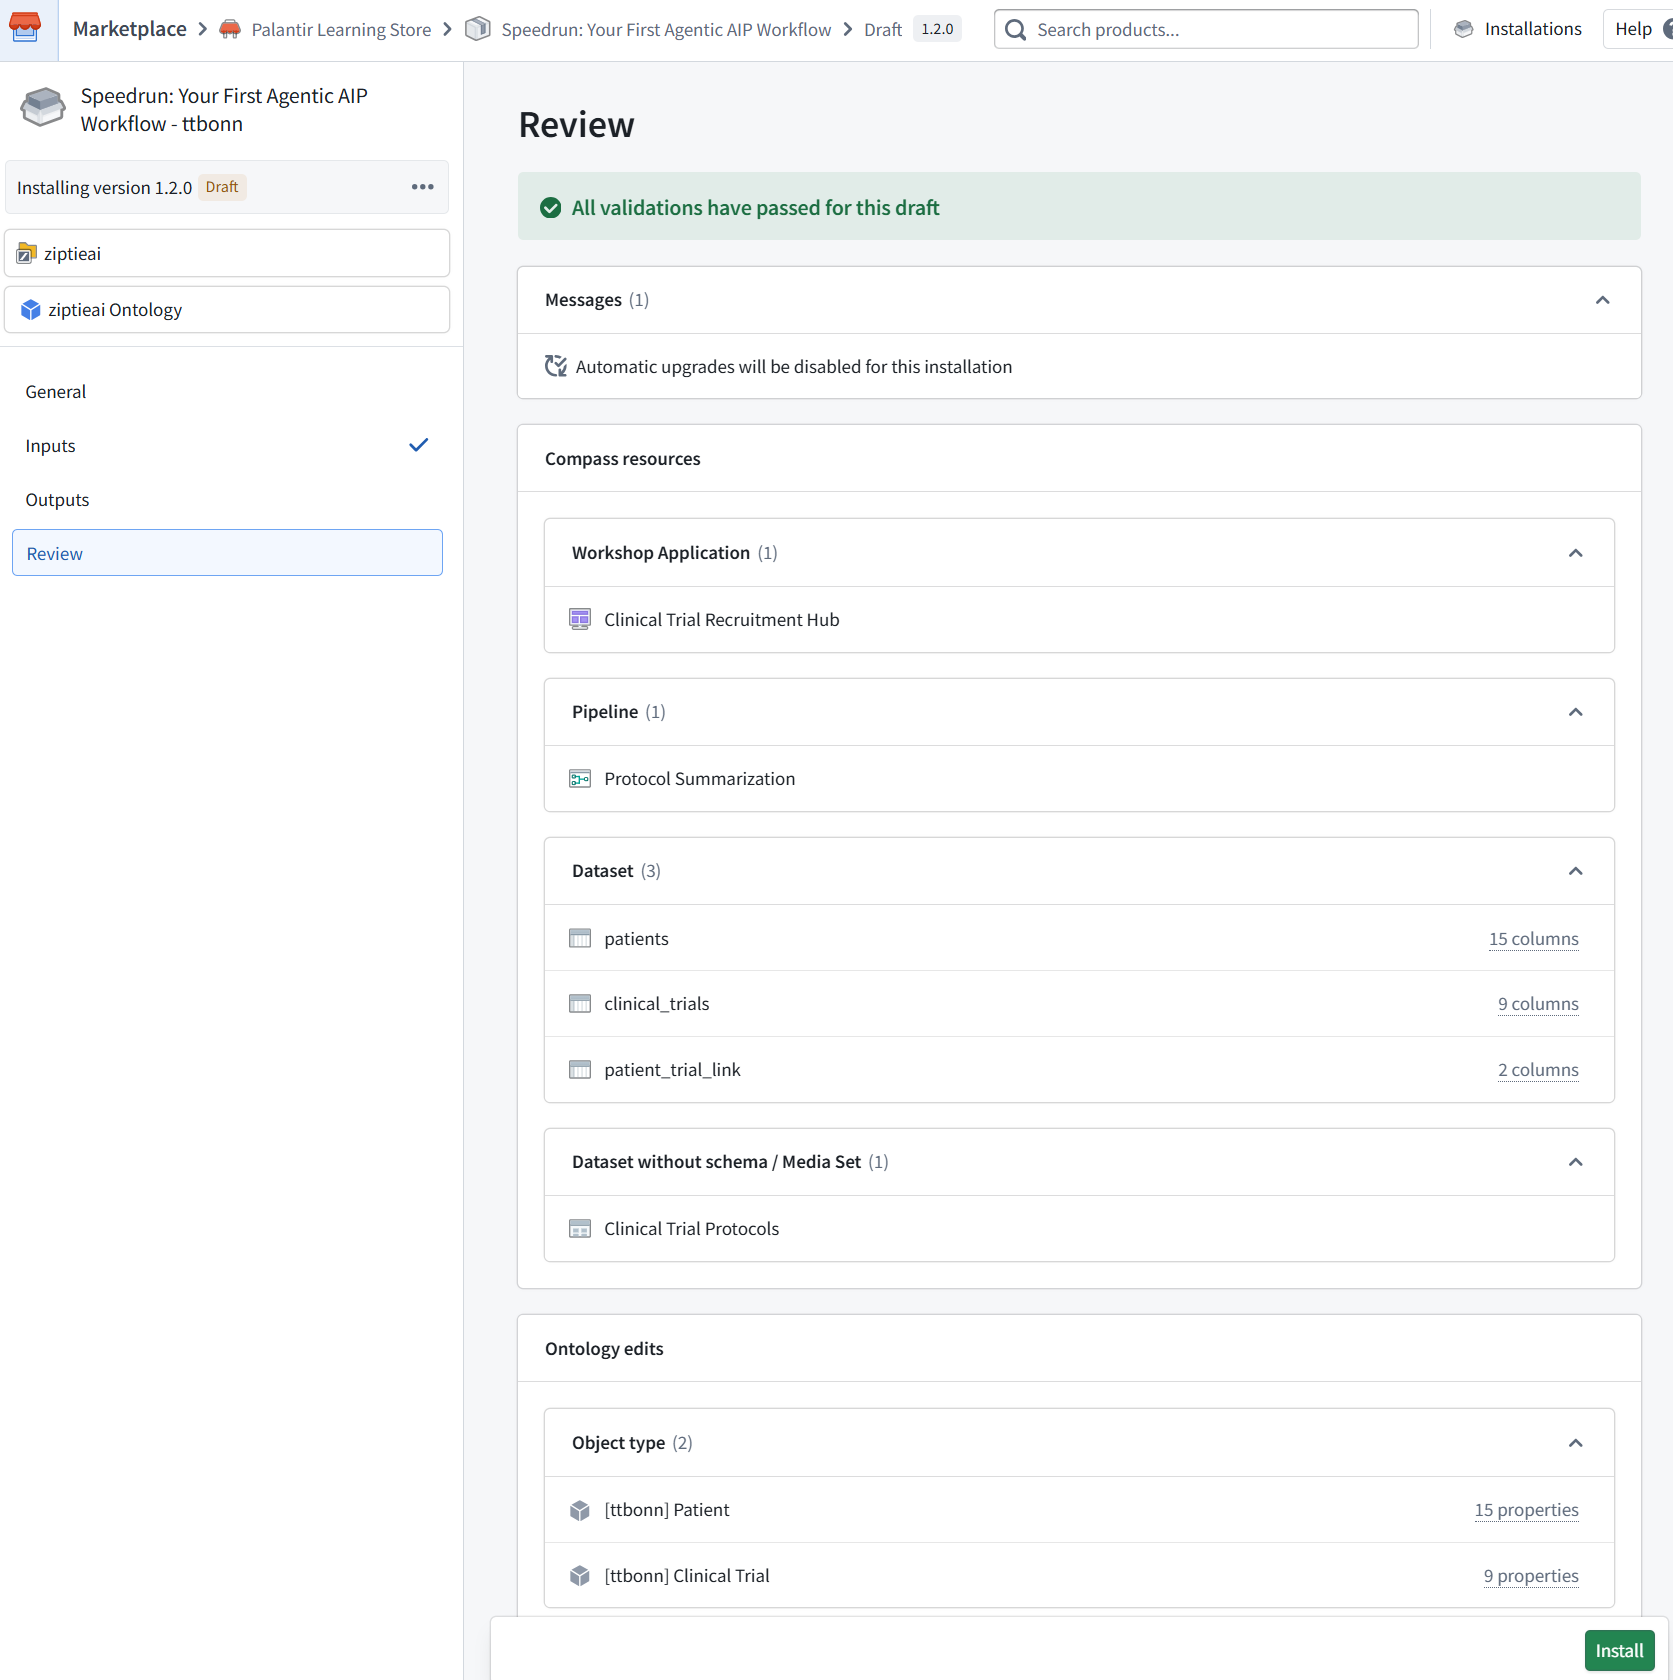
1.6 Install
1 Click the green Install button. The following shows the dialog after the install has completed.
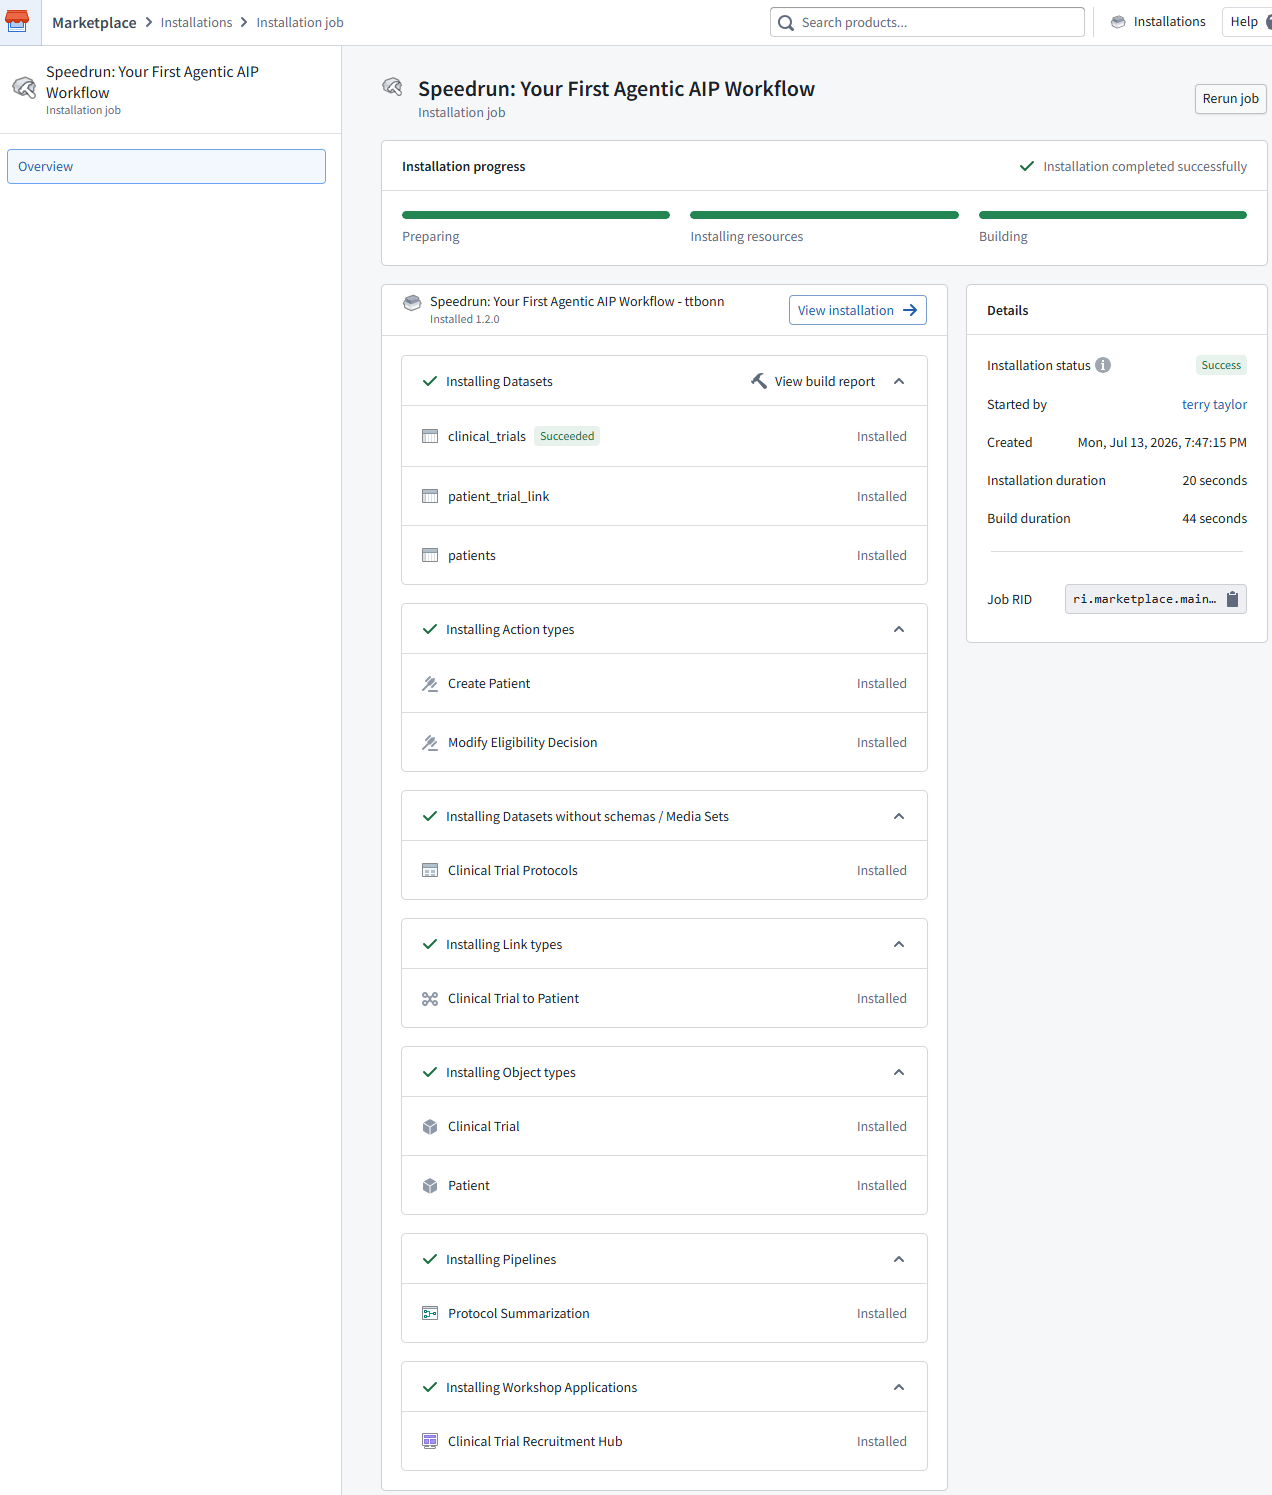
1.7 View installation folder
1 Click on View Installation.
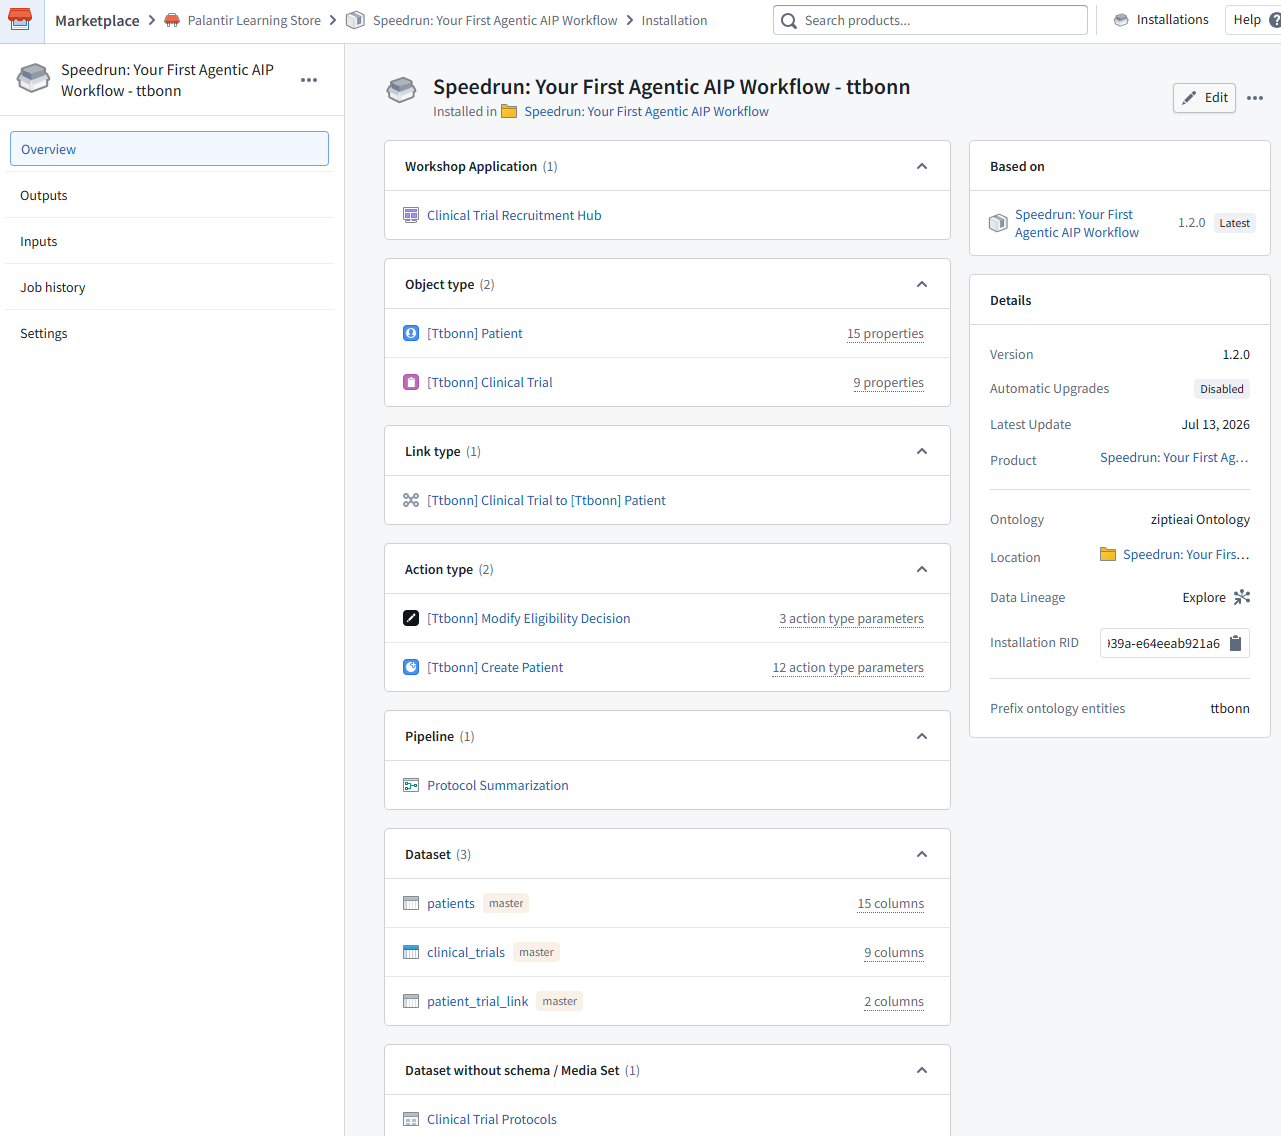
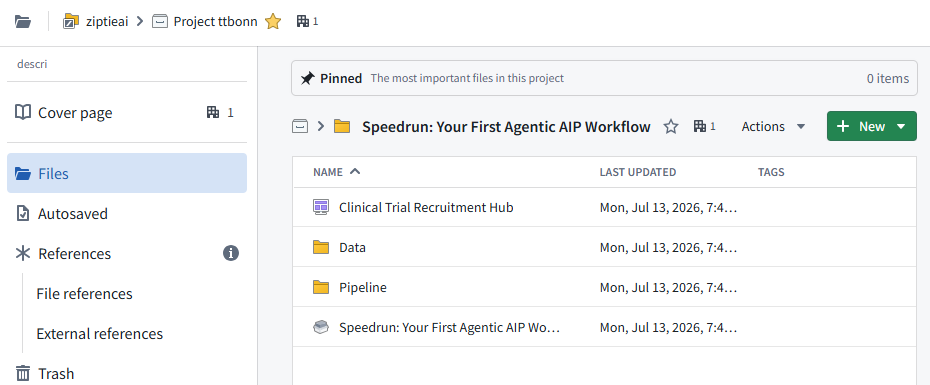
2 Click the Installed in hyperlink at the top of the screen to go to your course-specific folder. You should now see two folders and one Workshop Module installed next to your installation.
2 Test
- 2.1 Open the app (UI)
- 2.2 Add a patient / Nothing happens
- 2.3 Open Patient Review
- 2.4 Change the AI-selected eligibility
2.1 Open the app (UI)
1 Navigate to your working folder where you installed the Marketplace product.
2 Find the Workshop Module Clinical Trial Recruitment Hub.
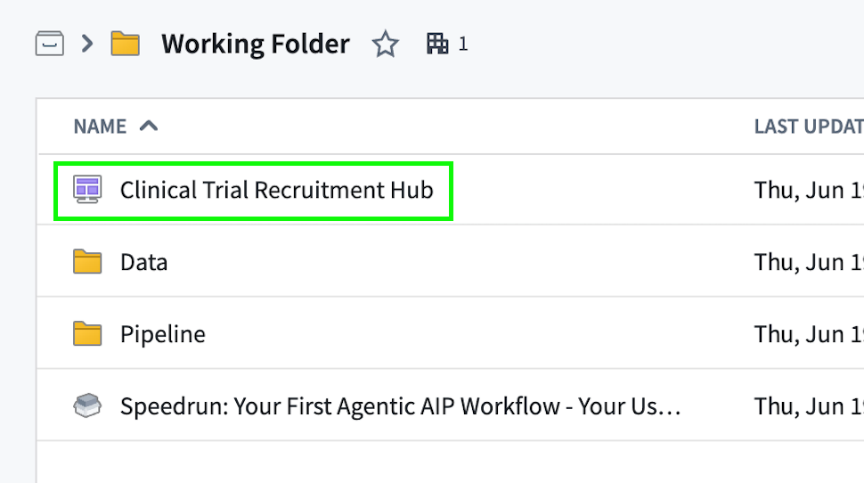
3 Click on it to launch it.
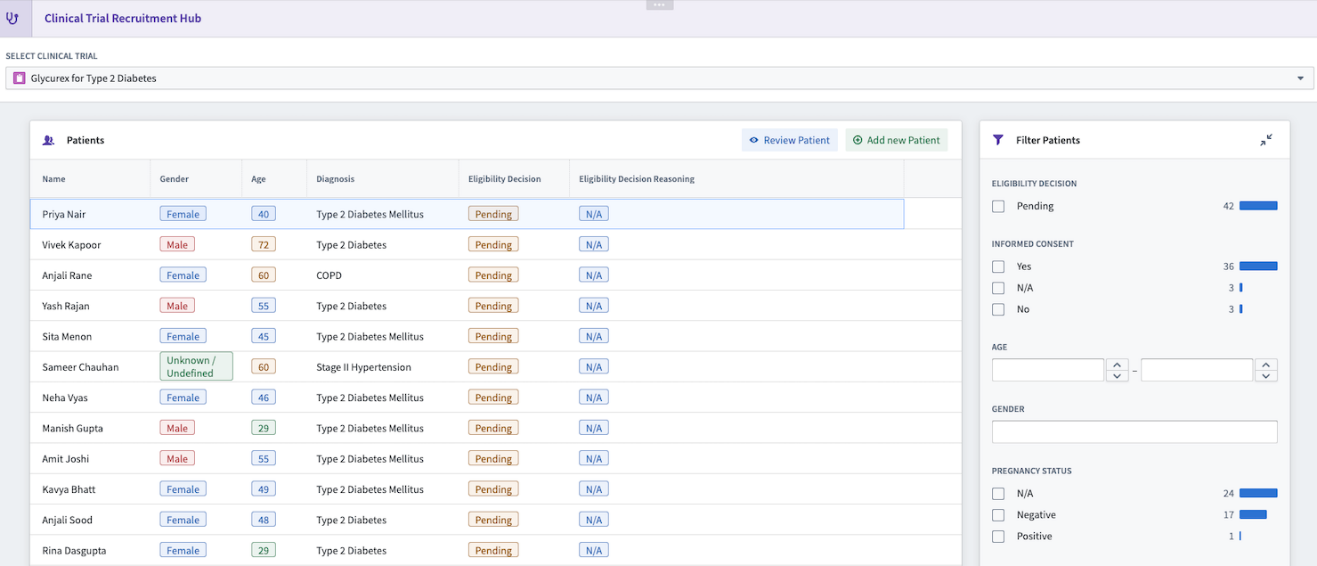
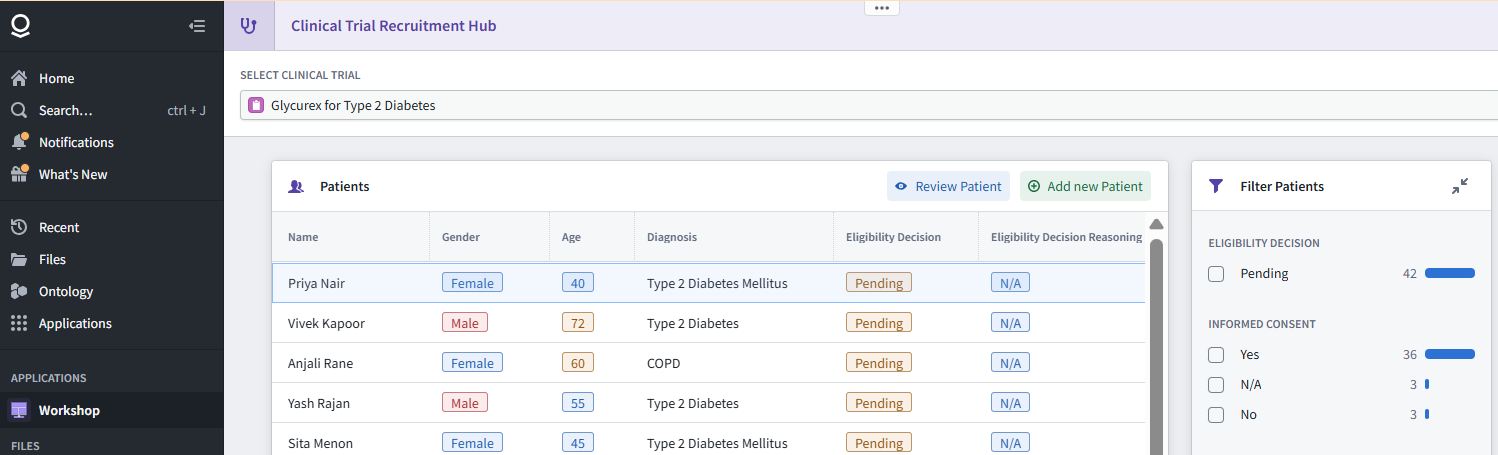
4 You can select a clinical trial (currently, there is only one clinical trial available)
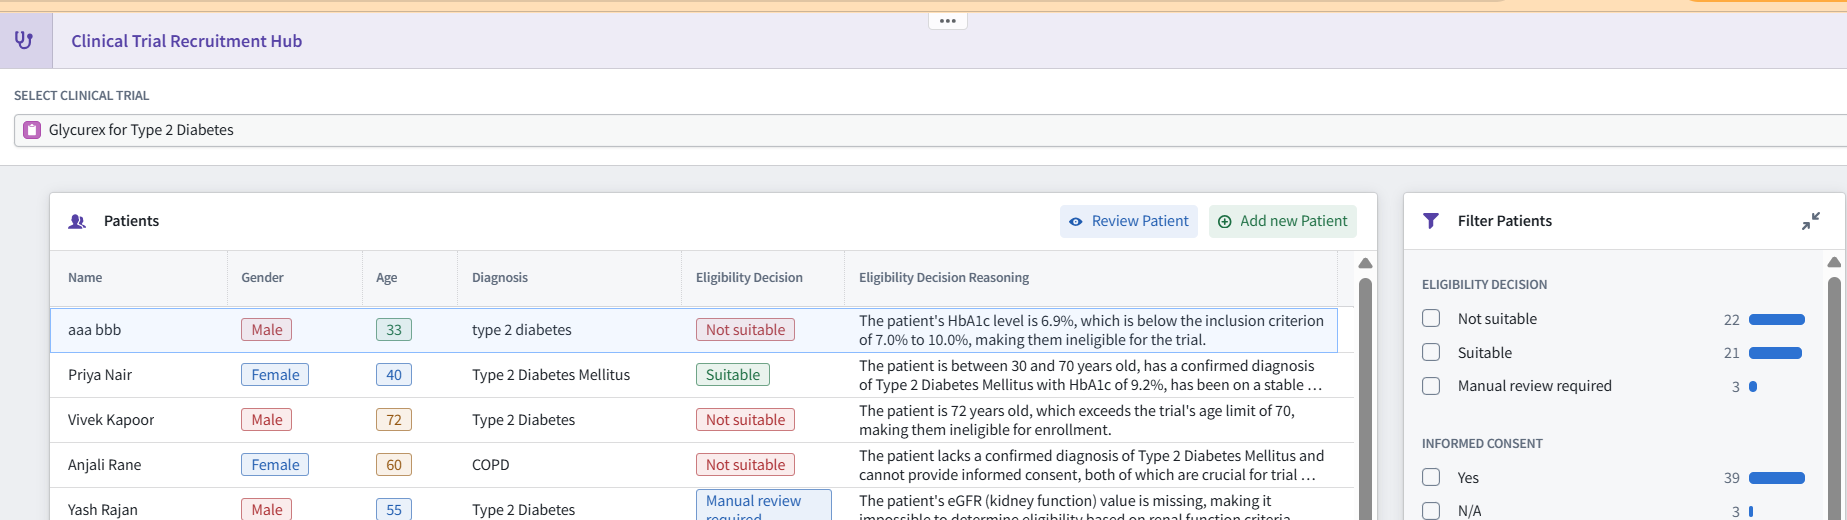
5 You can view all patients who are candidates for this clinical trial. You will notice that the Eligibility Decision for all of them is Pending.
6 You can filter the patients on the right-hand side of the application.
7 You can always go to the edit mode of the application, if you want to understand how it is configured.

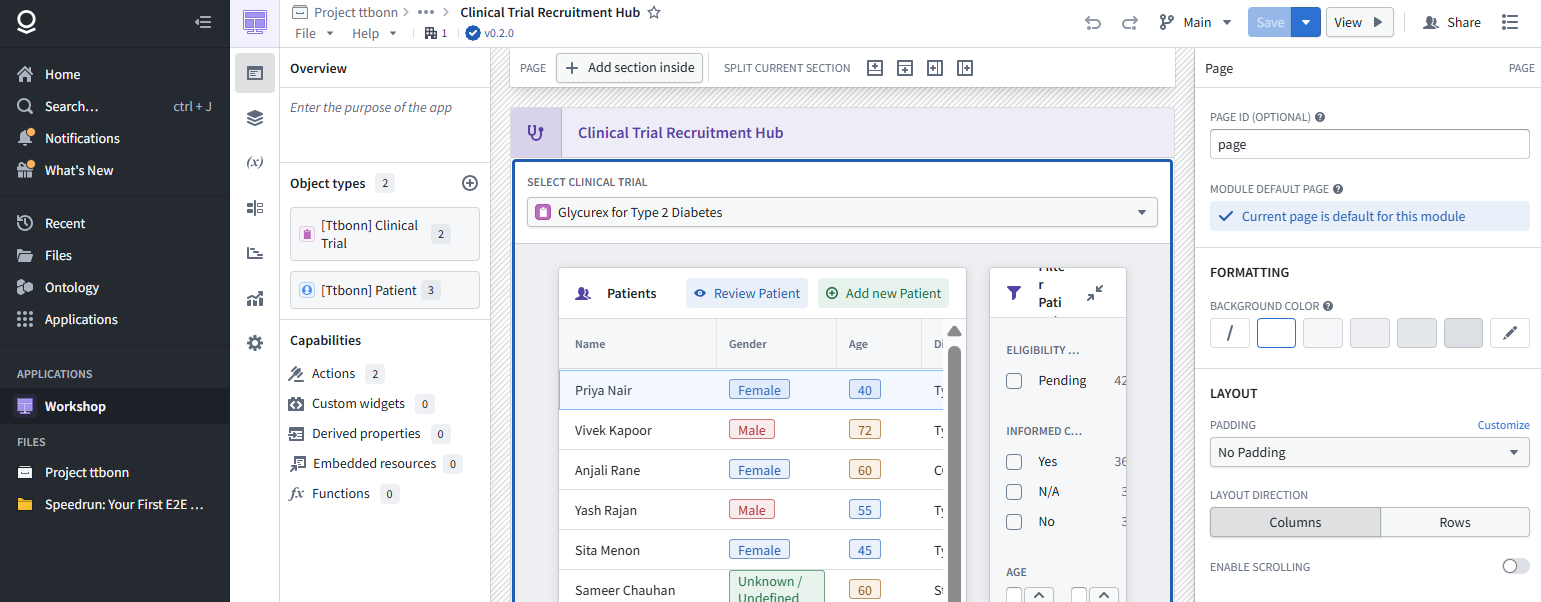
8 Click View to go back to the viewer mode of the application.

2.2 Add a patient / Nothing happens
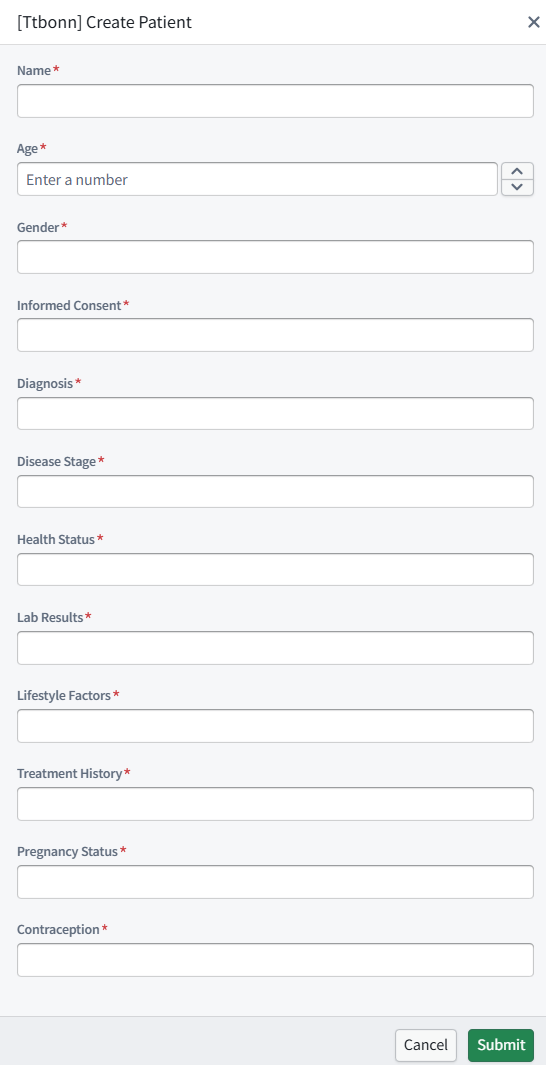
(ZAI) This a very important missing step that was added in this ZAI version. If you add the patient, then nothing happens because the agent has not be created yet. Adding the agent is the goal of this demo.
2.3 Open Patient Review
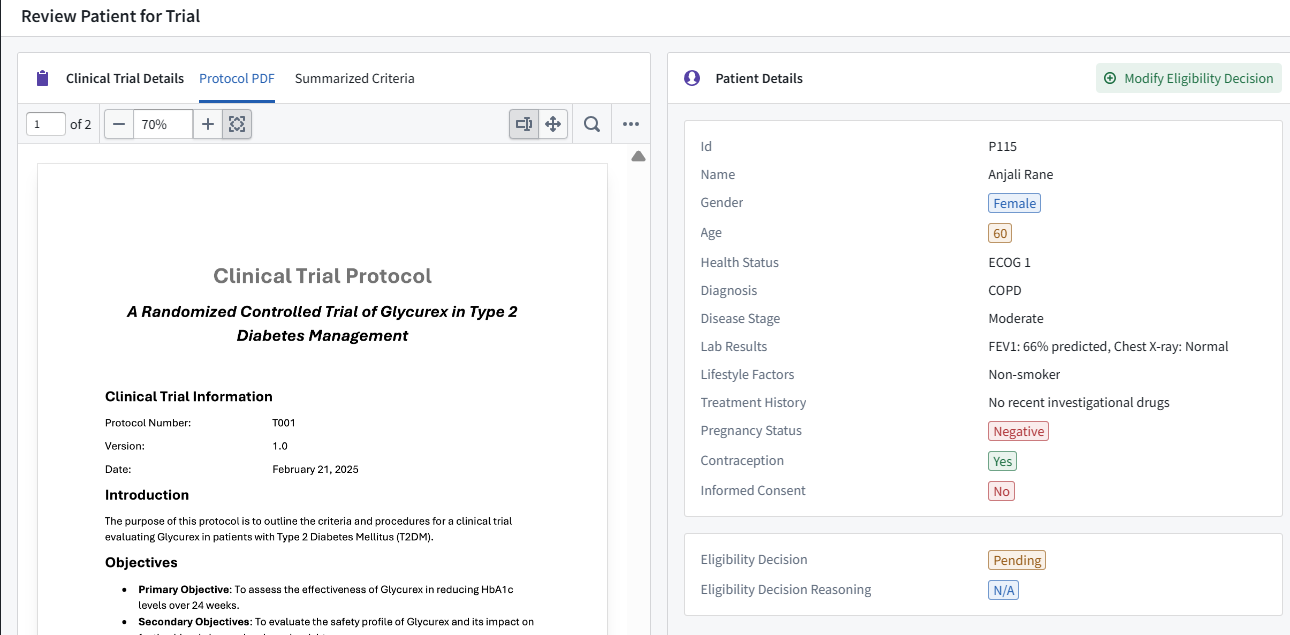
(ZAI) If the agent (with automation) had been configured, then adding a patient in the previous step would have triggered an agent review of the patient data. The agent would have used AI to compute the probabilities of allowed values for the Eligibility Decision (AI would have returned the most probable value). That value is critical and can only be recommended by AI. The final decision requires intelligent (and therefore human) review.
1 Select any patient in the table
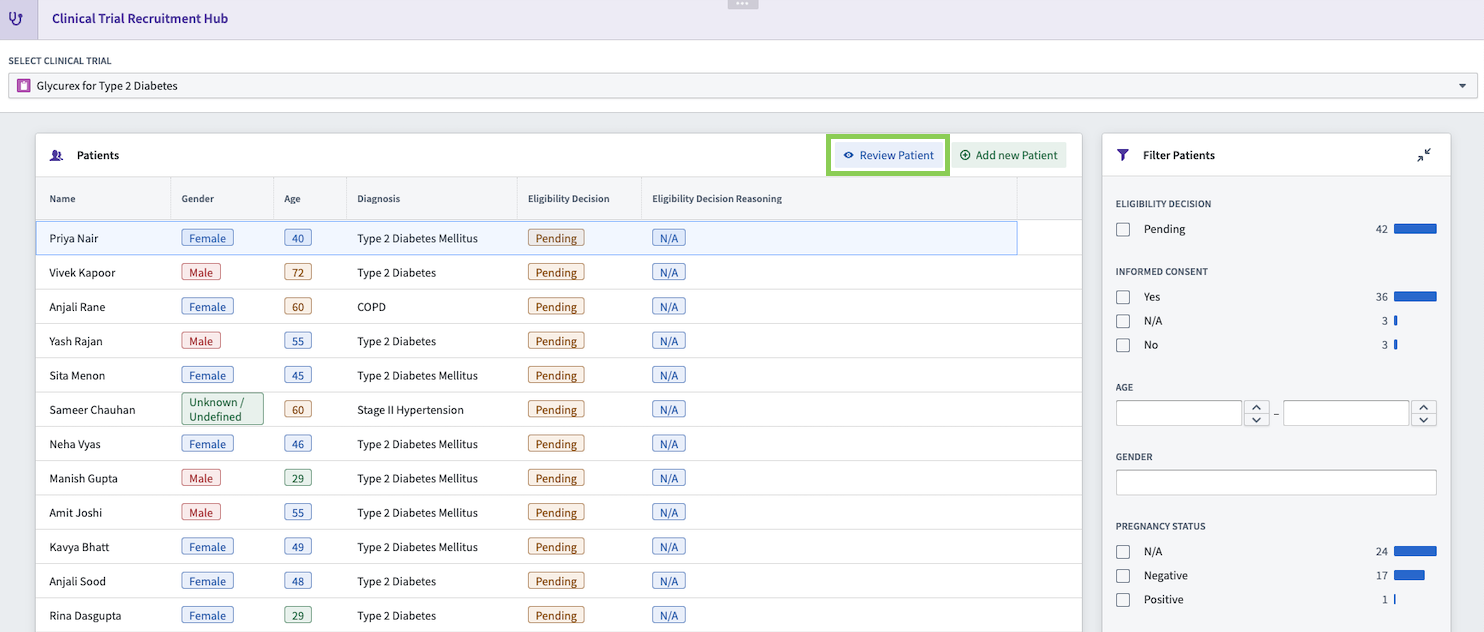
2 Click Review Patient. This opens an overlay page, where you can see clinical trial protocol and patient details. Note the “Eligibility Decision” value which was selected by the AI LLM.
2.4 Change the AI-selected eligibility
(The ZAI version of this section adds some missing parts in the original text)
This is the part where the human would correct a mistaken decision by the AI.
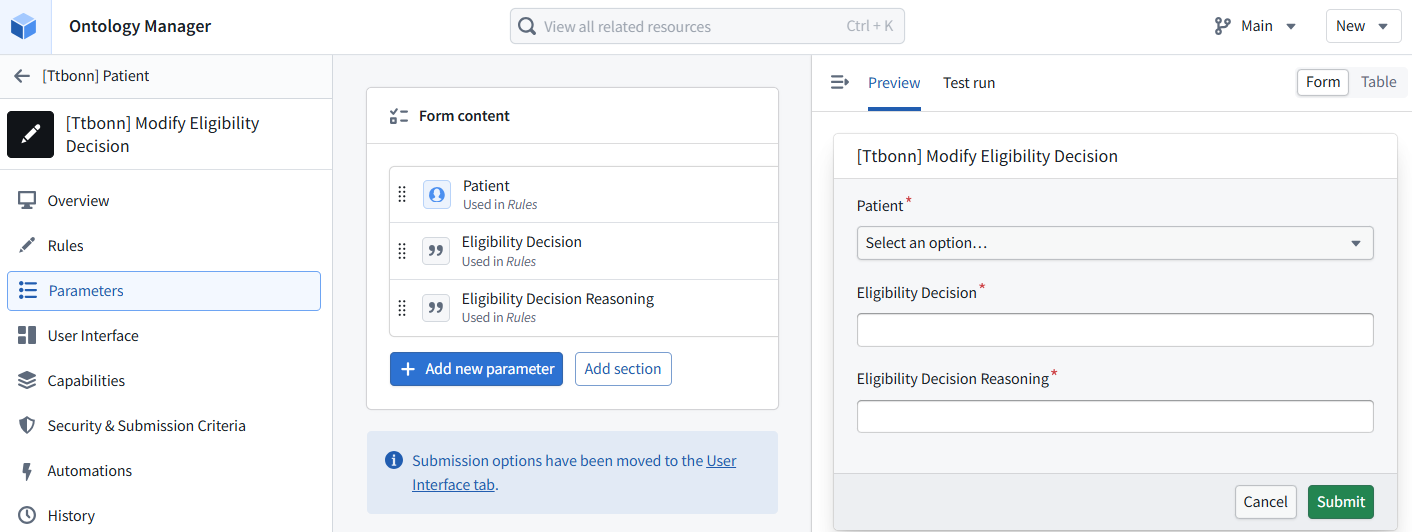
1 Click on “Modify Eligibility Decision”.
2 Change the decision to any value (enter any text).
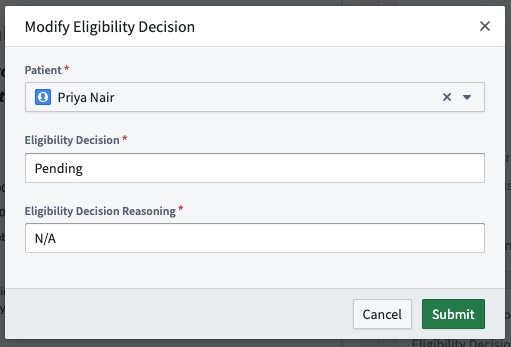
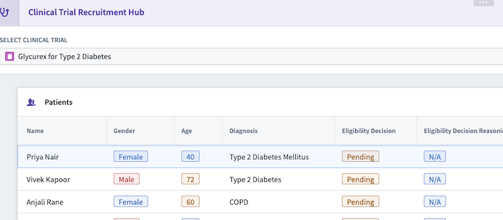
3 Click Submit. The decision (text) has now been changed (and will not be changed by AI).
3 Installed files
The following diagram shows what the marketplace installs
- Data sources
- Pipeline
- Ontology
- Actions and UI
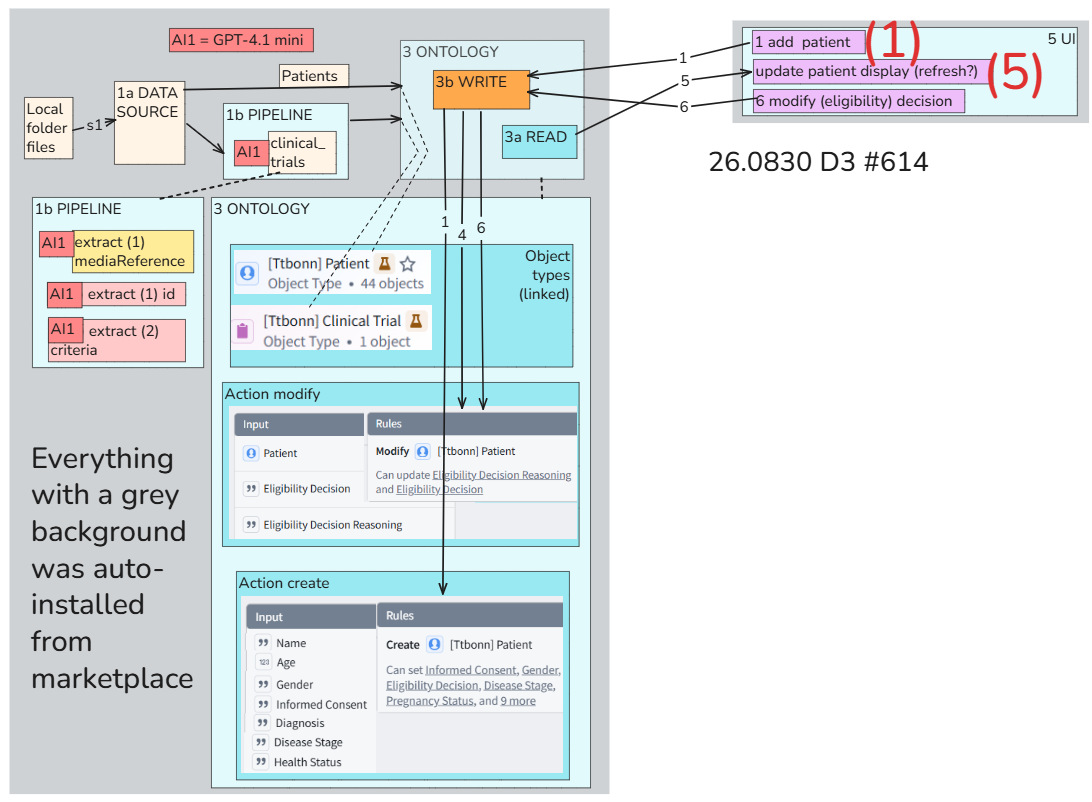
The following shows the typical the result of the installation.
- 1 DATA SOURCES / PIPELINE
- 3 ONTOLOGY
- 5 UI
1 DATA SOURCES / PIPELINE
- 1.1 CLINICAL_TRIALS: PIPELINE LLM (extract id, criteria FROM mediaReference)
- 1.2 PATIENTS
1.1 CLINICAL_TRIALS: PIPELINE LLM (extract id, criteria FROM mediaReference)
PIPELINE
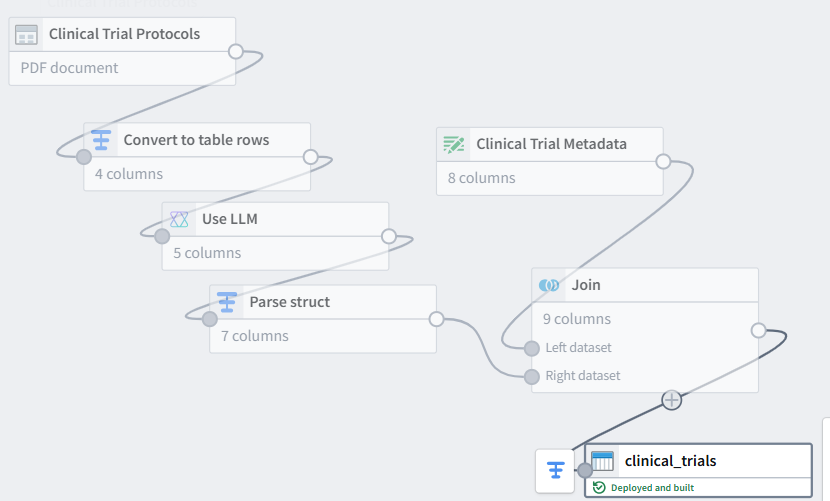
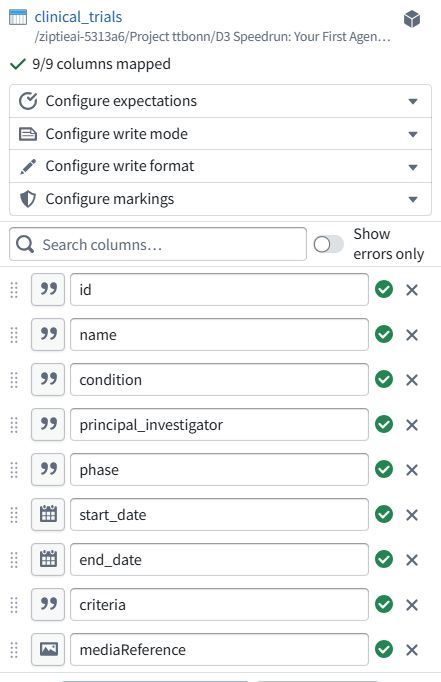
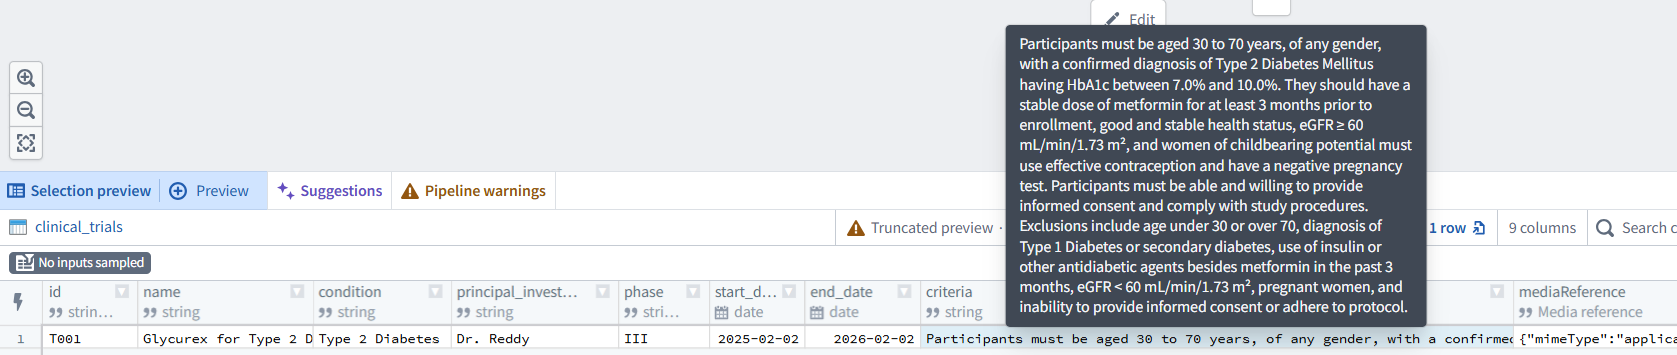
USE LLM
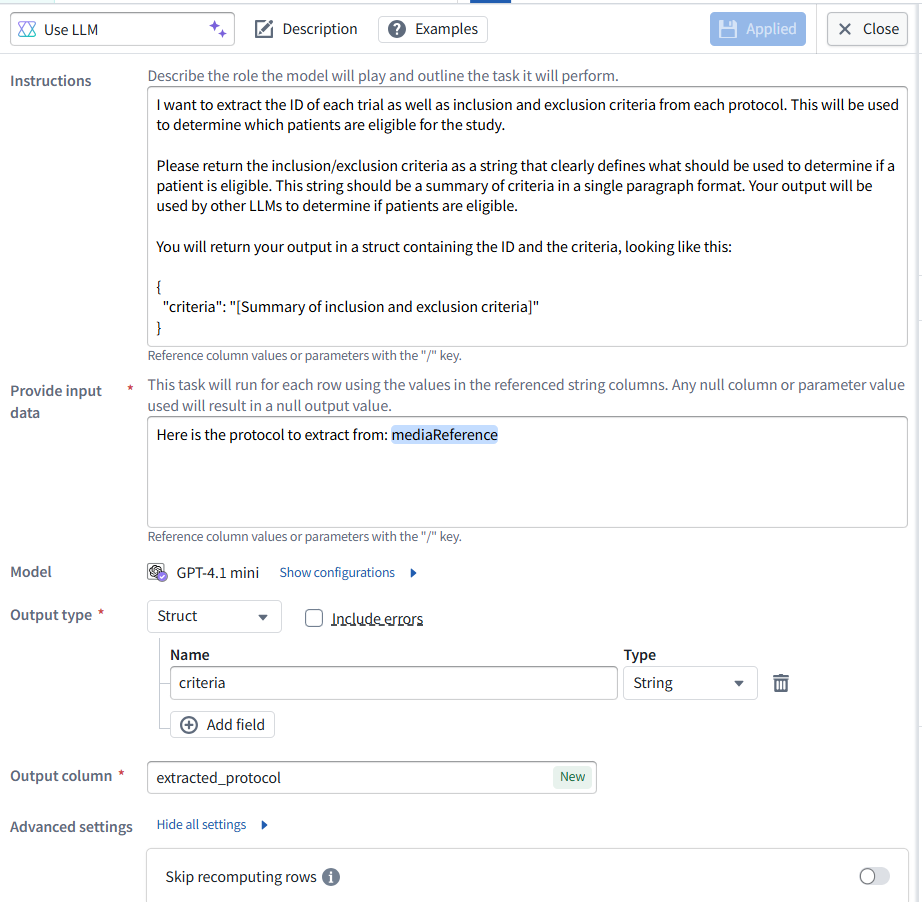
OUTPUT

1.2 PATIENTS
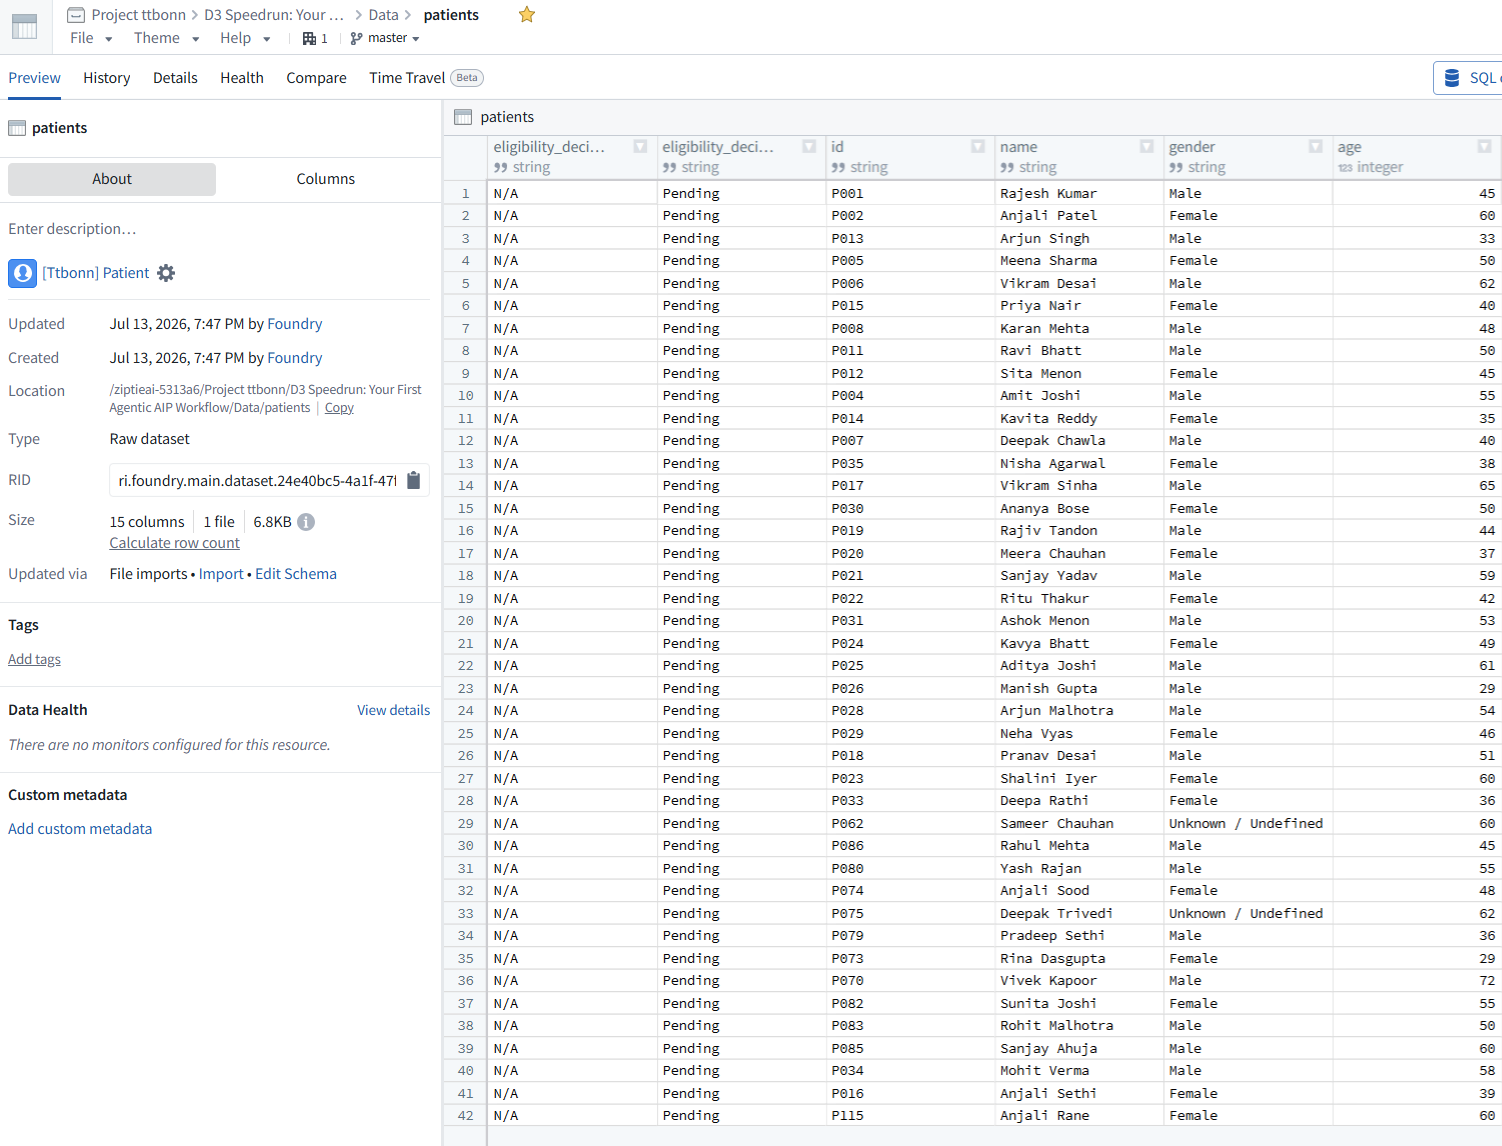
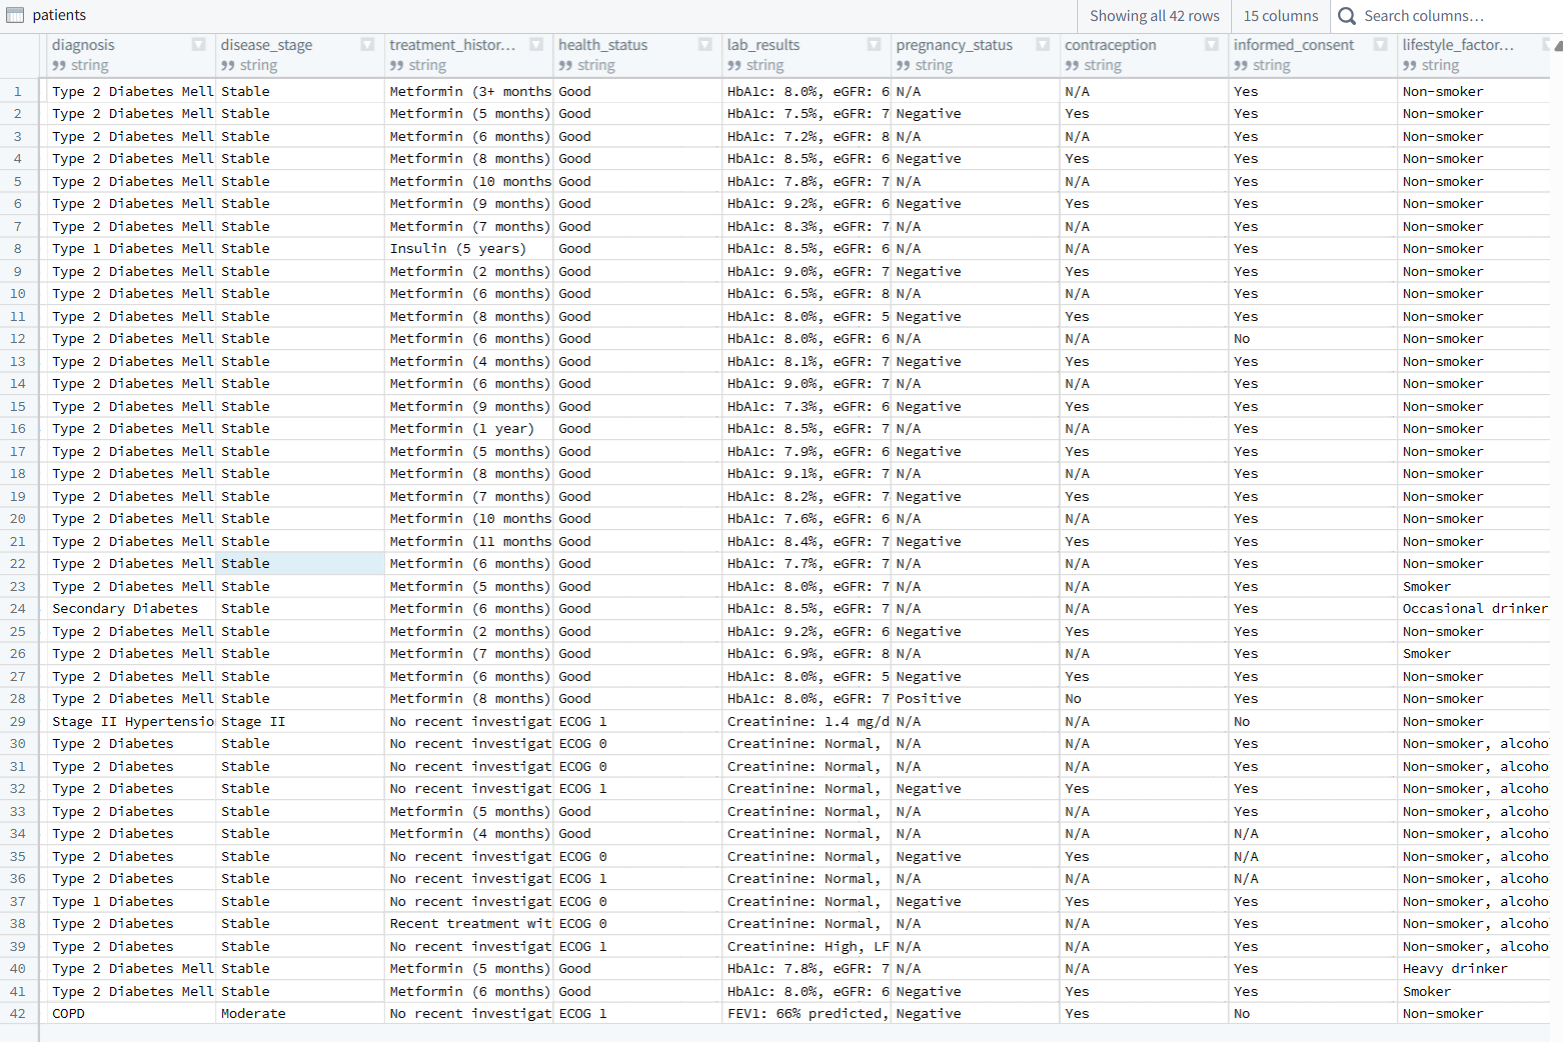
3 ONTOLOGY
- 3.1 CLINICAL_TRIAL
- 3.2 PATIENT
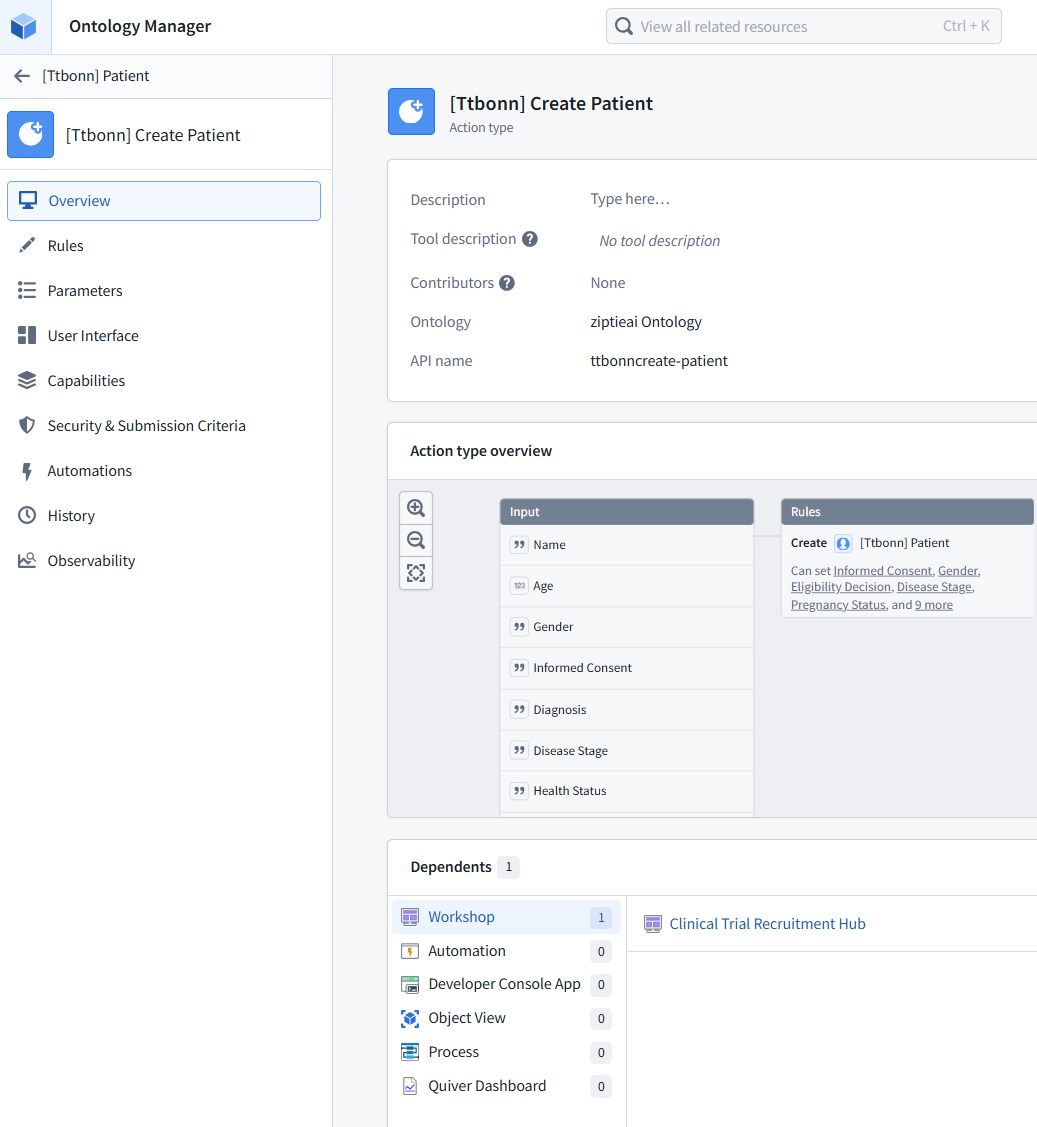
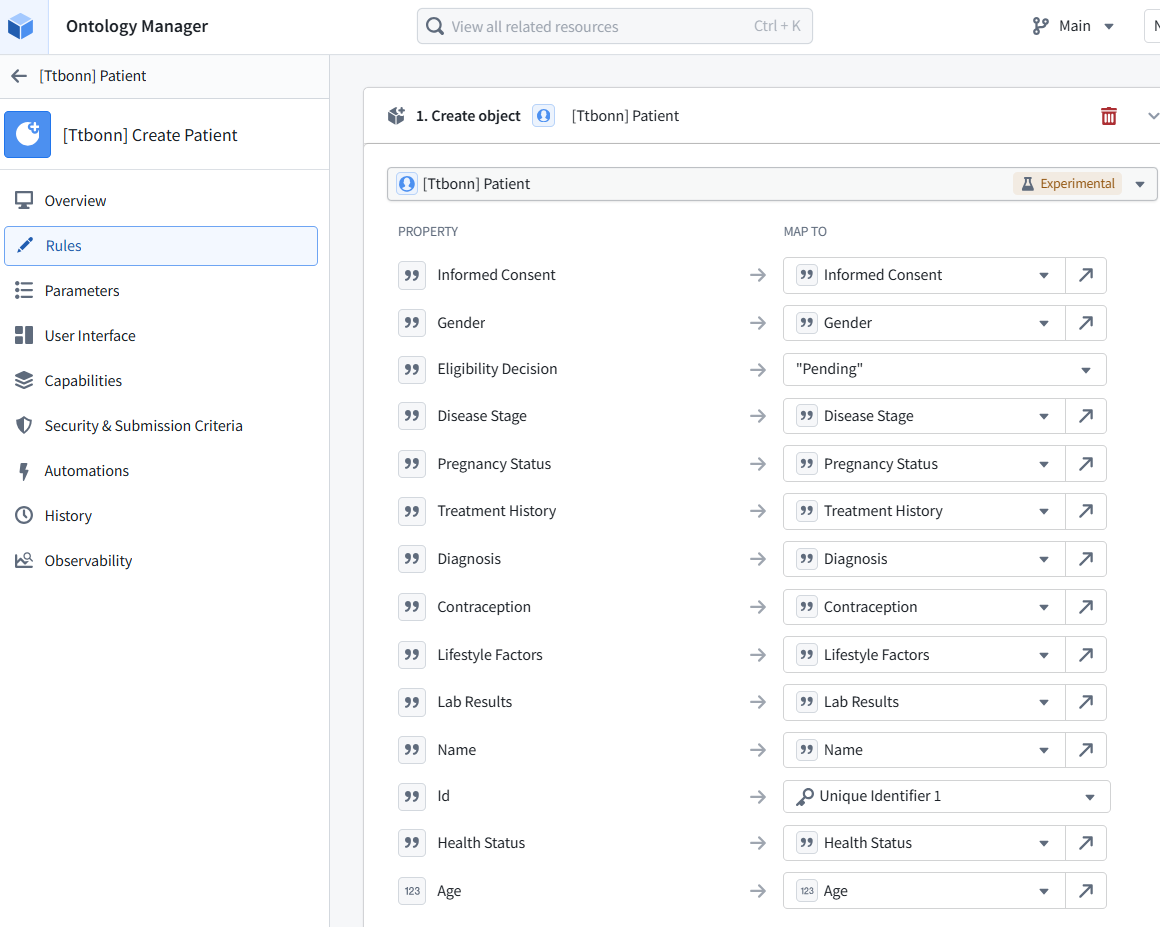
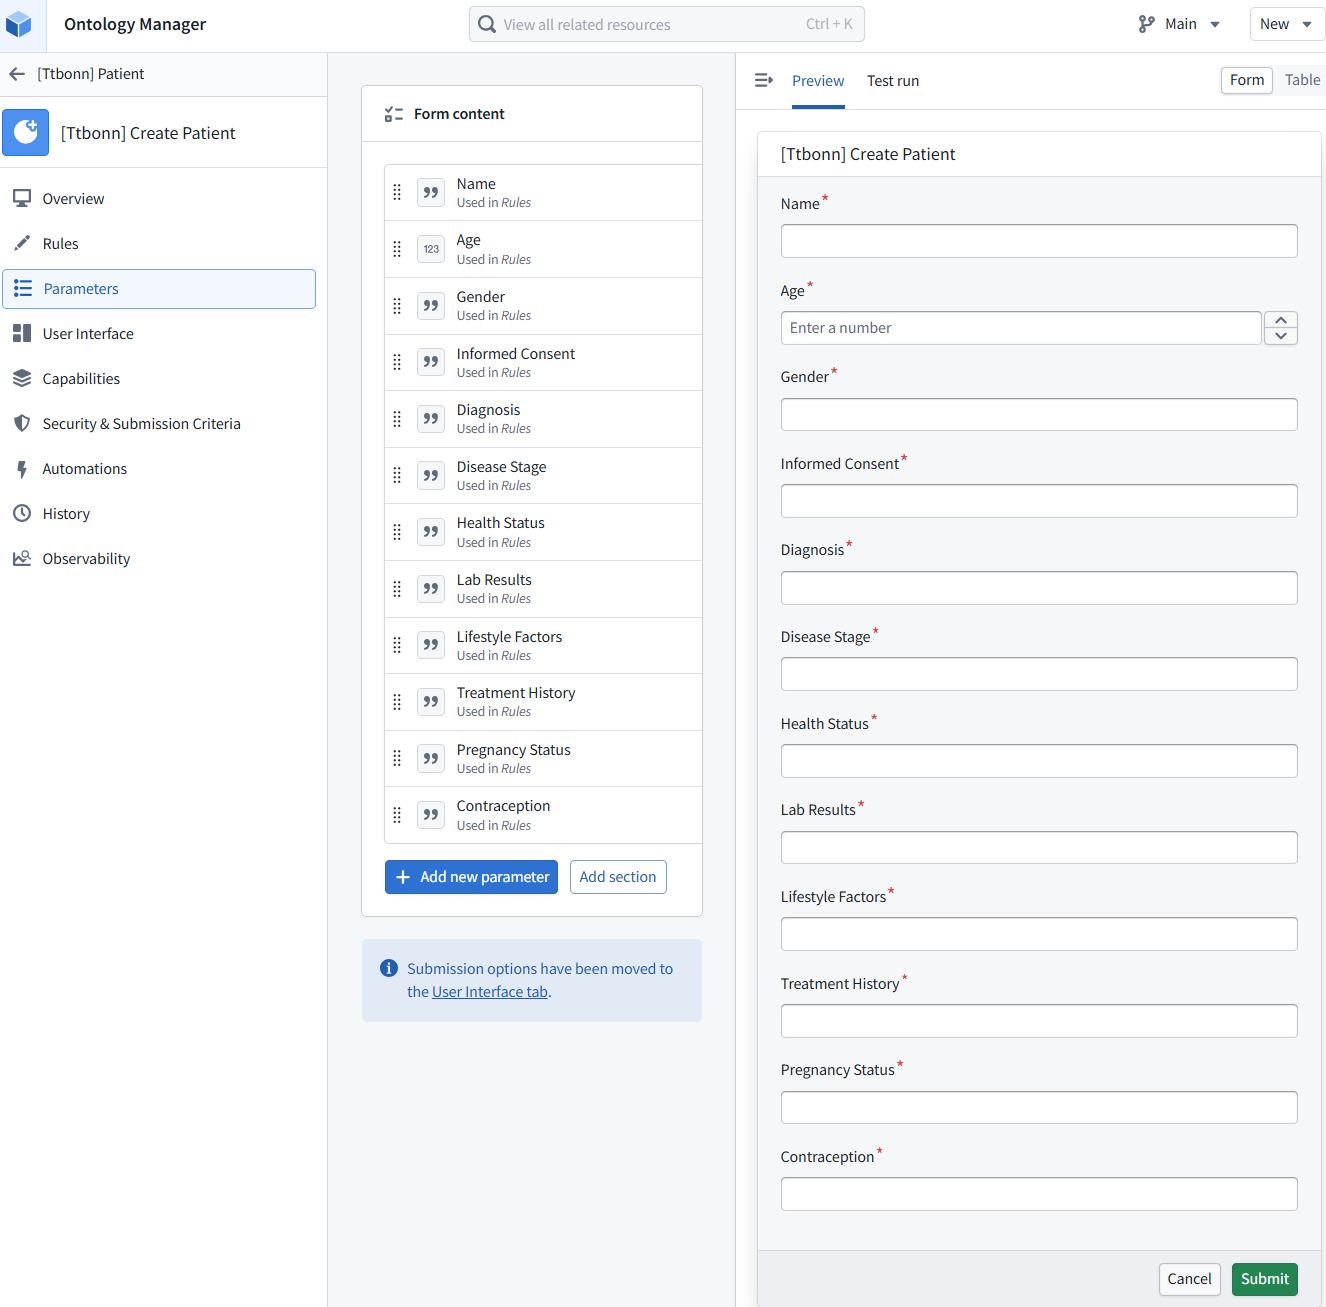
- 3.2-1 ACTION TYPE “Create Patient” (INPUT<>RULES)
- 3.2-2 ACTION TYPE “Modify Eligibility Decision” (INPUT<>RULES)
3.1 CLINICAL_TRIAL
BACKING DATASOURCE
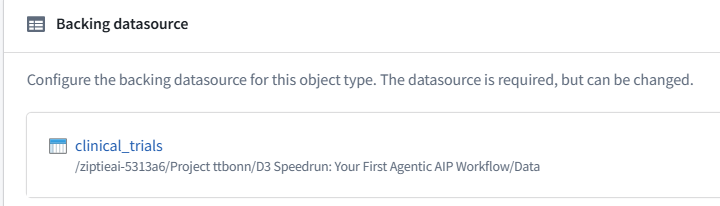
ACTION TYPES (0)
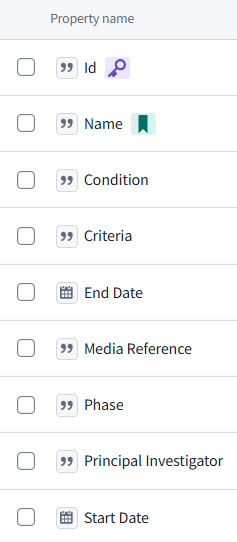
PROPERTIES (9)
LINKS

3.2 PATIENT
BACKING DATASOURCE
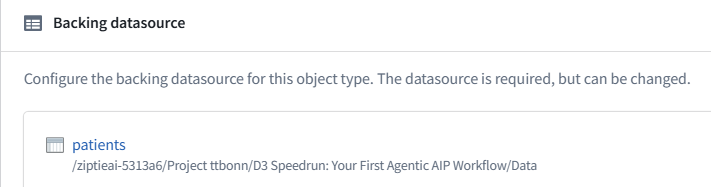
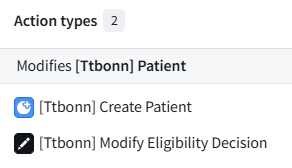
ACTION TYPE: Create Patient
ACTION TYPE: Modify Eligibility Decision
PROPERTIES (15 … FOR A DEMO???)
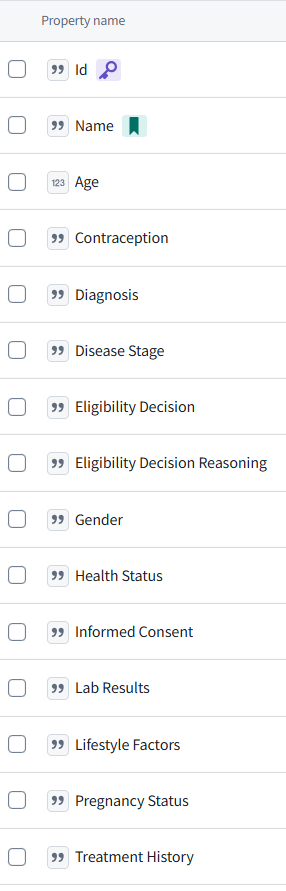
LINKS

3.2-1 ACTION TYPE “Create Patient” (INPUT<>RULES)
OVERVIEW
RULES: Create object Patient
PARAMETERS (UI): Create Patient
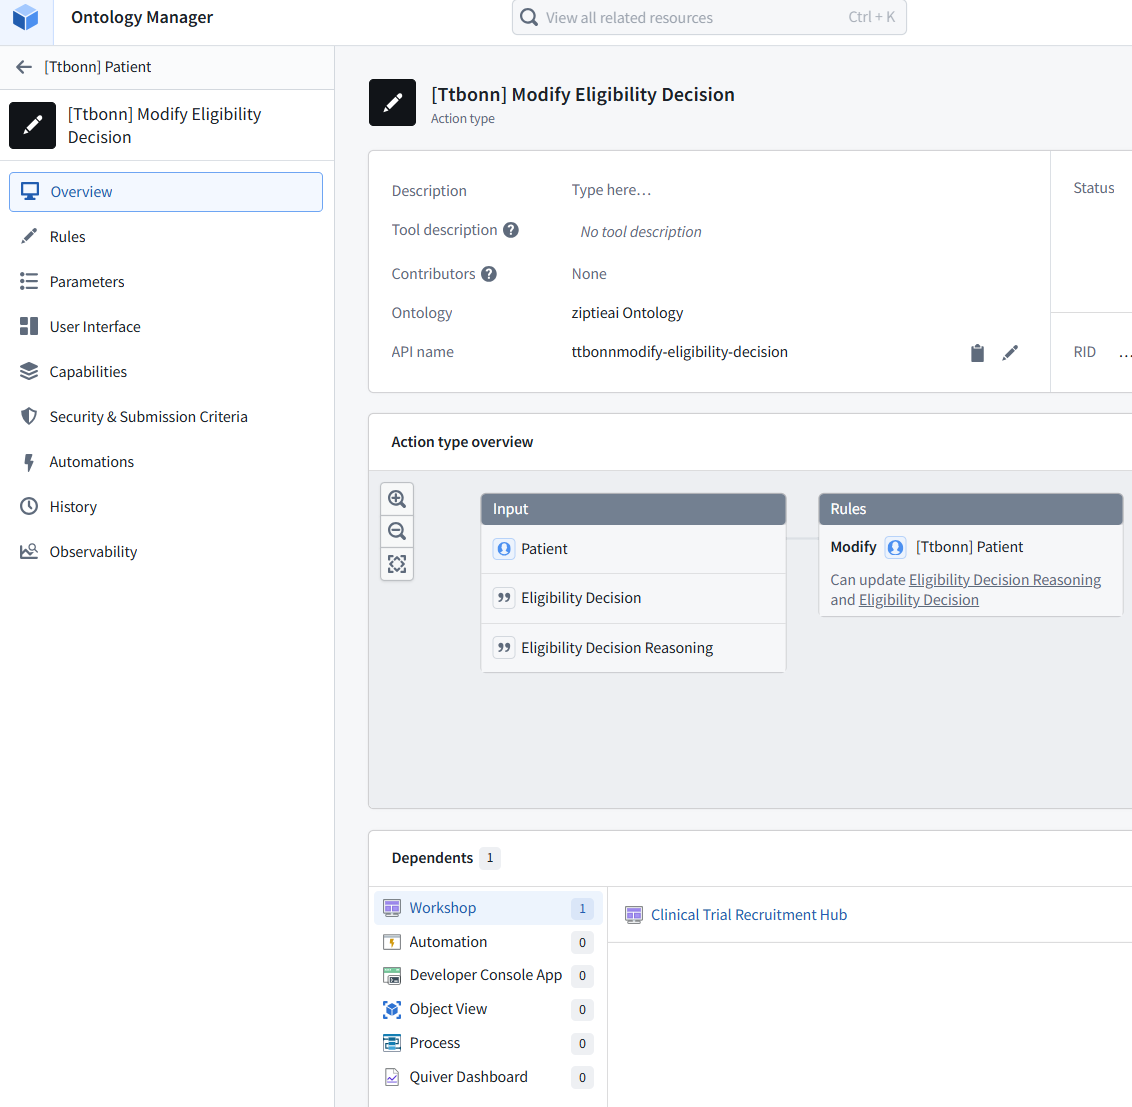
3.2-2 ACTION TYPE “Modify Eligibility Decision” (INPUT<>RULES)
OVERVIEW
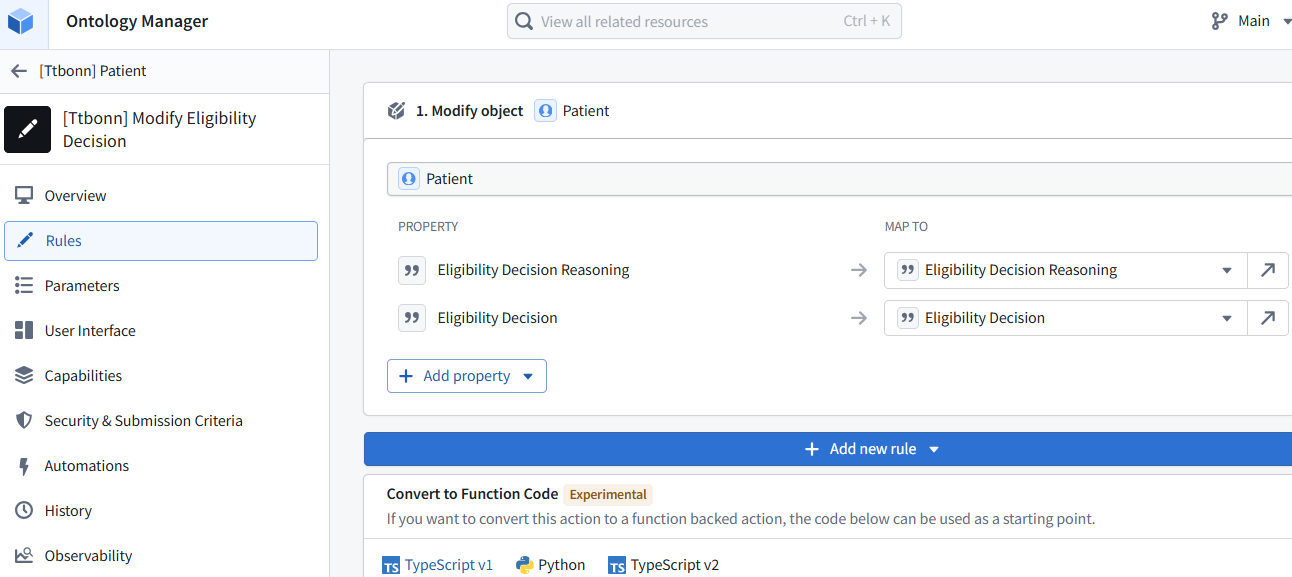
RULES: Modify object Patient
PARAMETERS (UI): Modify Eligibility Decision
5 UI
UI (add_new_patient button / ON CLICK Action = Create_Patient)
26.0902 (v1 26.0830)