D8.5 Train in Jupyter (2b)
See the working text for this QS in
- #619_.docx.
- Demo URL there are actually many … this was a chaotic demo.
TOC
- 5.1 How to create a notebook for model training
- 5.2 How to split feature data for testing and training
- 5.3 How to train a model in (Jupyter) Code Workspaces (not repos)
- 5.4 How to publish a model from Code Workspaces
- 5.5 Optional: Configure inference or retraining jobs
- 5.5 Next steps
5. Tutorial: Train a model in a Jupyter® notebook
https://www.palantir.com/docs/foundry/model-integration/tutorial-train-jupyter-notebook/
Before starting this step of the tutorial, you should have completed the modeling project set up. In this tutorial, you can choose to either train a model in a Jupyter® notebook or in Code Repositories. Jupyter® notebooks are recommended for fast and iterative model development whereas code repositories are recommended for production-grade data and model pipelines.
In this step of the tutorial, we will train a model in a Jupyter® notebook with Code Workspaces. This step will cover:
Creating a Jupyter® Code Workspace for model training
Splitting feature data for testing and training
Training a model in Code Workspaces
Publishing a model from Code Workspaces
Viewing a model and submit it to a modeling objective
5.1 How to create a notebook for model training
The Code Workspaces application in Foundry is a web-based development environment that provides third-party IDEs for data analysis and model development. You can directly publish models from Jupyter® notebooks within Foundry that can be used in downstream applications.
Code Workspaces provide an interactive development environment by securing continually available compute resources while you are using the workspace. Code Workspaces enable you to configure your Python environment, transform data, plot charts, and train models without waiting for compute resources or packaging a Python environment.
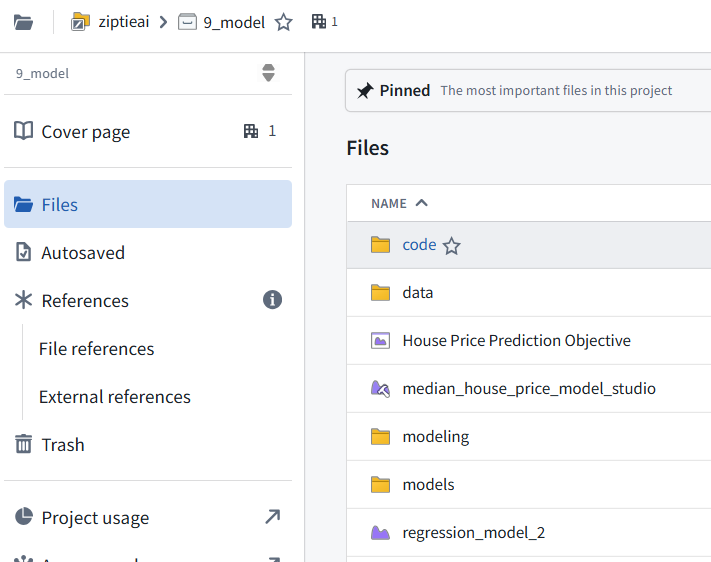
Action: In the code folder you created during the previous step of this tutorial,
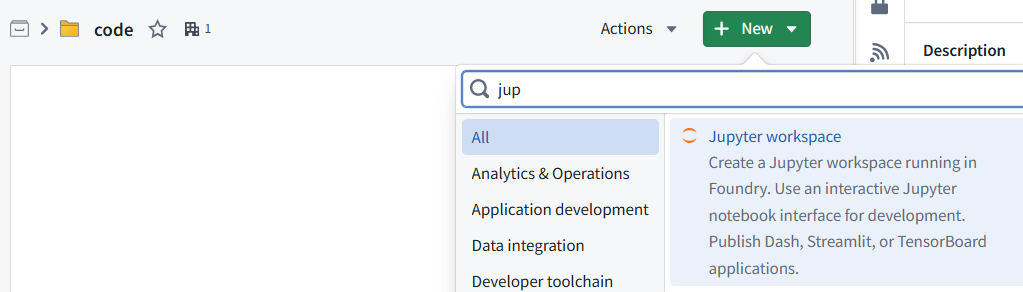
select + New > Jupyter Code Workspace.
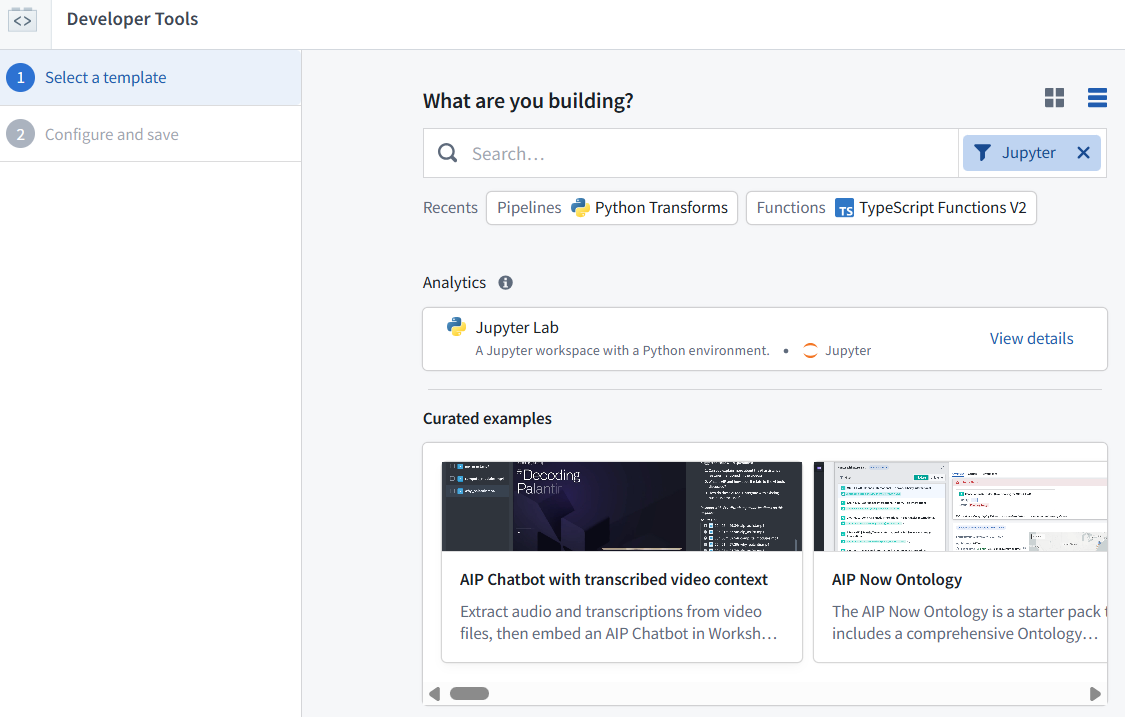
Your code workspace should be named in relation to the model that you are training. In this case, name the repository median_house_price_model_notebook.
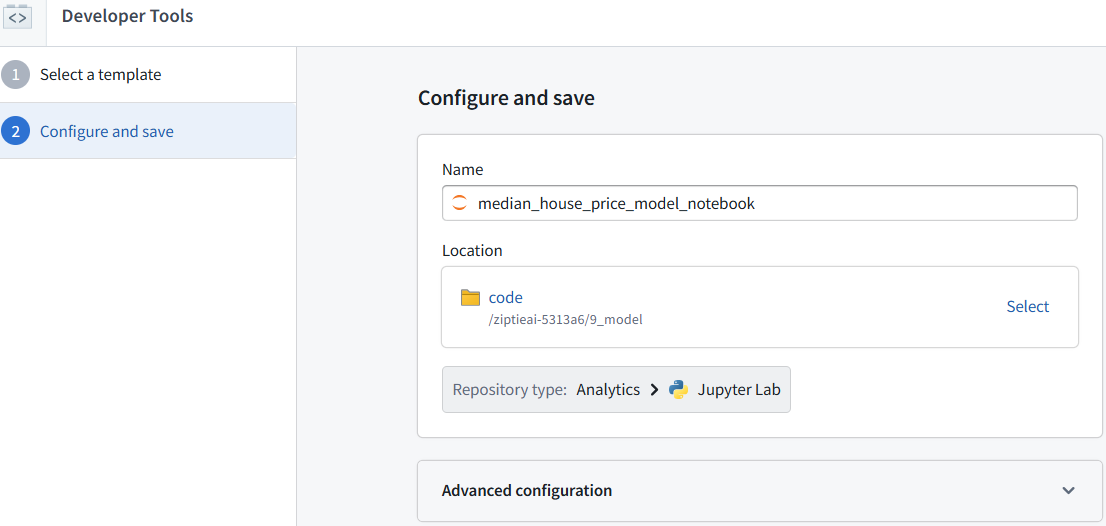

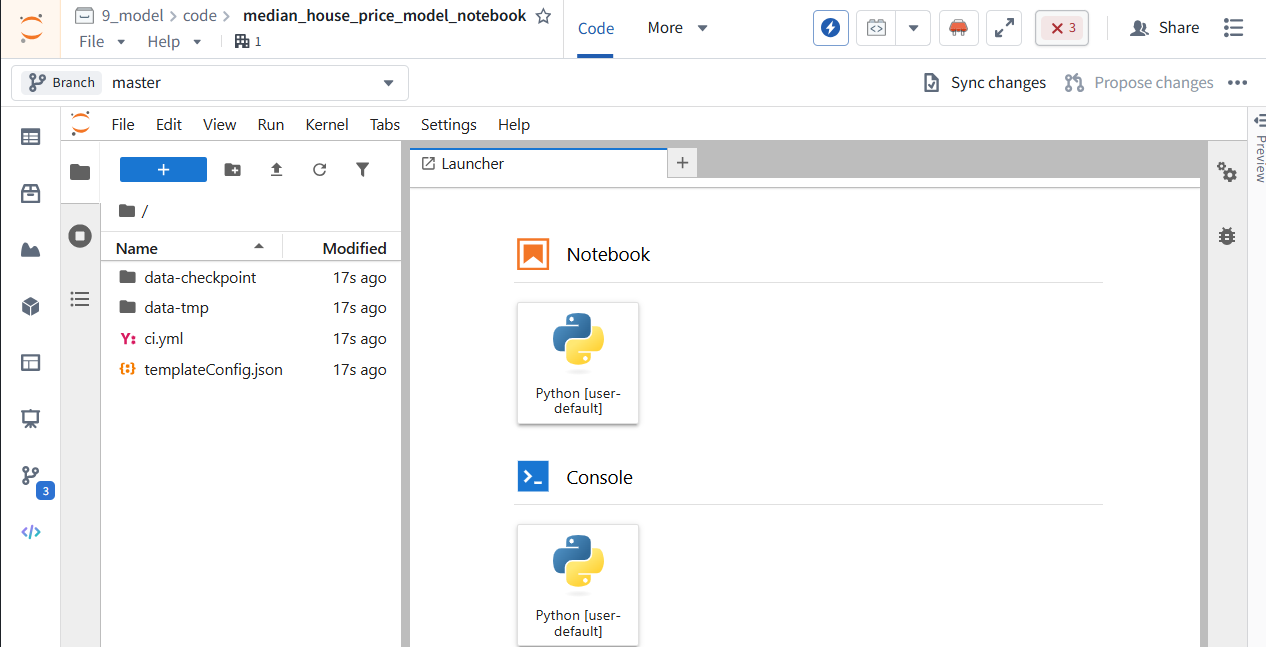
Select Continue to use default compute resources and repository configuration, then, use Create to create and launch the workspace.
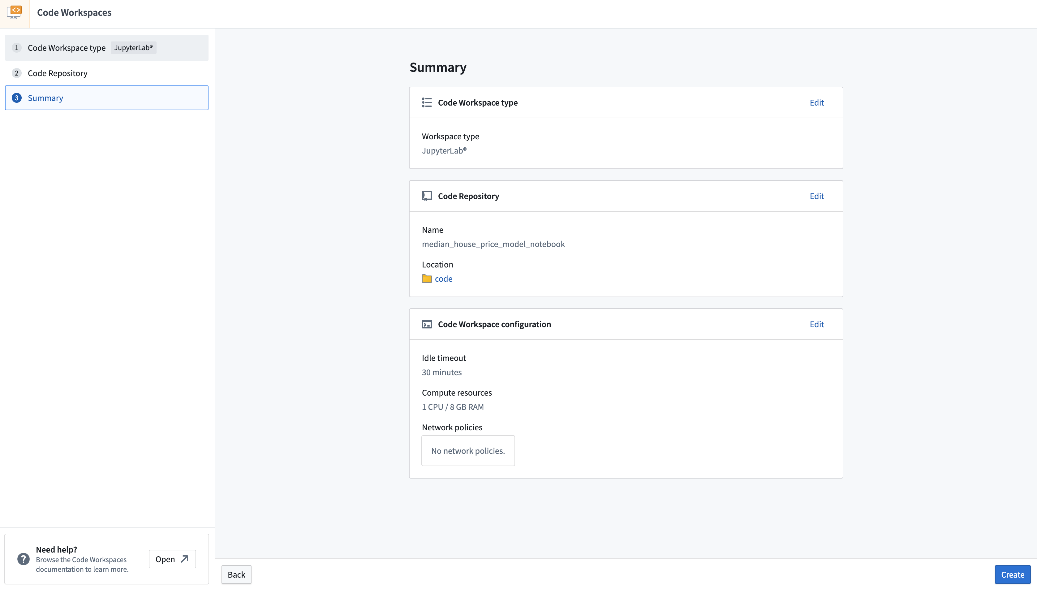
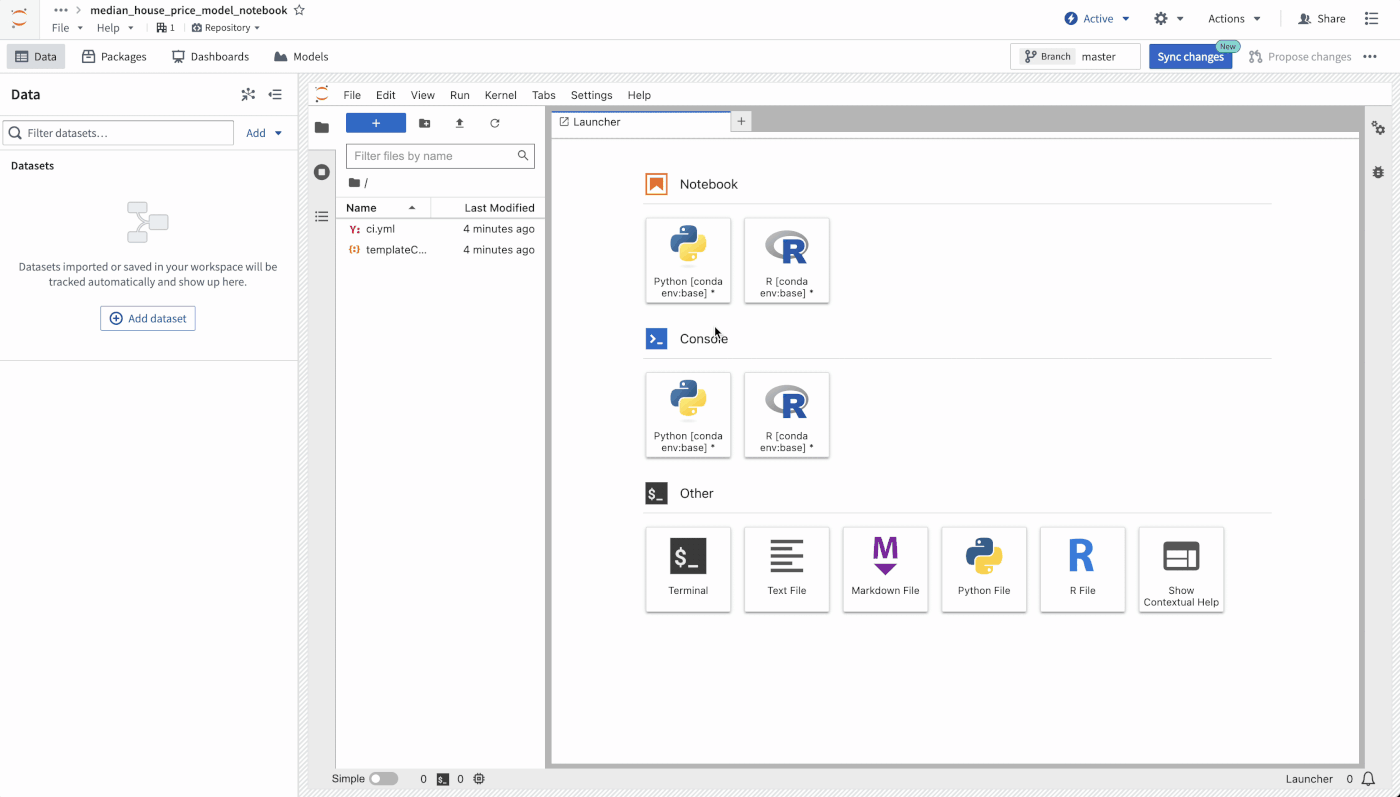
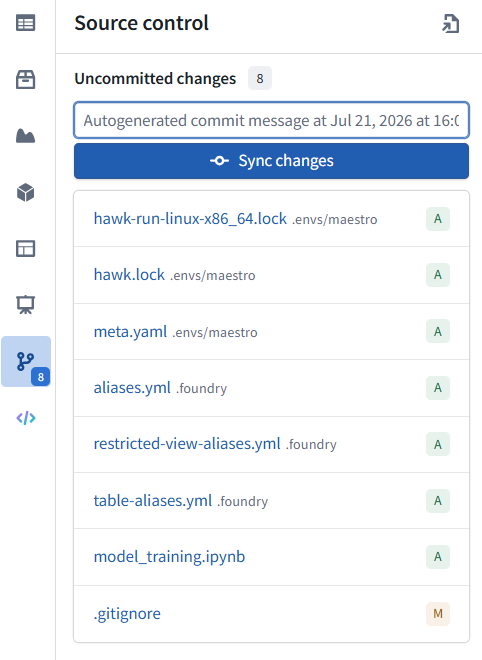
Once the workspace is created, we need to create a notebook and install some dependencies to train the model. In the Jupyterlab® launcher screen, select a notebook kernel to use.
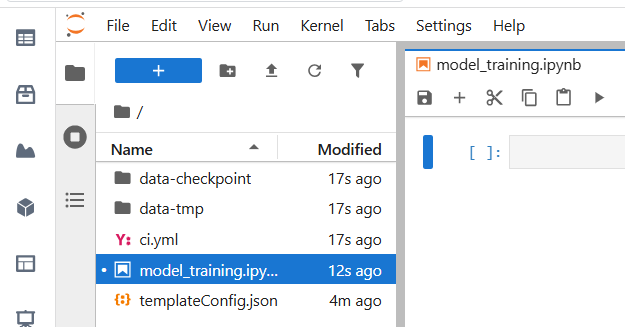
Action: Select the base Python conda kernel to create a new notebook and then rename the file to model_training.ipynb.
5.2 How to split feature data for testing and training
The first step in a supervised machine learning project is to split our labeled feature data into separate datasets for training and testing. Eventually, we will want to create performance metrics (estimates of how well our model performs on new data) so we can decide whether this model is good enough to use in a production setting and so we can communicate how much to trust the results of this model with other stakeholders. We must use separate data for this validation to help ensure that the performance metrics are representative of what we will see in the real world.
S1 Import a dataset into a Code Workspace
First, let’s make our dataset available for use in our Jupyter® notebook in Code Workspaces. Code Workspaces allow us to create an “alias” for our input data which helps make our code more readable. In this case, we will use the alias training_data.
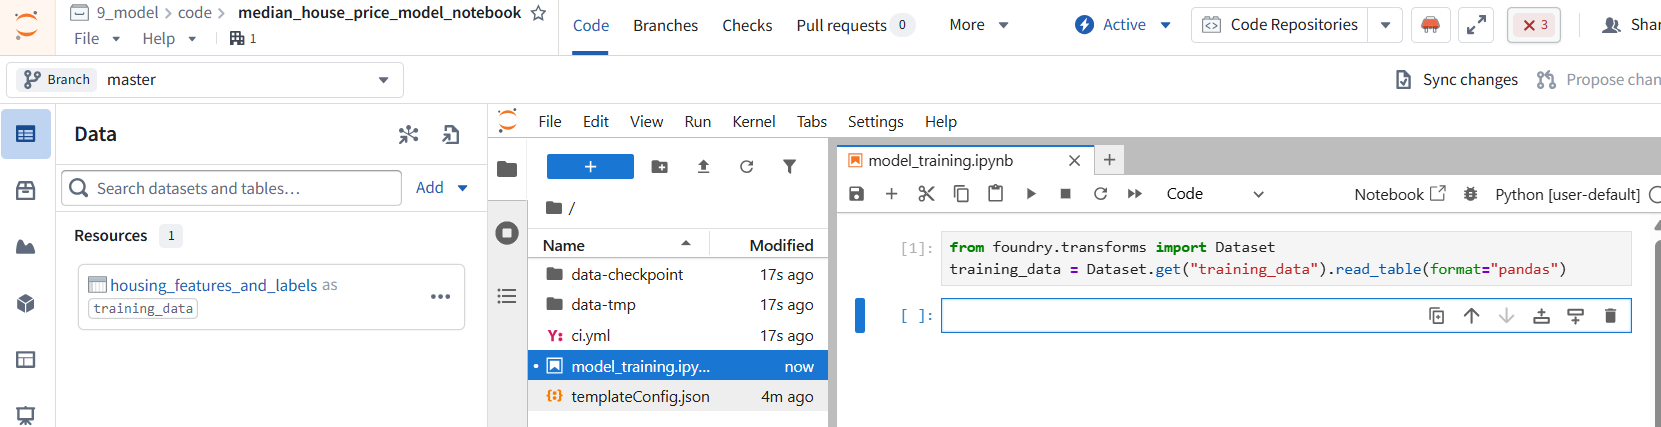
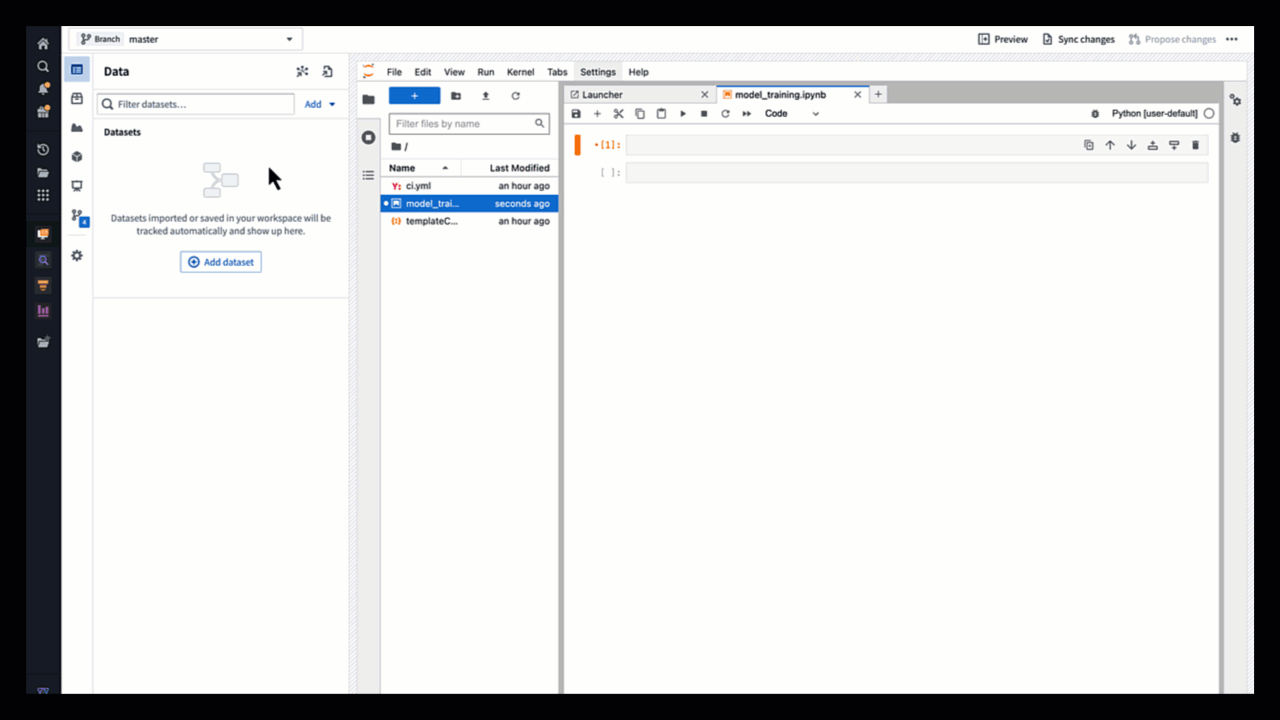
Action: Open the Data tab, then select Add dataset > Read existing datasets.
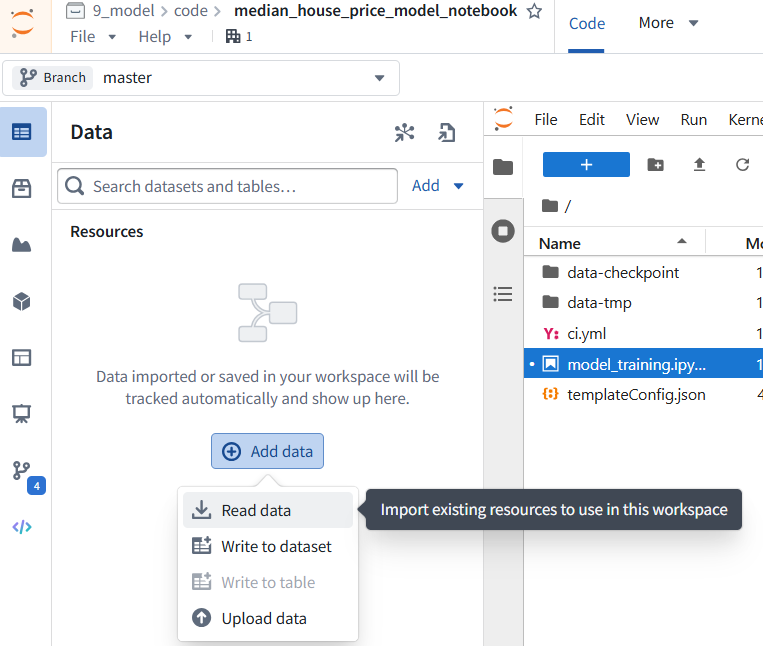
Add the housing_features_and_labels dataset that we created earlier
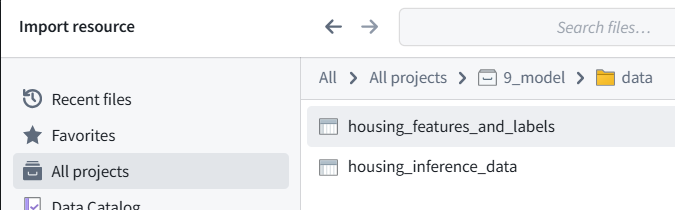
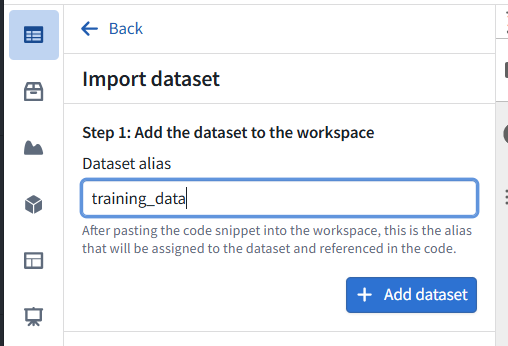
and provide it the alias training_data.
Copy the provided import logic into a cell in your Jupyter® notebook.
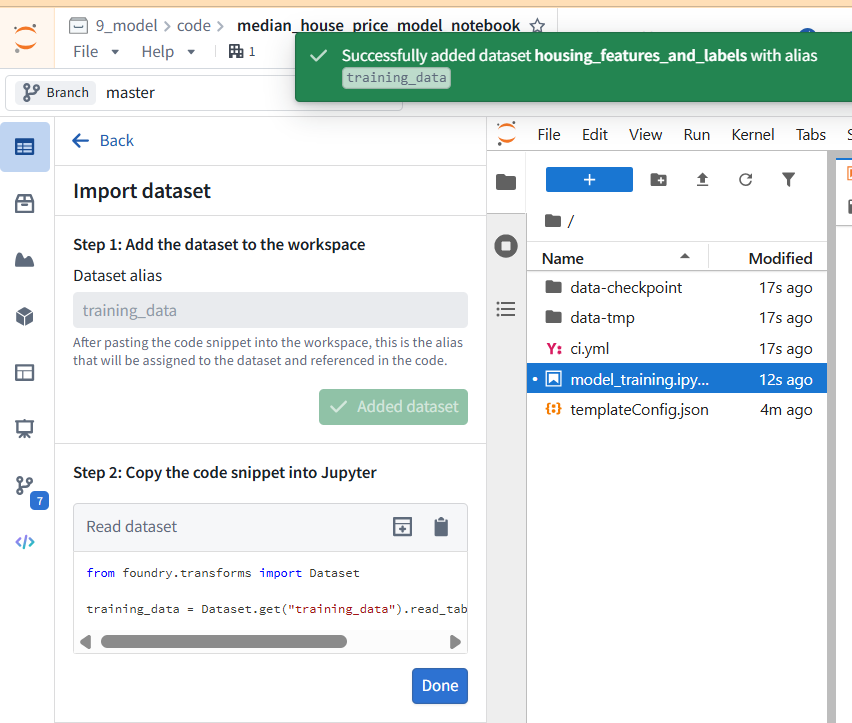
from foundry.transforms import Dataset
training_data = Dataset.get(“training_data”).read_table(format=”pandas”)
You can press Shift + Enter to run the code cell.
Copied!
from foundry.transforms import Dataset
training_data = Dataset.get(“training_data”).read_table(format=”pandas”)
S2 Split data into testing and training
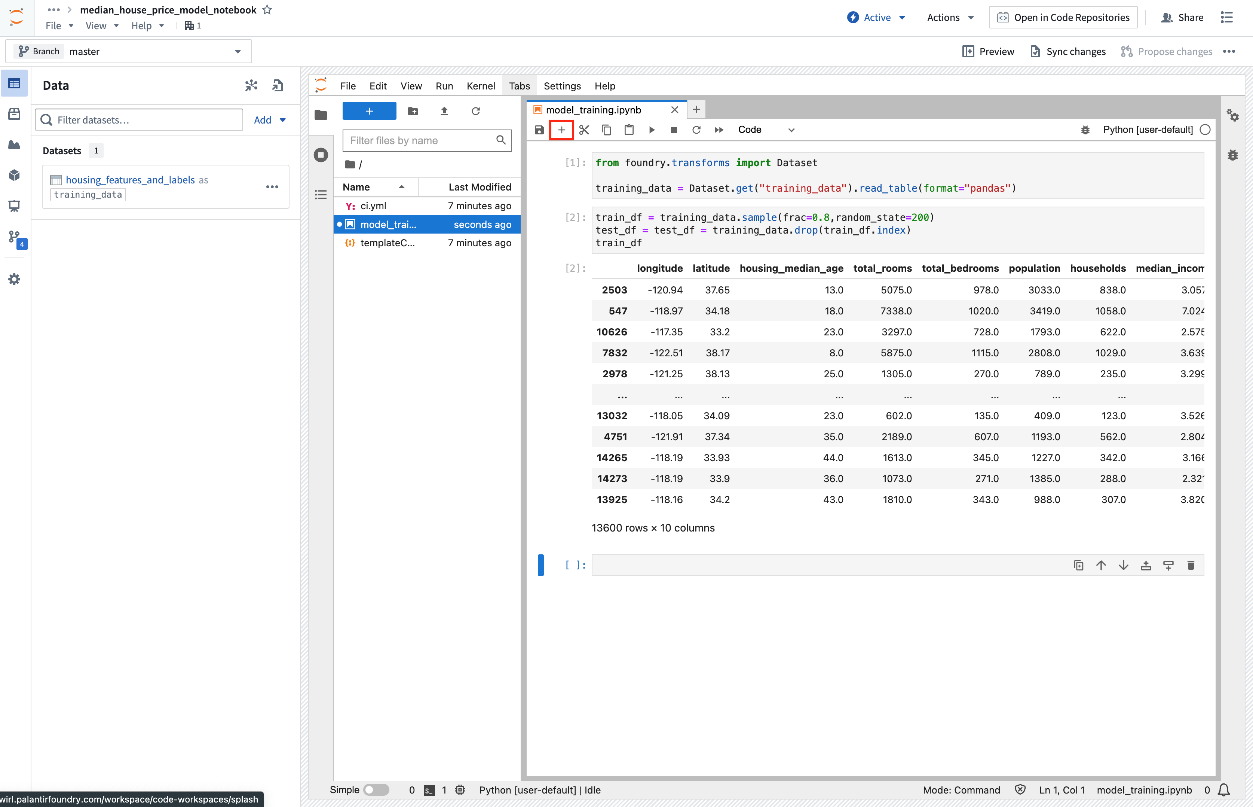
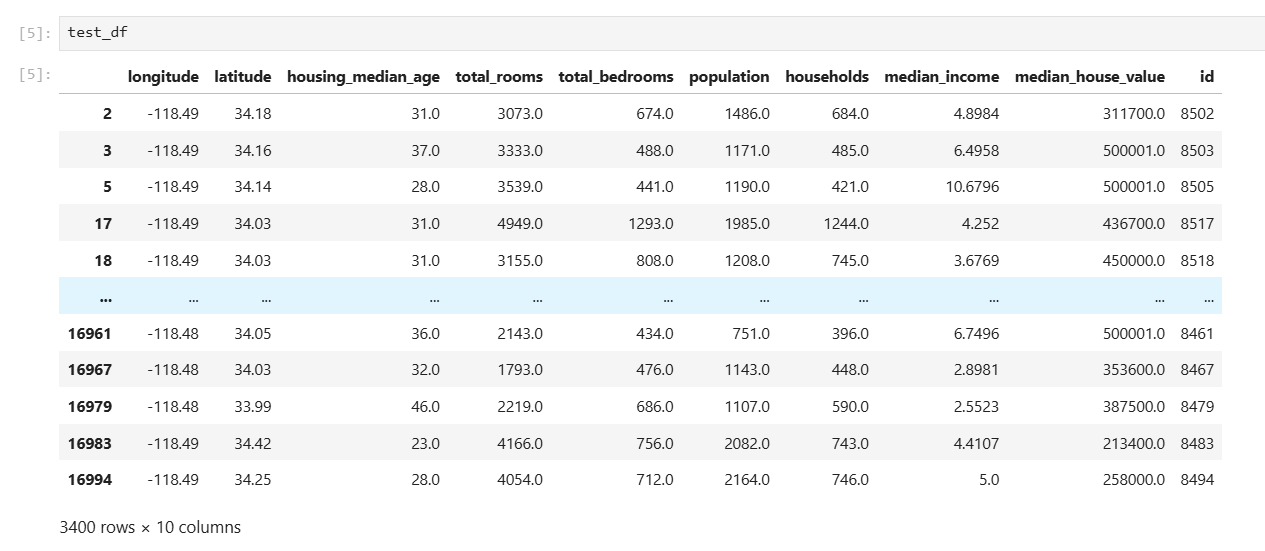
Now that we have imported our dataset, let’s split the data into a testing and training dataframe.
Action: Create a new notebook cell by using the + option at the top of the notebook, then copy in the snippet below and run the cell.
train_df = training_data.sample(frac=0.8,random_state=200)
test_df = training_data.drop(train_df.index)
train_df
S3 Save test dataset to Foundry
Next, we can save our testing and training splits back to Foundry. This enables us to have a record of the datasets we used for training and testing for future reference.
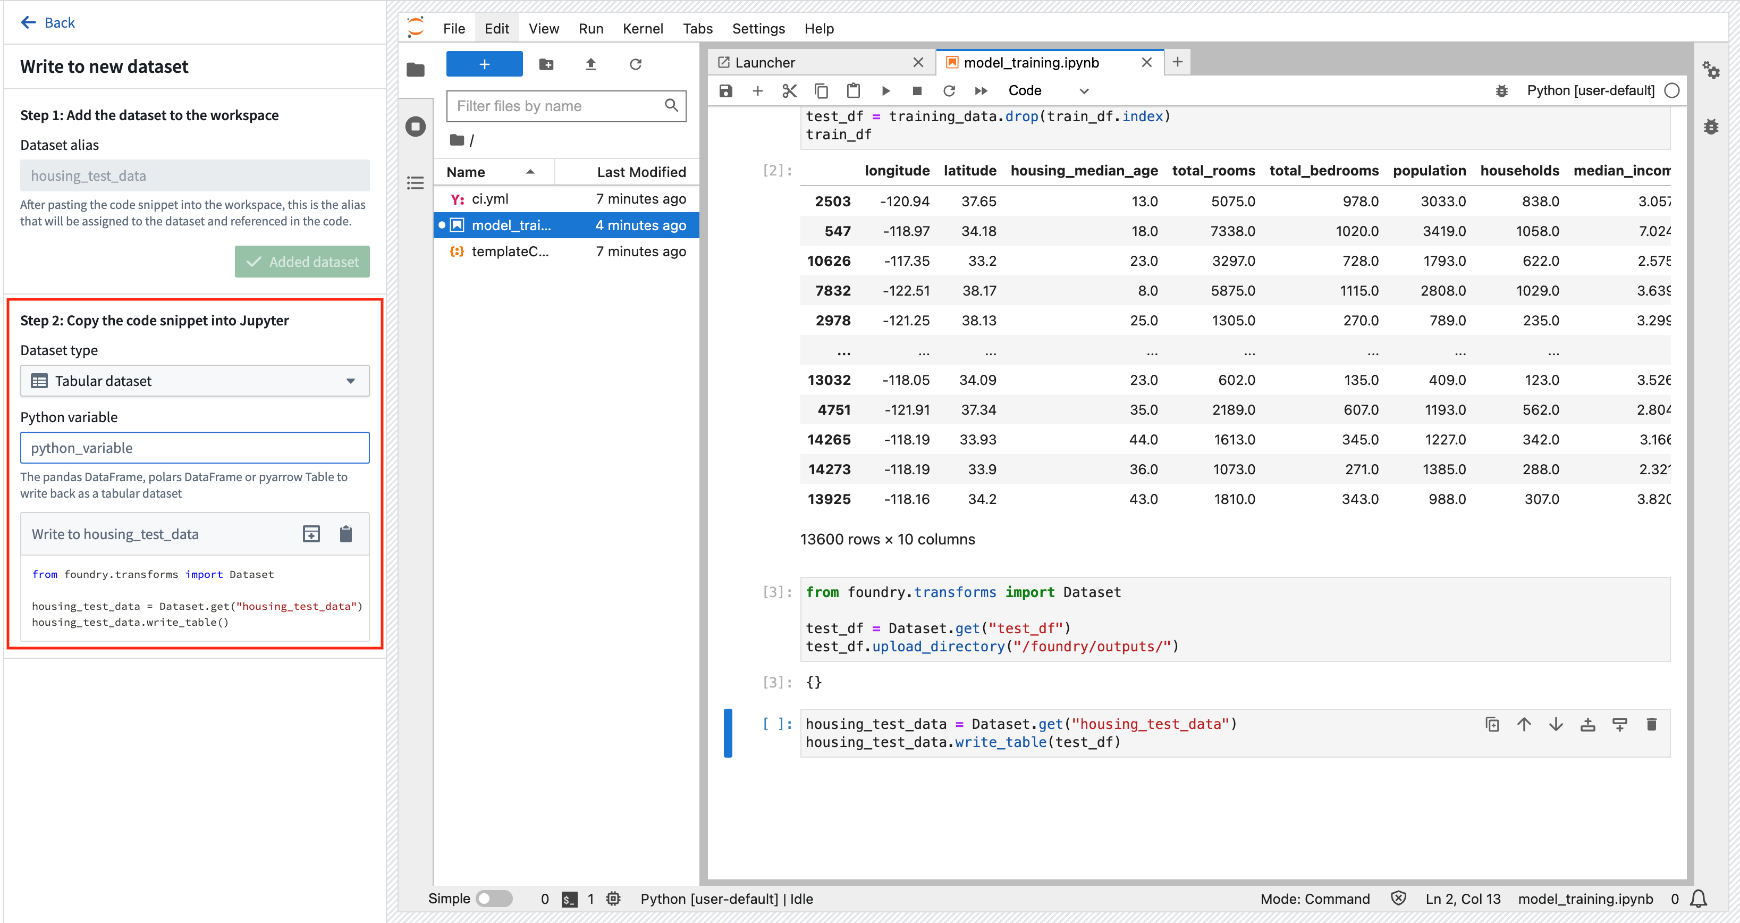
Action: Select Add > Write data to a new dataset to create a new dataset output.
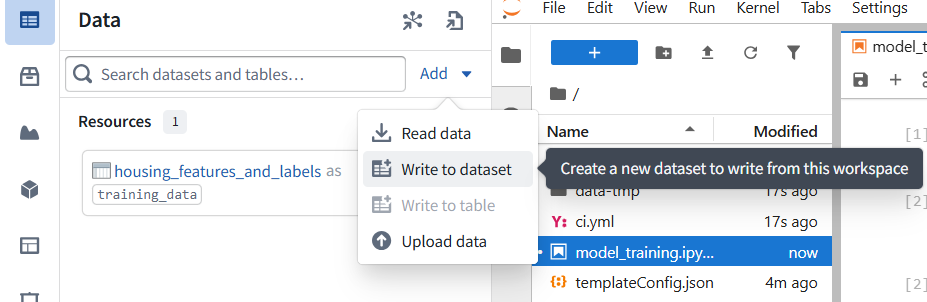
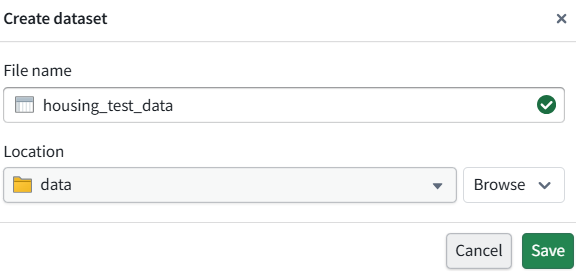
You can name the output housing_test_data and save the output in the data folder from earlier.
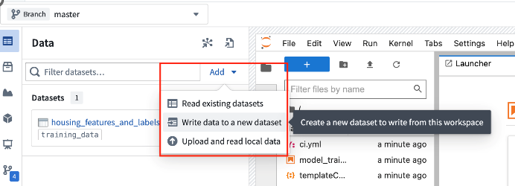
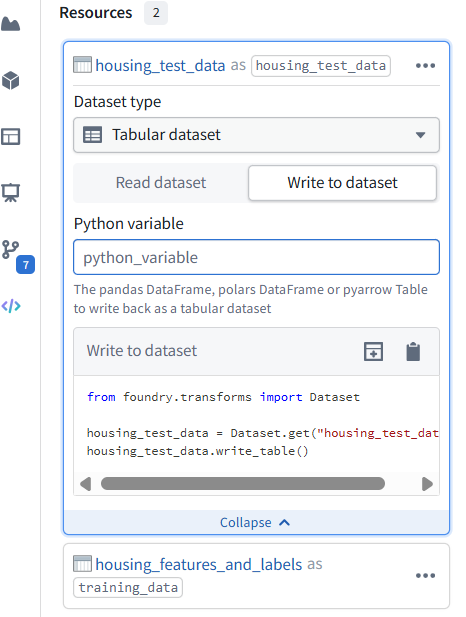
Select Add Dataset and Tabular dataset for the dataset type and test_df for the Python variable. You can then copy the code to a new cell and execute it to save the dataset back to Foundry.
from foundry.transforms import Dataset
housing_test_data = Dataset.get(“housing_test_data”)
housing_test_data.write_table(test_df)
what is this ???? YOU HAVE TO CLICK “EXPAND” !!!!!!!!!!!!!

Why you are doing this
The tutorial split the original data into:
train_df → used to train model
test_df → saved separately for testing/evaluation
You already created test_df in memory inside the notebook. Now you are saving it back to Foundry so it exists as a real dataset.
**<foundry.transforms._dataset.Dataset at 0x7fe2fe765dc0>
can i view this?**
FDE: Yes. That output means the dataset object was created/written, but Jupyter is just showing the Python object reference:
<foundry.transforms._dataset.Dataset at …>
To view the data, do one of these.
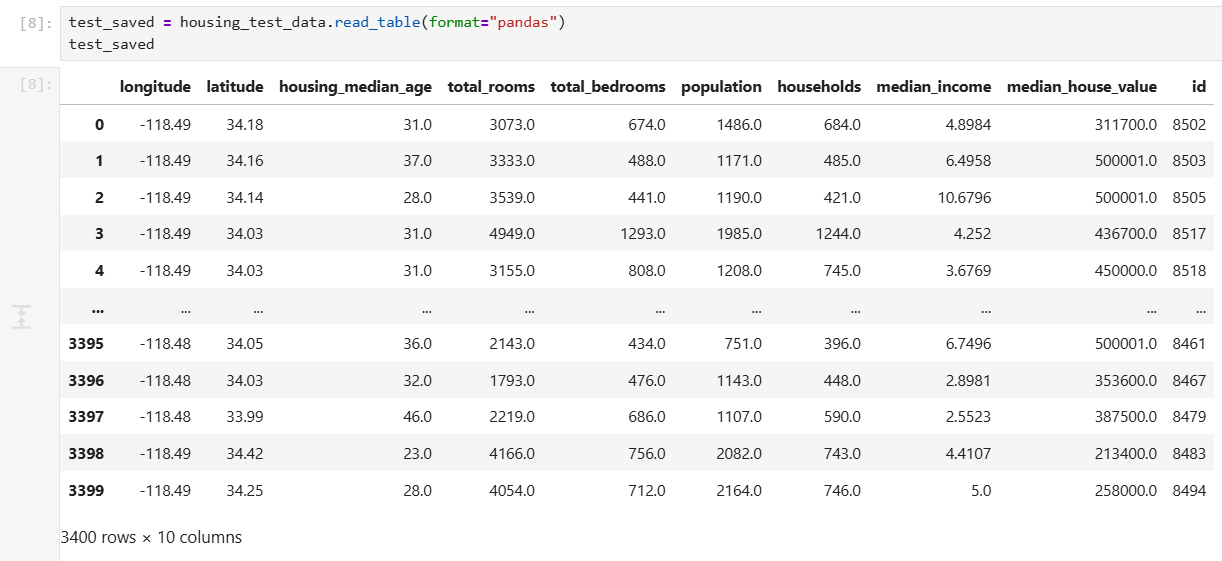
Option 1: Read it back in the notebook
Run:
housing_test_data.read_table(format=”pandas”).head()
or:
test_saved = housing_test_data.read_table(format=”pandas”)
test_saved
Option 2: Open it in Foundry
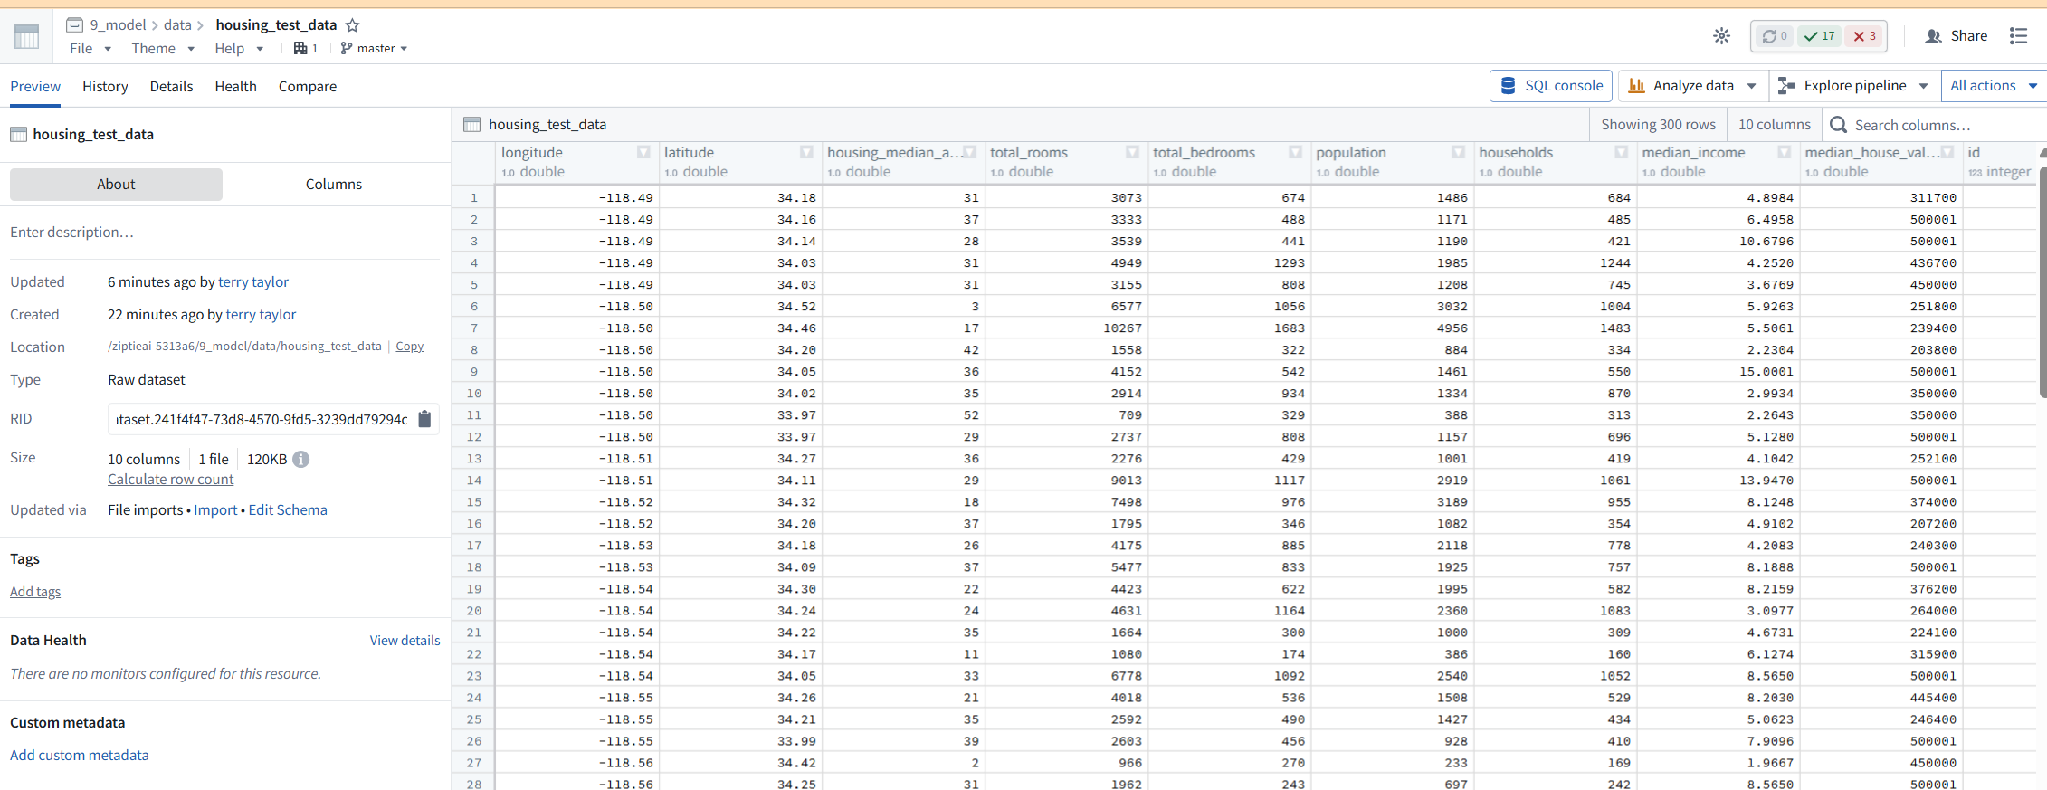
In the left Data panel, click:
housing_test_data
or click the … menu next to it and choose something like:
Open
Open in dataset preview
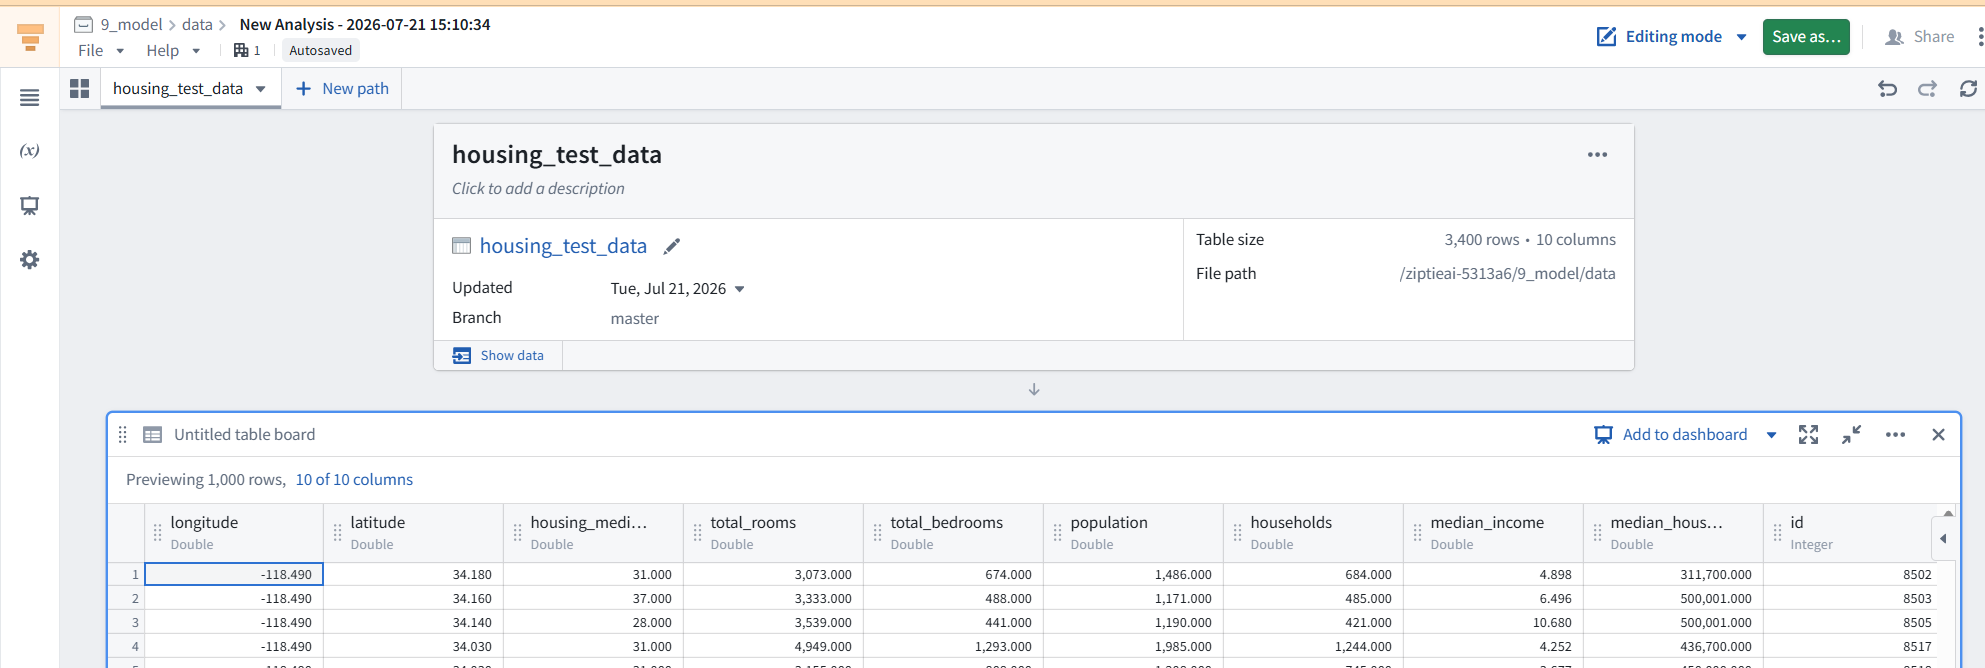
Option 3: Check row count
Run:
housing_test_data.read_table(format=”pandas”).shape

You should see something like:
(number_of_rows, number_of_columns)
Why you saw that object text
This line:
housing_test_data = Dataset.get(“housing_test_data”)
returns a dataset handle, not the table contents.
To see contents, use:
.read_table(format=”pandas”)
contour
5.3 How to train a model in (Jupyter) Code Workspaces (not repos)
Models in Foundry are comprised of two components:
Model artifacts: Model files produced in a model training job.
Model adapter: A Python class that describes how Foundry should interact with the model artifacts to perform inference.
S1 Model dependencies
Model training will almost always require adding Python dependencies that contain model training, serialization, inference, or evaluation logic. Foundry supports adding dependency specifications through conda and PyPI (pip). These dependency specifications create a Python environment that can be used to train a model.
In Foundry, these resolved dependencies and all Python .py files in your Jupyter® notebook are automatically packaged with your models to ensure that your model automatically has all of the logic required to perform inference (generate predictions) in production. Environments in Jupyter® Code Workspaces are managed through maestro commands.
In this example, we will use pandas and scikit-learn to produce our model and dill to save our model.
Action: Open Launcher by selecting the blue + button, then start a terminal.
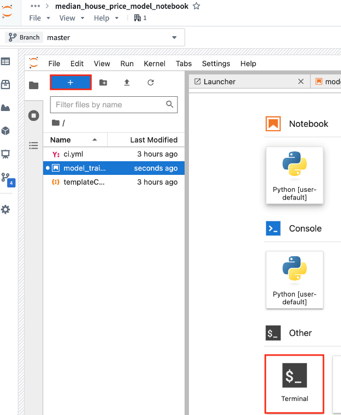
Add all three dependencies by running the command below. You can also use the Packages tab in the sidebar to install the backing repositories of the package you wish to install, which will open a terminal and run the maestro command for you.
maestro env conda install scikit-learn pandas dill “palantir_models>=0.1795.0”
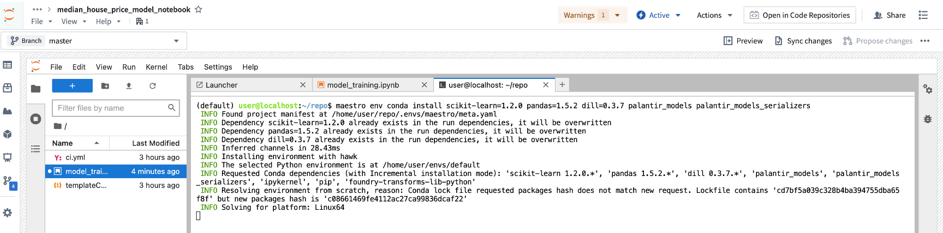
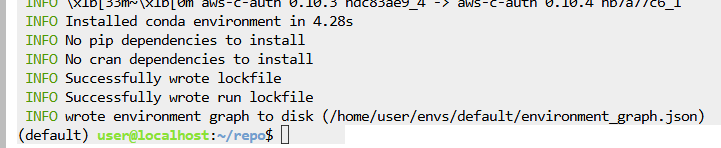
FDE: If the notebook kernel was already running
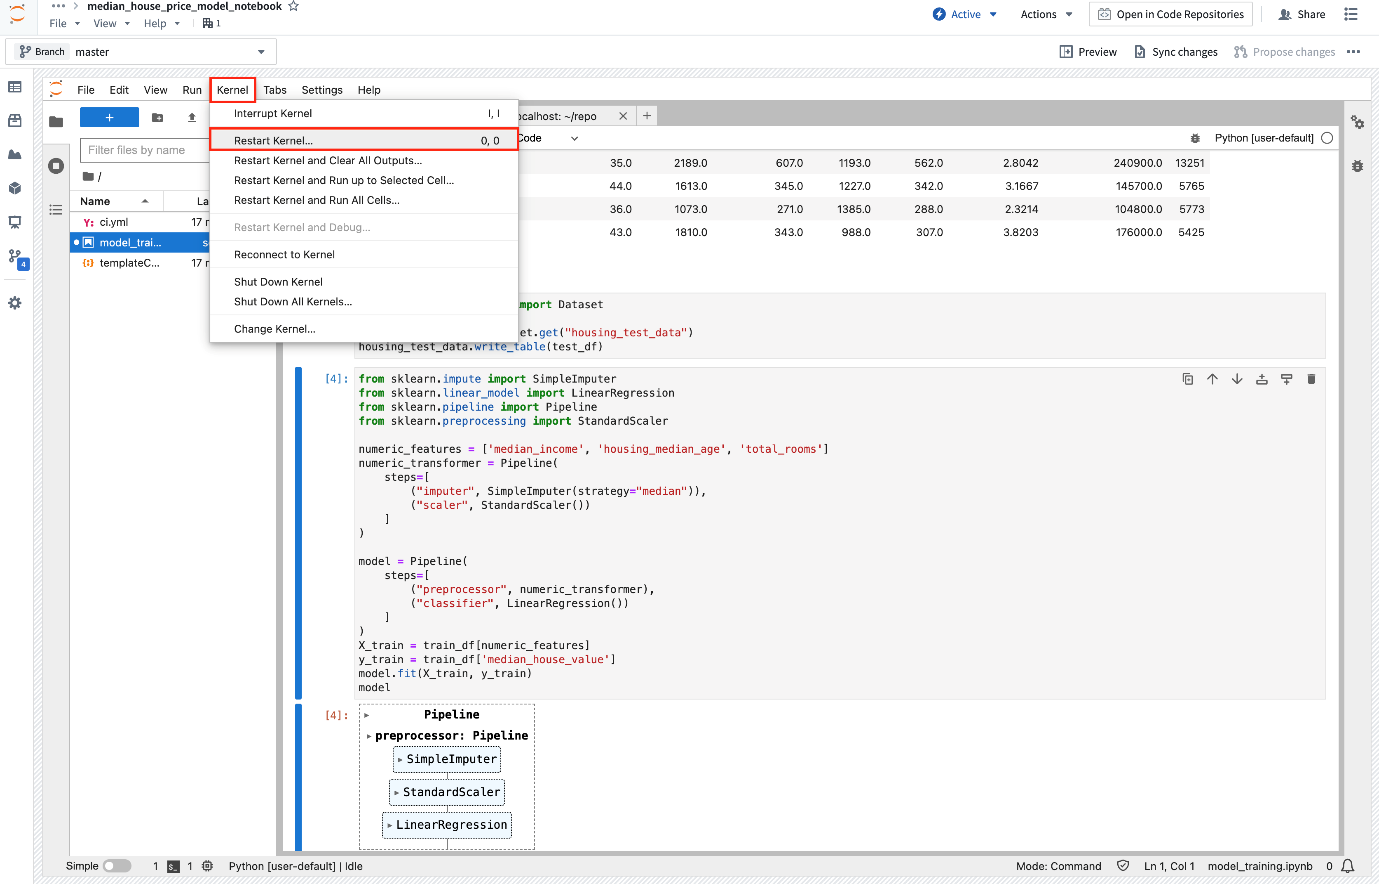
Because you changed the Python environment, you may need to restart the notebook kernel:
Kernel → Restart Kernel
Then rerun the notebook cells from the top.
S2 Model training
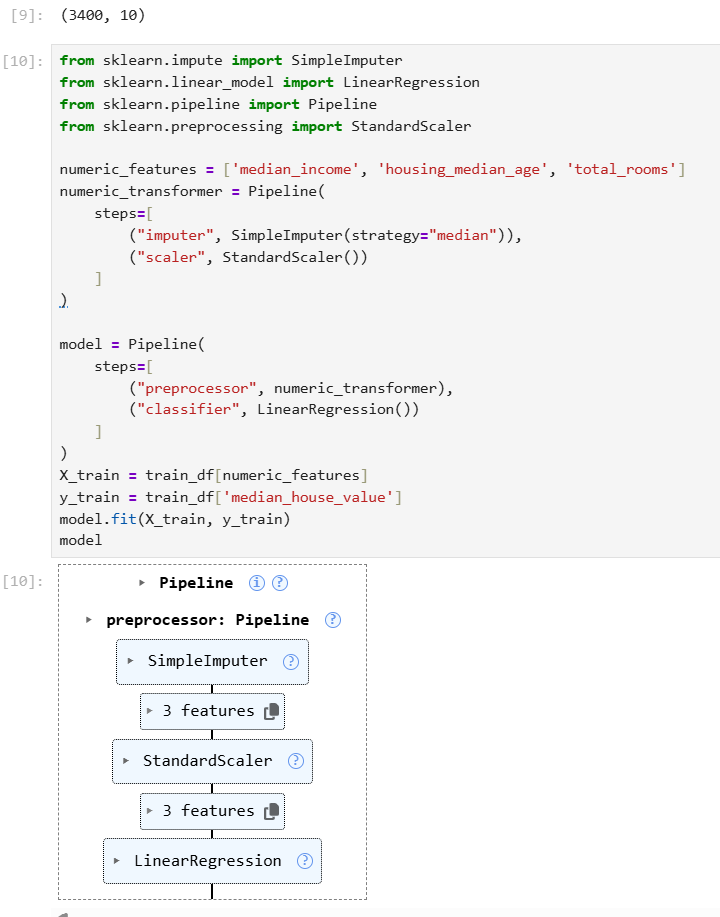
Action: Copy the above code into a new cell and execute it to train a new model in memory in your Jupyter® notebook. If you run into a ModuleNotFoundError or ImportError, restart the kernel (Kernel > Restart Kernel…) to make sure the environment has picked up the requested dependency changes.
from sklearn.impute import SimpleImputer
from sklearn.linear_model import LinearRegression
from sklearn.pipeline import Pipeline
from sklearn.preprocessing import StandardScaler
numeric_features = [‘median_income’, ‘housing_median_age’, ‘total_rooms’]
numeric_transformer = Pipeline(
steps=[
(“imputer”, SimpleImputer(strategy=”median”)),
(“scaler”, StandardScaler())
]
)
model = Pipeline(
steps=[
(“preprocessor”, numeric_transformer),
(“classifier”, LinearRegression())
]
)
X_train = train_df[numeric_features]
y_train = train_df[‘median_house_value’]
model.fit(X_train, y_train)
model
Yes — this cell was successful.
Evidence:
No error traceback appeared.
The model pipeline was displayed.
The final object shows:
Pipeline
├─ SimpleImputer
├─ StandardScaler
└─ LinearRegression
That means this ran successfully:
model.fit(X_train, y_train)
So your linear regression model has been trained.
Small note: the step name says ”classifier”, but the model is actually:
LinearRegression()
So it is a regression model, not a classifier. The name is harmless, but cleaner would be:
(“regressor”, LinearRegression())
But yes — training succeeded.
An imputer fills in missing values.
xxxxS3 (Optional) Log metrics and hyperparameters to a model experiment
Model experiments is a lightweight framework for logging metrics and hyperparameters produced during a model training run, which can then be published alongside a model and persisted in the model page.
Learn more about creating and writing to experiments.
5.4 How to publish a model from Code Workspaces
Now that we have created a model, we can publish it to Foundry to integrate it with our production apps.
To publish a model, we need to
create the model resource in Foundry to which we will save the model, then
wrap the model in a model adapter so Foundry knows how to interact with your model.
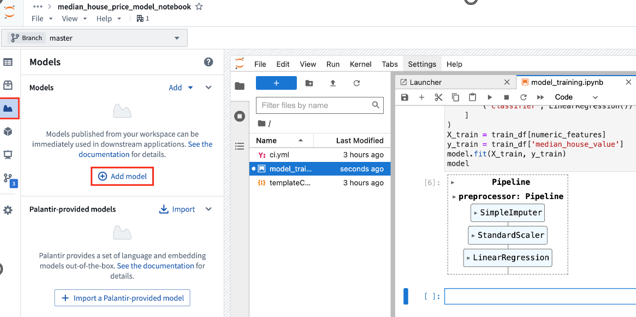
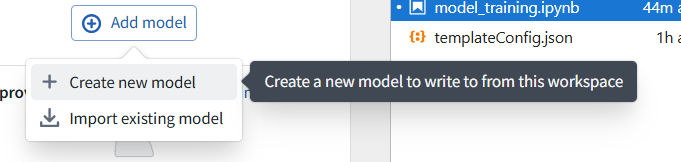
Action: In the Models tab, select Add model > Create new model and name it linear_regression_model. You can save the model to the models folder created earlier and then select Create to create the resource.
NEEDED HARD RELOAD
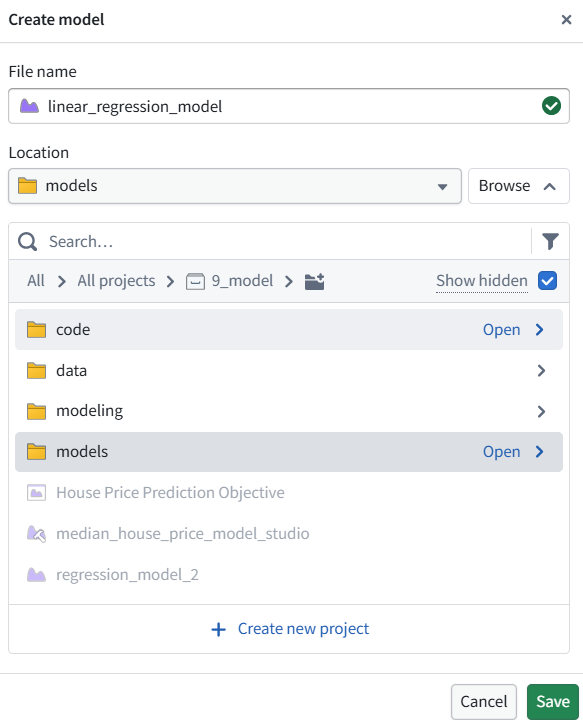
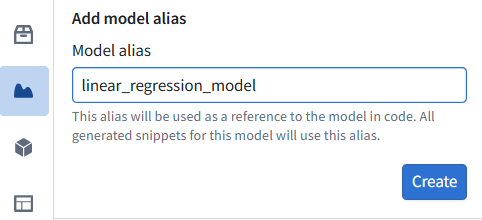
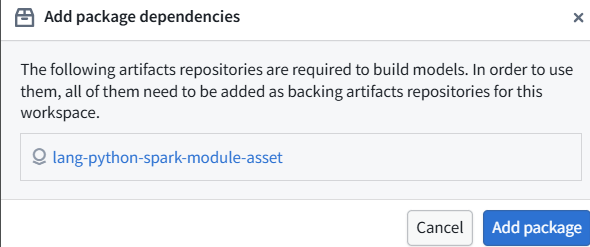
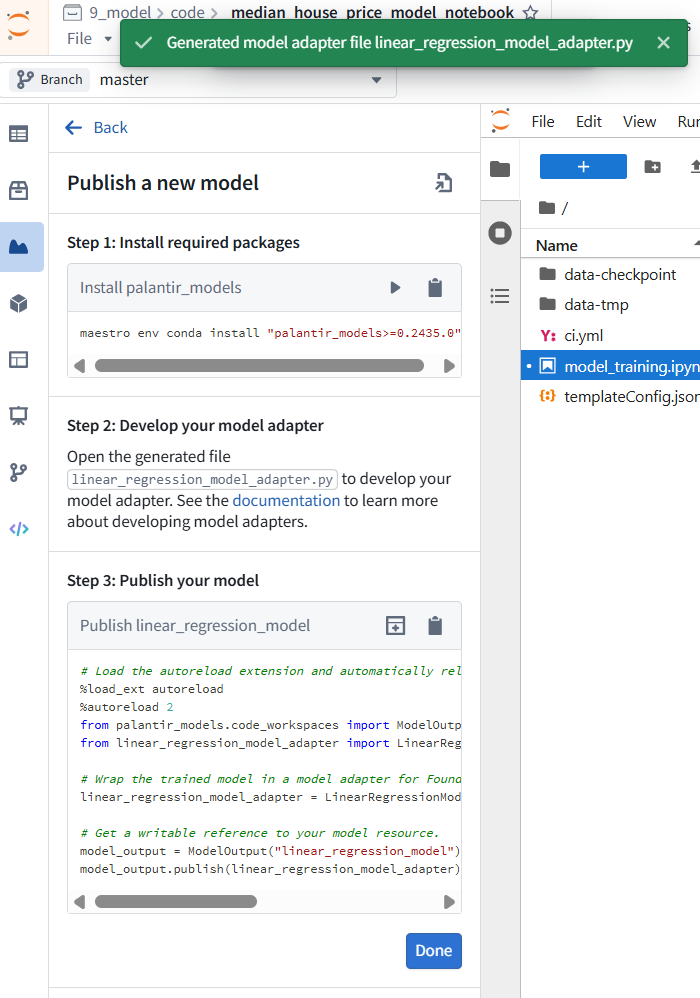
Now that you have created a model resource,
Foundry will automatically create a new Python file for you to implement a model adapter in. Model adapters provide a standard interface for all models in Foundry. The standard interface ensures that all models can be used immediately in production applications as Foundry will handle the infrastructure to load the model, its Python dependencies, expose its API, and interface with your model.
Model adapters in Code Workspaces must be defined in a separate Python (.py) file and imported into the notebook.
To create a model adapter, you will need to implement four functions:
Model save and load:
To reuse your model, you must define how your model should be saved and loaded. Palantir provides many default methods of serialization (saving), and in more complex cases, you can implement custom serialization logic.
api:
Defines the API of your model and tells Foundry what type of input data your model requires.
predict:
Called by Foundry to provide data to your model. This is where you can pass input data to the model and generate inferences (predictions).
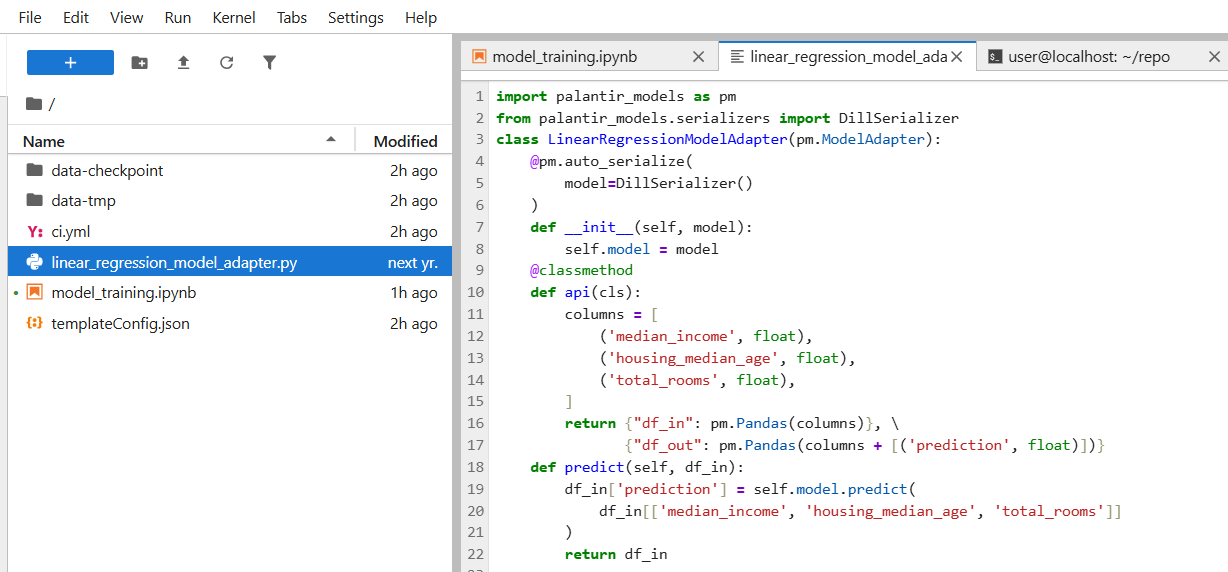
import palantir_models as pm
from palantir_models.serializers import DillSerializer
class LinearRegressionModelAdapter(pm.ModelAdapter):
@pm.auto_serialize(
model=DillSerializer()
)
def init(self, model):
self.model = model
@classmethod
def api(cls):
columns = [
(‘median_income’, float),
(‘housing_median_age’, float),
(‘total_rooms’, float),
]
return {“df_in”: pm.Pandas(columns)}, \
{“df_out”: pm.Pandas(columns + [(‘prediction’, float)])}
def predict(self, df_in):
df_in[‘prediction’] = self.model.predict(
df_in[[‘median_income’, ‘housing_median_age’, ‘total_rooms’]]
)
return df_in
Action: Copy the above code into a new file named linear_regression_model_adapter.py.
FILE ALREADY EXISTS… REPLACE CONTENT
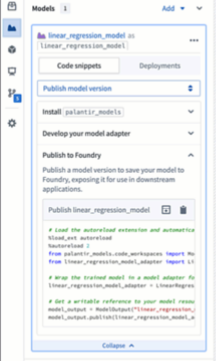
Select the Publish model version snippet from the model sidebar on the left, then expand the Publish to Foundry section and copy the corresponding code snippet into your main notebook.
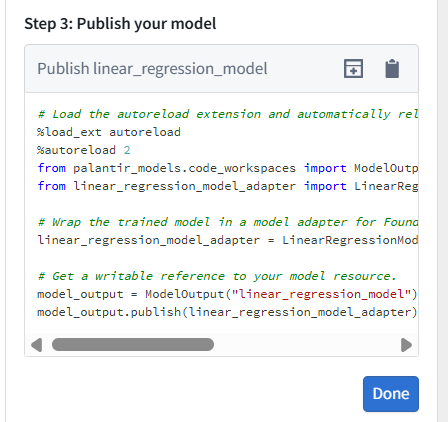
Make sure to adjust the code snippet to your new model variable in Python. You may want to test your model adapter before actually calling the .publish function, which you can do by running .transform from the adapter model instance:
Create adapted model instance and test it:
Load the autoreload extension and automatically reload all modules
%load_ext autoreload
%autoreload 2
from palantir_models.code_workspaces import ModelOutput
from linear_regression_model_adapter import LinearRegressionModelAdapter # Update if class or file name changes
Wrap the trained model in a model adapter for Foundry
linear_regression_model_adapter = LinearRegressionModelAdapter(model)
linear_regression_model_adapter.transform(test_df).df_out
Publish the model to Foundry:
Get a writable reference to your model resource.
model_output = ModelOutput(“linear_regression_model”)
model_output.publish(linear_regression_model_adapter) # Publishes the model to Foundry
5.5 Optional: Configure inference or retraining jobs
You can create an inference and/or retraining job and configure it to run on a schedule directly from your Jupyter® notebook. This will execute your .ipynb file as a transform leveraging the Palantir build infrastructure, which will keep track of data lineage and permissions. This feature also enables you to set up long-running training jobs in parallel while continuing to iterate on your Jupyter® notebook. Learn how to create transforms with model outputs directly from your notebook, how to consume a model from a Code Repository, and how to use the model in Pipeline Builder.
This model can also be consumed as a REST API via a direct deployment. Learn how to configure a direct deployment.
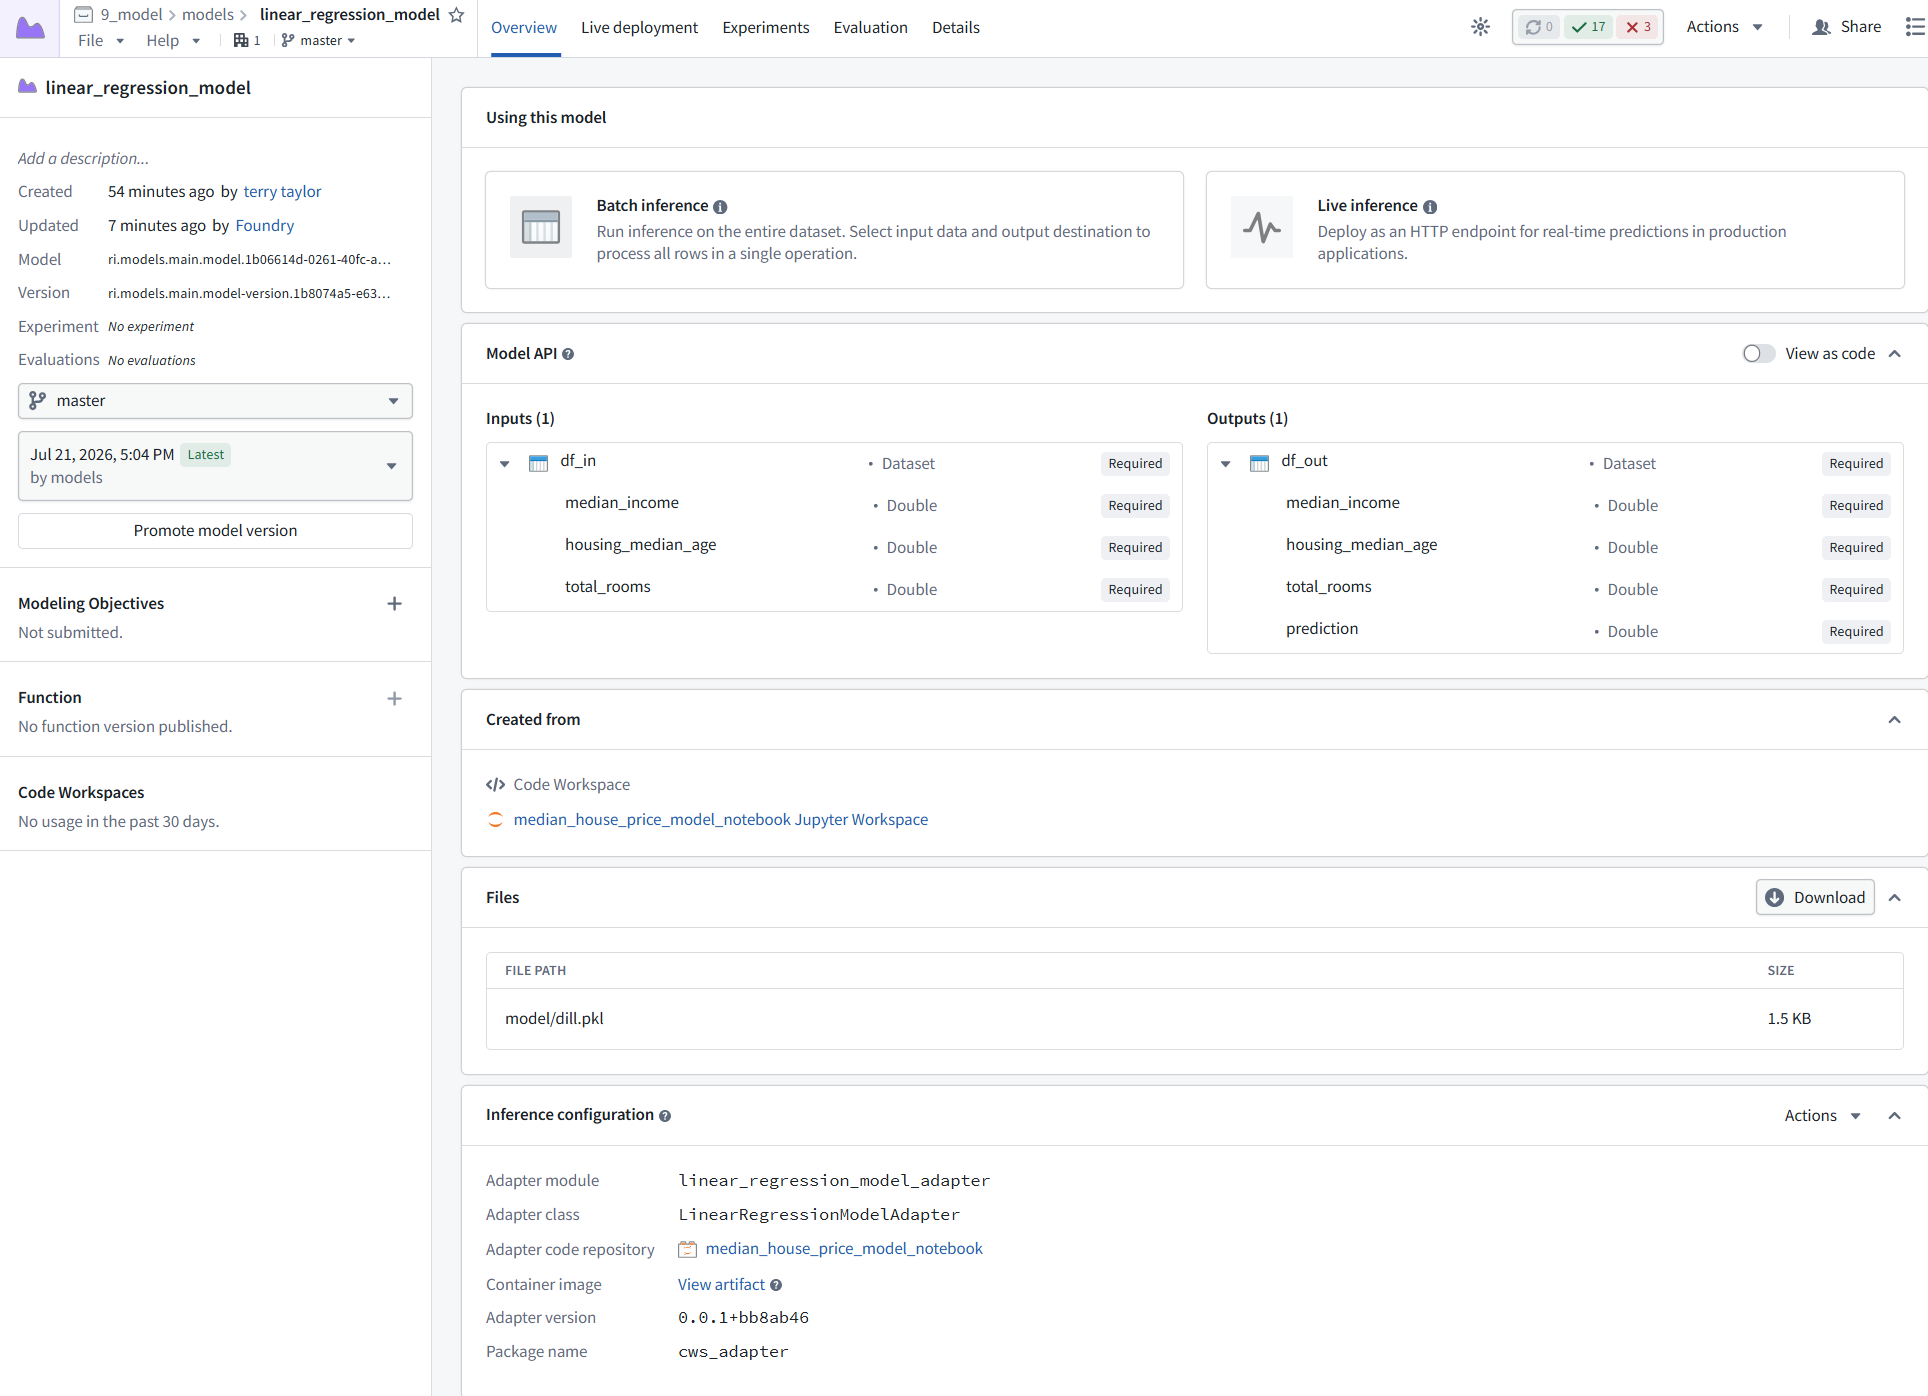
2b.6 How to view a model and submit it to a modeling objective
Now that you have a model, you can submit that model to a modeling objective to manage the entire model lifecycle for a problem. With modeling objectives, you can configure checks to validate new releases and perform continuous evaluation.
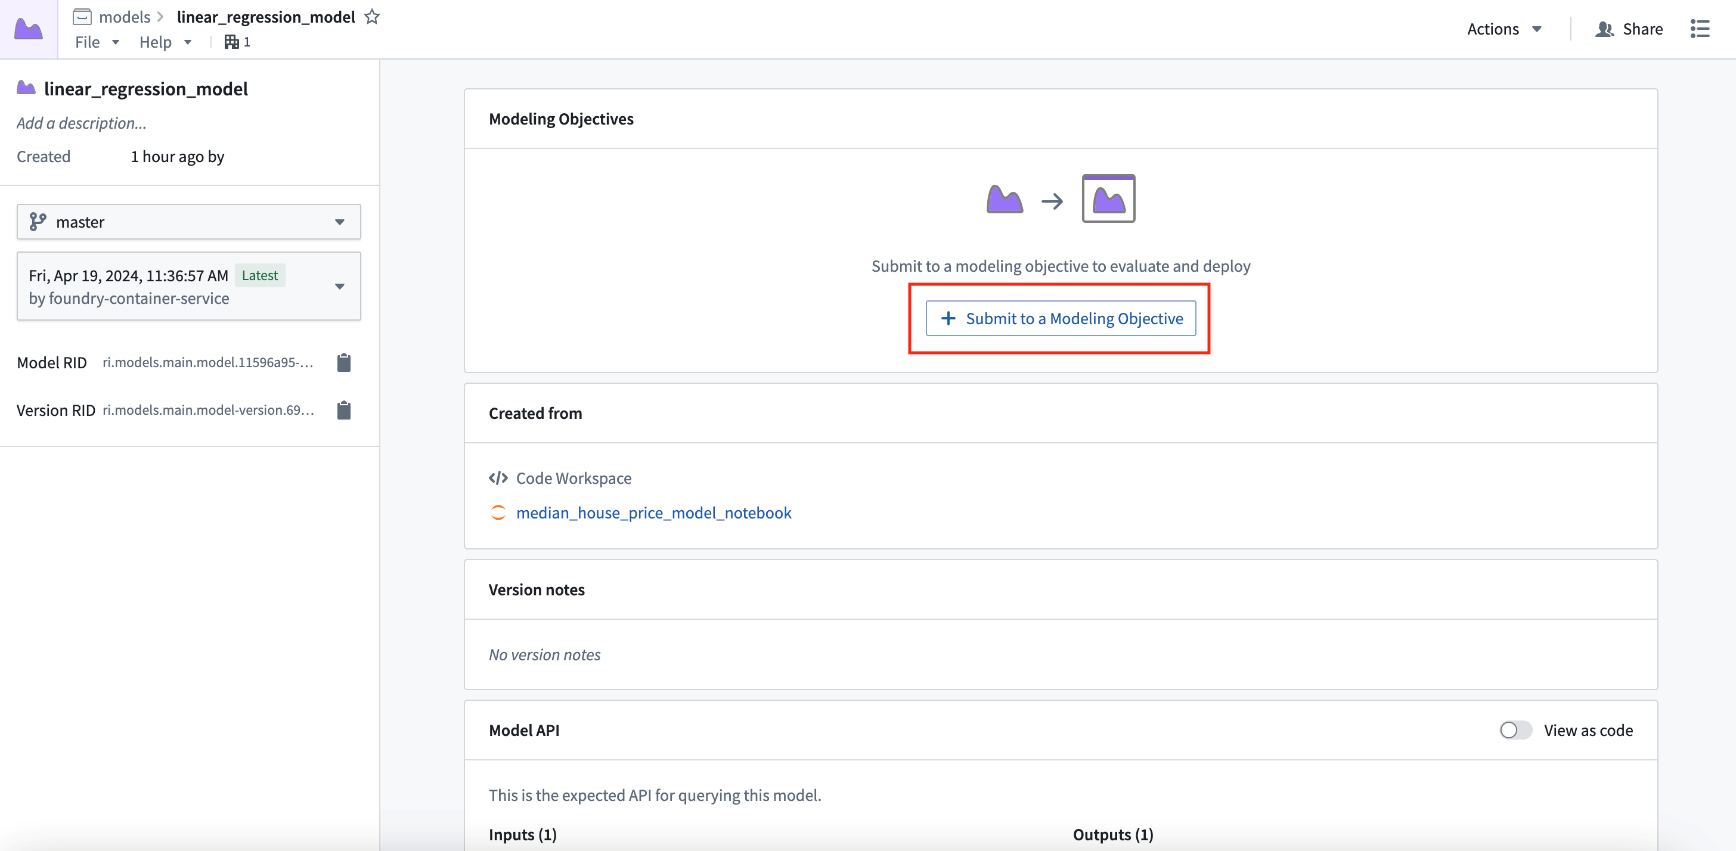
Action: Select View model version in the preview window to navigate to the model asset you have created, then select Submit to a Modeling Objective and submit that model to the modeling objective you created in step 1 of this tutorial. You will be asked to provide a submission name and submission owner. This is metadata that is used to track the model uniquely inside the modeling objective. Name the model linear_regression_model and mark yourself as the submission owner.
5.5 Next steps
Now that you have trained a model in Foundry, you can move onto model management, testing, and model evaluation. Here are some examples of additional steps you can take in Modeling Objectives:
Automatic model evaluation
Configuring checks for model submissions
Live and batch inference can also be configured from the modeling objective
No-code batch inference in Pipeline Builder
Optionally, you can also train a model in the Code Repositories application, designed for creating production-grade model training pipelines.
26.0903 (v1 26.0903)