3c.2.2 PAL AIP QS ch2 P1 AI (TOP/BOTTOM)
TOC
- P1.1 Pipeline
- P1.2 Ontology (chunks only)
- P1.3 AIP logic (core section of this demo)
- P1.4 UI TOP (input question) / BOTTOM (output LLM RAG answer) (BINGO)
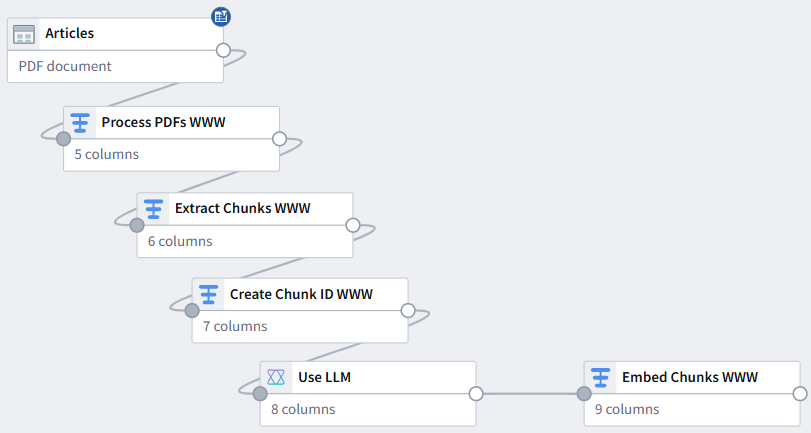
P1.1 Pipeline
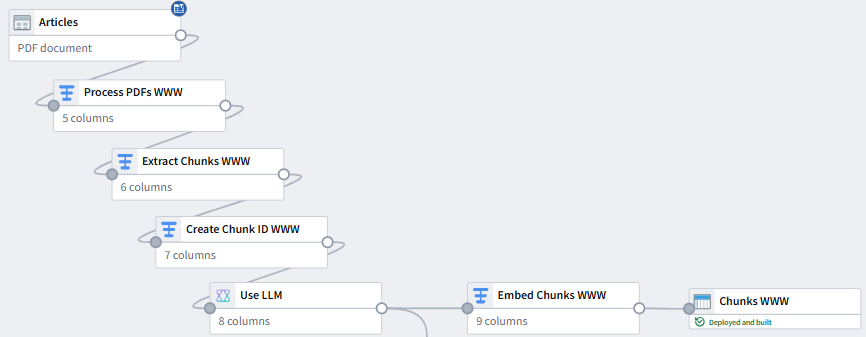
This is the pipeline you will build in this phase.
NOTE:
-
This is only half of the original demo pipeline (the other half has nothing to do with AIP).
-
In the other half there was an error that causes quite a bit of confusion for new users (FDE can solve this easily, but you need to understand how to work with FDE)
TOC
- P1.1-0 Create pipeline
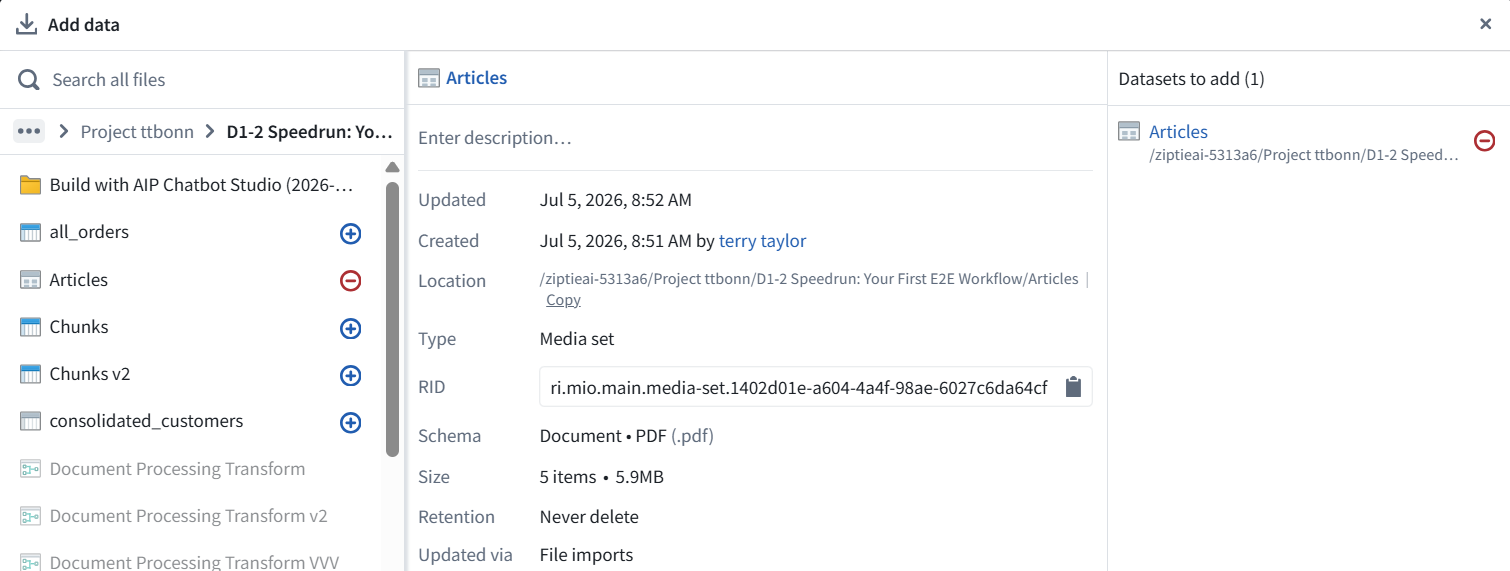
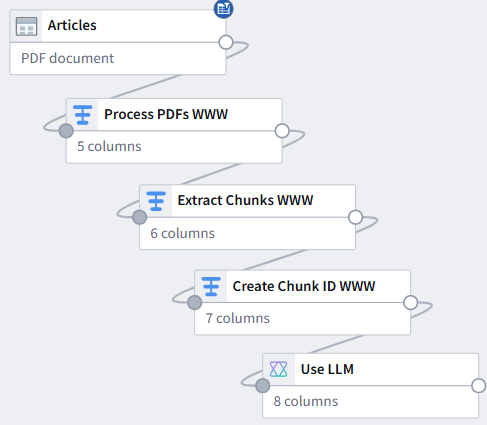
- P1.1-1 Create Source node “Articles” (5 pdfs, 58 pages)
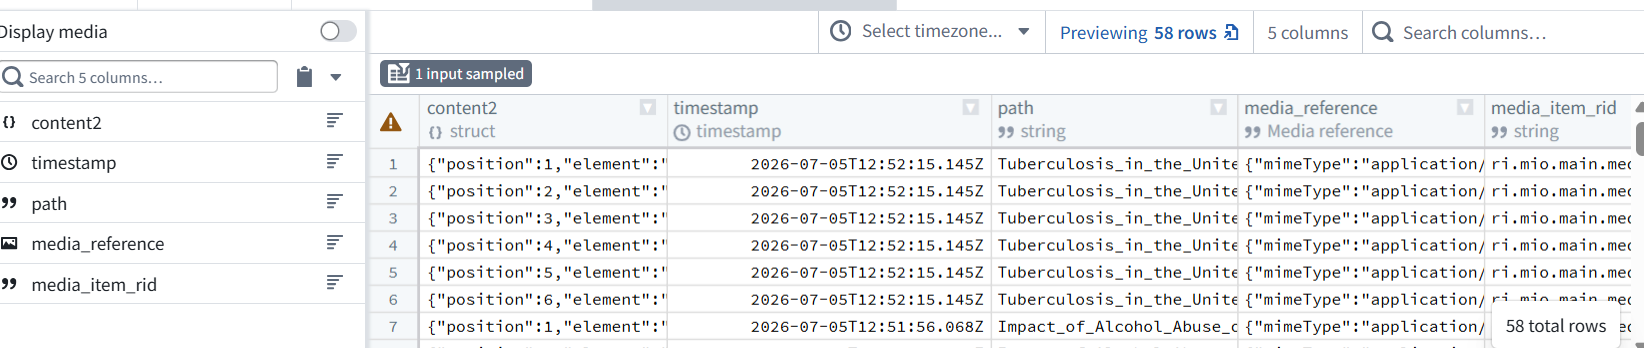
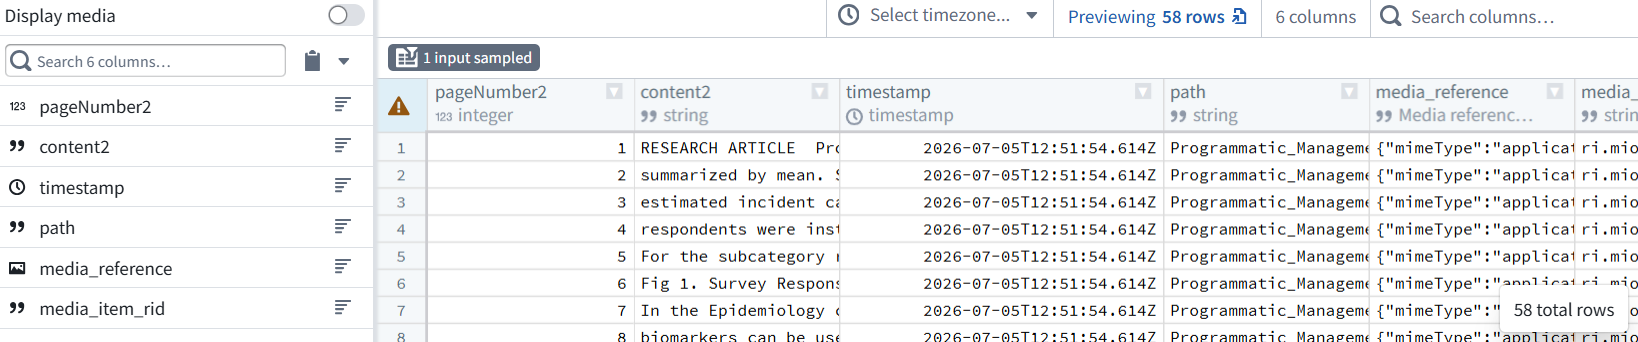
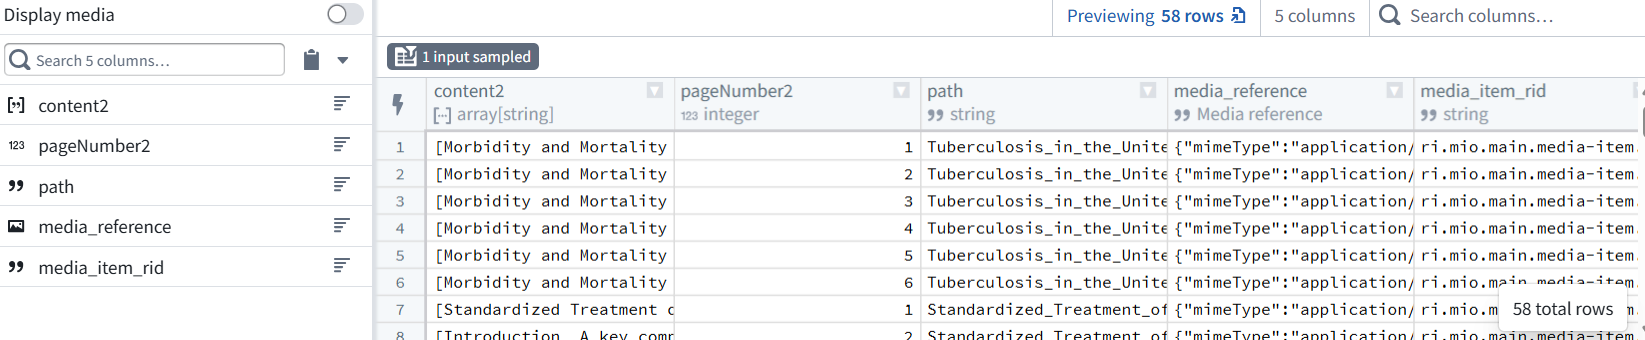
- P1.1-2 Create Transform node “Process PDFs” (get pageNumber2, content2) (output 58 rows)
- P1.1-3 Create Transform node “Extract chunks” (pageNumber2, content 2 » chunkNumber2, content2) (output 578 rows)
- P1.1-4 Transform node “Create chunk ID” (media_item_rid + pageNumber2 + chunkNumber2) (output 578 rows)
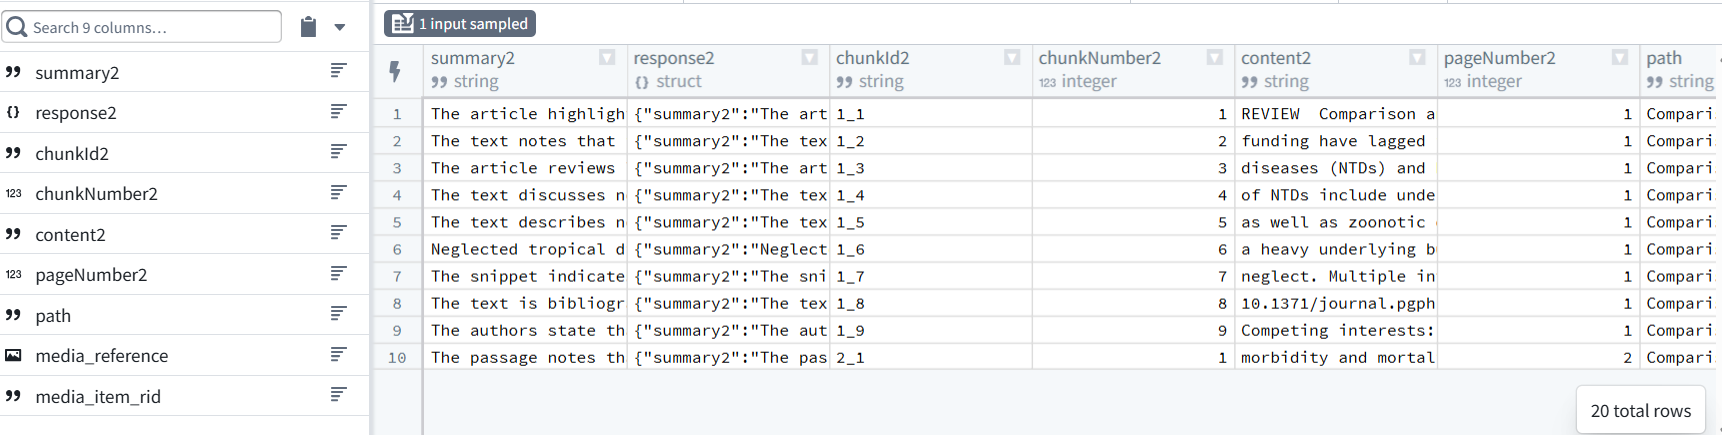
- P1.1-5 Use_LLM node “Use LLM” (create summary2, entities2) “entities” = keywords (output 20 rows)
- P1.1-6 Transform node “Embed chunks” (for searching; USES AI) / output = embedding2 (output 20 rows)
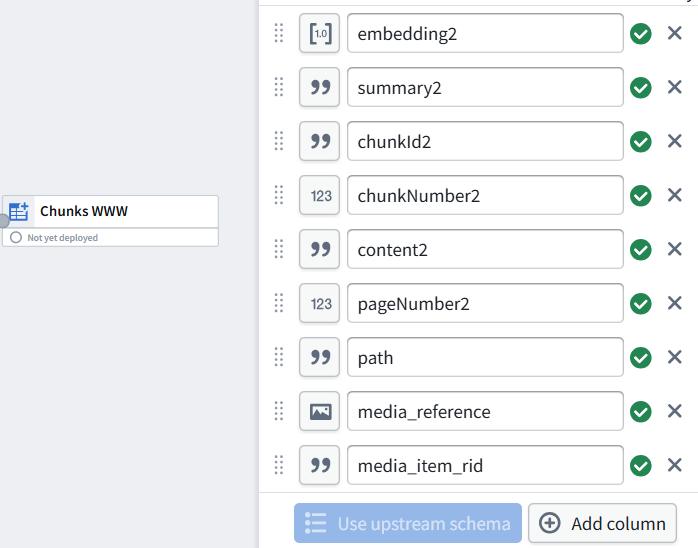
- P1.1-7 Dataset node “Chunks”
- P1.1-8 Deploy all pipeline outputs
Diagram: P1 Pipeline to build (Chunks only; no entities, no join table)
P1.1-0 Create pipeline
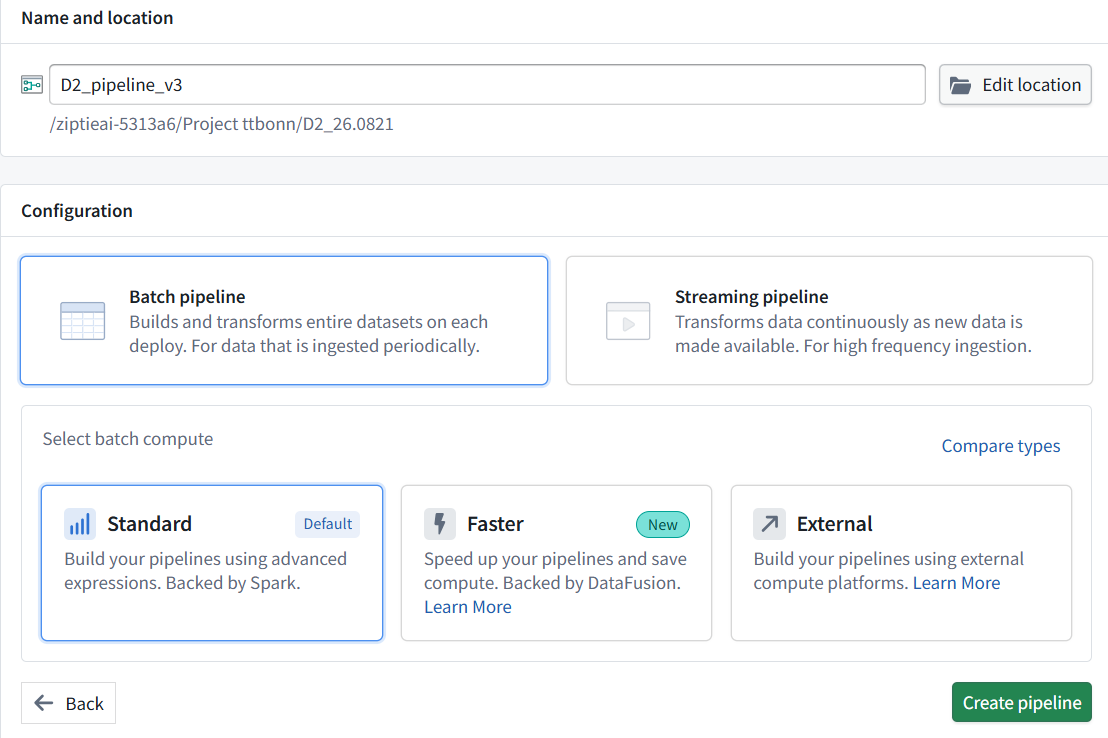
FDE: In this step we create the Pipeline Builder pipeline that will prepare data for the AIP demo. We choose a batch pipeline, meaning the pipeline runs when built/deployed and processes the available dataset as a whole. This is appropriate for demo data or periodically updated data. The pipeline will later contain the transforms that prepare the text/chunks/entities used by the question-answering workflow.
A streaming pipeline is different: it continuously processes new records as they arrive, for high-frequency or near-real-time data. Instead of rebuilding the whole dataset each time, it reacts to incoming events and updates outputs continuously. For this demo, batch is simpler and sufficient.
Diagram: Open Pipeline Builder in Foundry
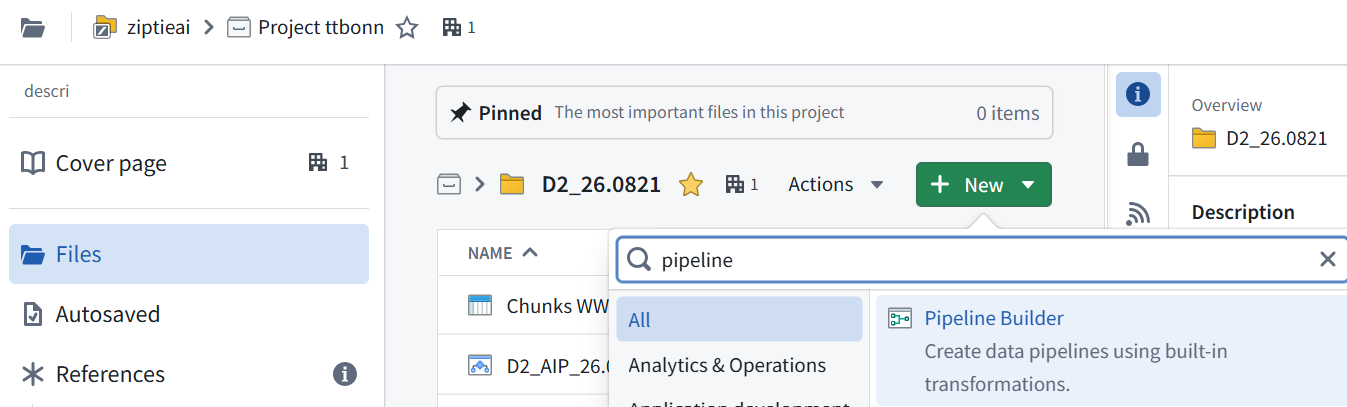
Diagram: Enter pipeline settings
P1.1-1 Create Source node “Articles” (5 pdfs, 58 pages)
Diagram: Add dataset “Articles” to the pipeline
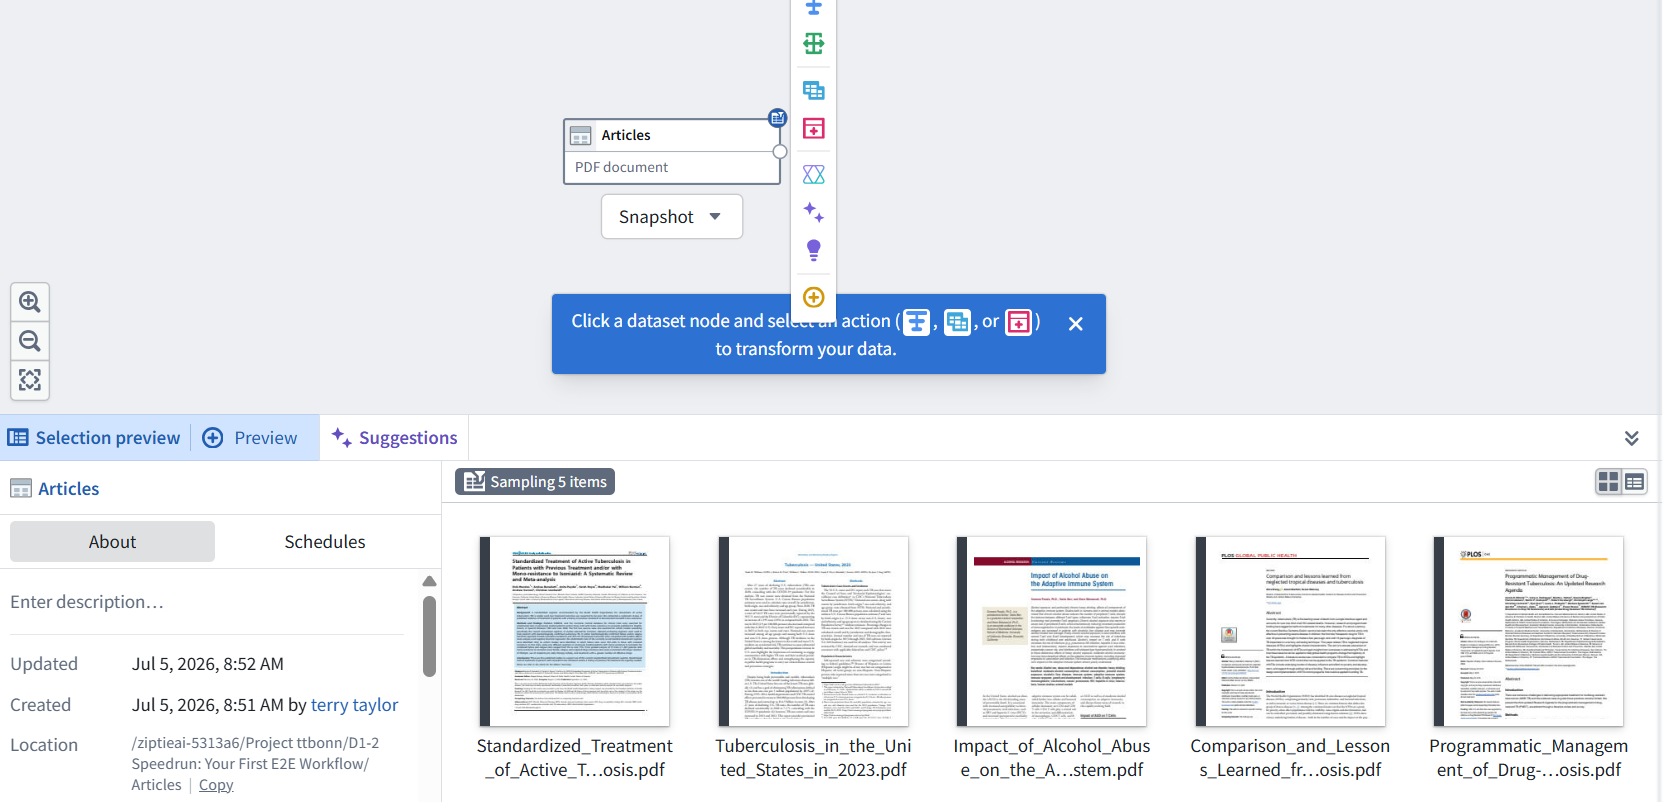
Below is the dataset source/input node named Articles.
Articles is the input table/dataset.
PDF document is one of its columns.
Snapshot indicates the selected dataset transaction/view mode.
It is not a transform node; downstream transform nodes consume data from it.
Diagram: Resuting dataset source/input node “Articles”
P1.1-2 Create Transform node “Process PDFs” (get pageNumber2, content2) (output 58 rows)
TOC
- P1.1-2.1 Add Node operation “Extract text from PDF” (the dialog recently changed… this section discusses changes)
- P1.1-2.2 Add Node operation “Explode array with position”
- P1.1-2.3 Add node operation “Extract many struct fields”
- P1.1-2.4 Add node operation Drop columns
Diagram: From node “Articles”: Create Transform node “Process PDFs”
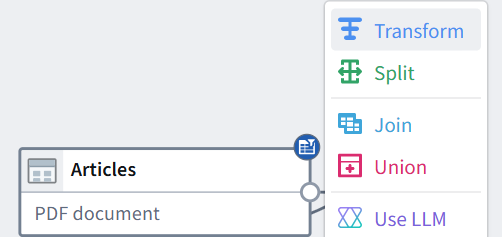
P1.1-2.1 Add Node operation “Extract text from PDF” (the dialog recently changed… this section discusses changes)
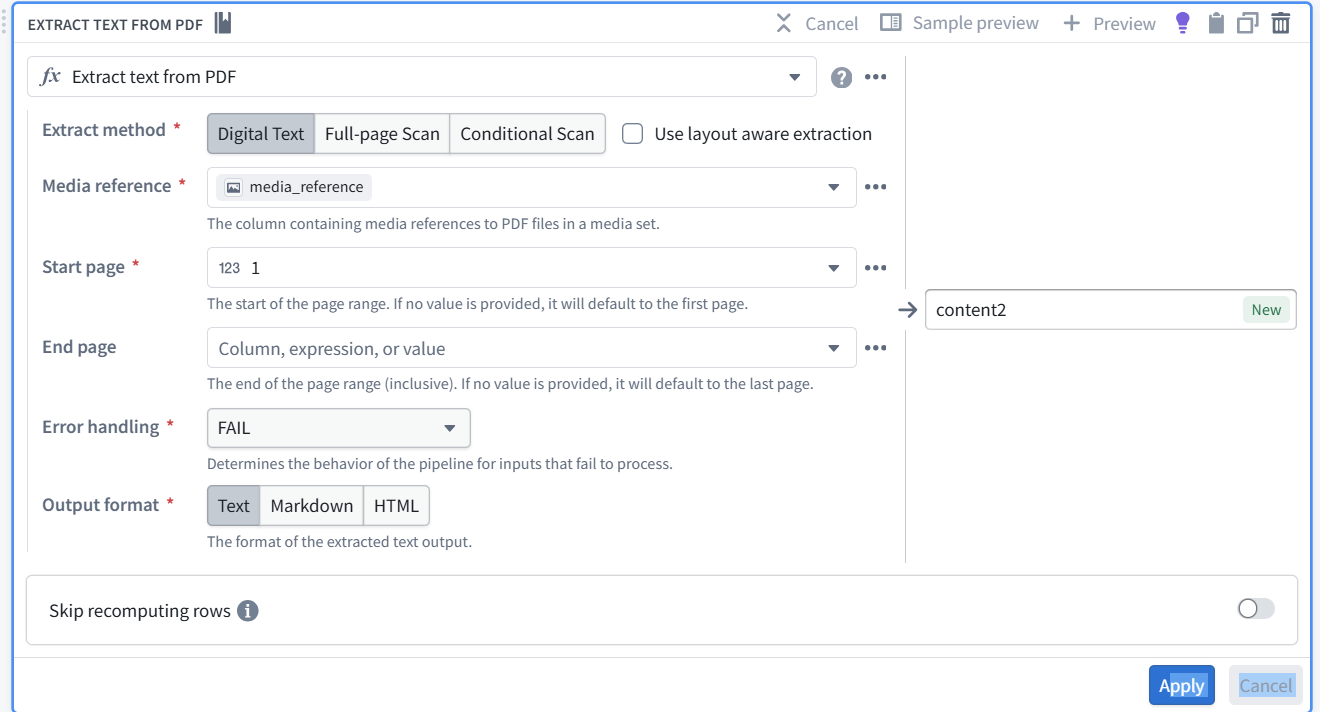
FDE: To reproduce the old Raw text configuration in the new UI, configure it as follows:
| New setting | Value | | — | — | | Extract method | Digital Text | | Use layout aware extraction | Unchecked | | Media reference | media_reference | | Start page | 1 | | End page | Leave blank | | Error handling | FAIL | | Output format | Text | | Output column | Change extracted_text to content2 | | Skip recomputing rows | Off, matching the previous version | Diagram: Settings for Node operation “Extract text from PDF” (NOTE: The official docs shows an older UI version)
Click Apply and run a preview.
Diagram: Preview of extracted text from PDF
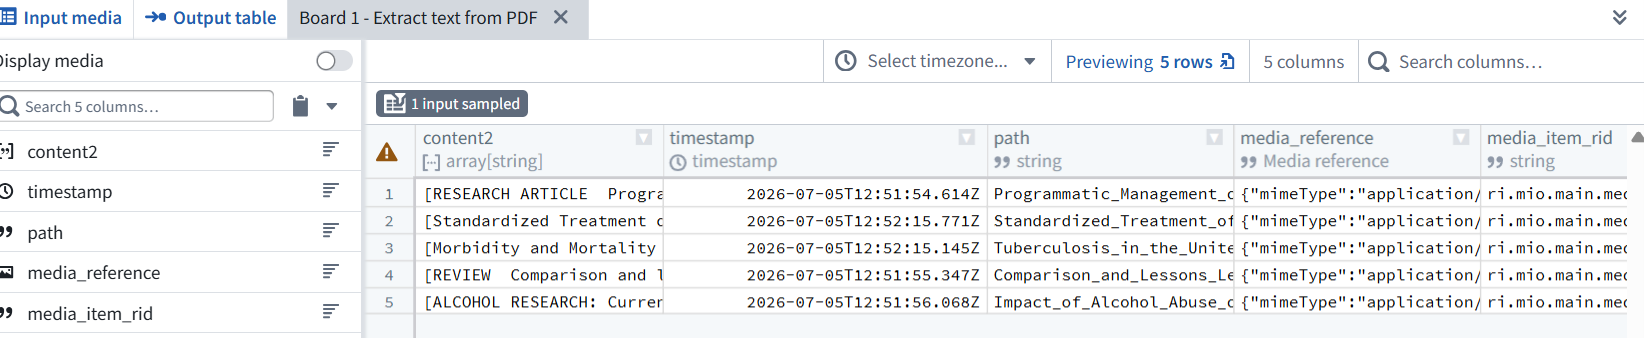
The extracted result is an array of page strings—one entry for each PDF page. Your following explode operation should turn those arrays into the approximately 58 page rows used by the rest of the demo.
Old-to-new option mapping
| Old UI | New UI | | — | — | | Raw text | Digital Text | | OCR | Full-page Scan | | Layout aware | Enable Use layout aware extraction | | No equivalent | Conditional Scan | What the new choices mean
Digital Text: extracts existing selectable text from a PDF. This most closely reproduces your old Raw text setting.
Full-page Scan: runs OCR on every page; use this for scanned-image PDFs.
Conditional Scan: uses digital text when available and scans pages that need OCR. This is useful for mixed PDFs, but it does not exactly reproduce the old configuration.
Layout-aware extraction: preserves more document structure. It is unnecessary for this demo’s simple text chunking workflow.
Because the previous demo worked with Raw text, use Digital Text + Text output for the clean rebuild.
P1.1-2.2 Add Node operation “Explode array with position”
Diagram: Settings for node operation “ Explode array with position”
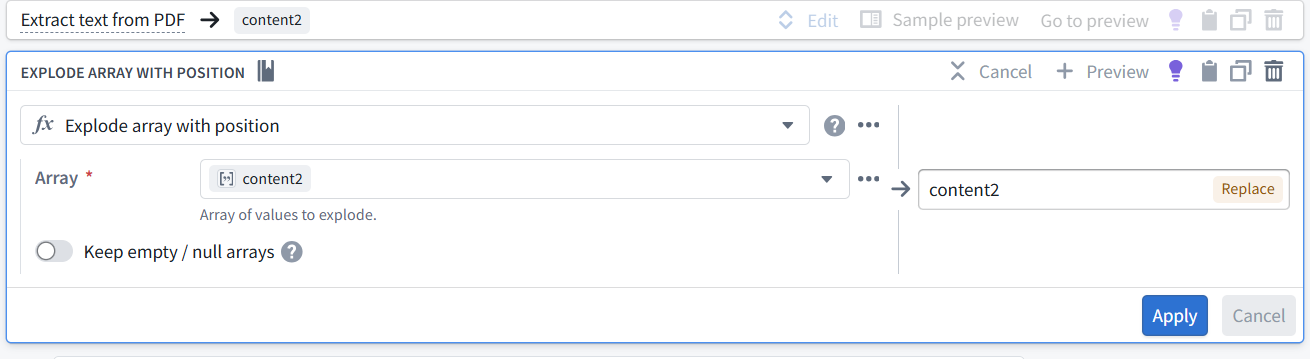
Diagram: Preview of Exploded array with position
P1.1-2.3 Add node operation “Extract many struct fields”
Diagram: Settings for node operation “Extract many struct fields”
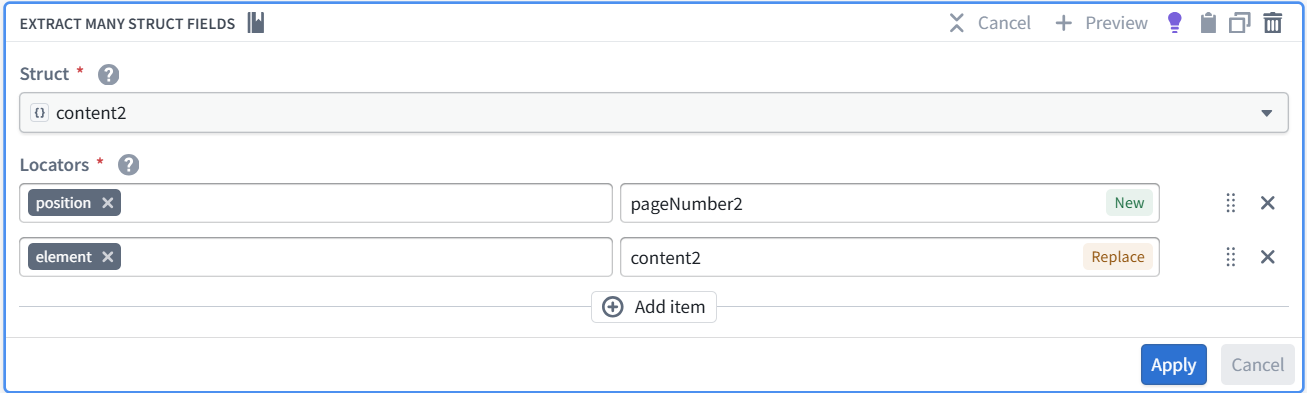
Diagram: Preview of Extracted struct’s
P1.1-2.4 Add node operation Drop columns
Diagram: Settings for node operation “Drop columns”

Diagram: Resulting operations for transform node “Process PDFs”
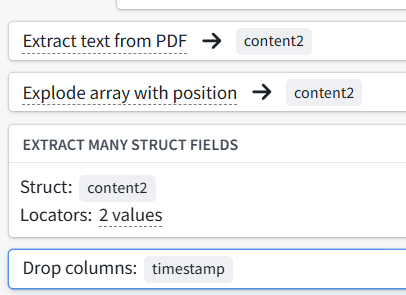
Diagram: Preview of final output for transform node “Process PDFs”

Diagram: New transform node “Process PDFs” in the pipeline diagram

P1.1-3 Create Transform node “Extract chunks” (pageNumber2, content 2 » chunkNumber2, content2) (output 578 rows)
TOC
- P1.1-3.1 Chunk string
- P1.1-3.2 Explode array with position
- P1.1-3.3 Extract many struct fields
Diagram: From node “Process PDFs”: Create Transform node “Extract chunks”
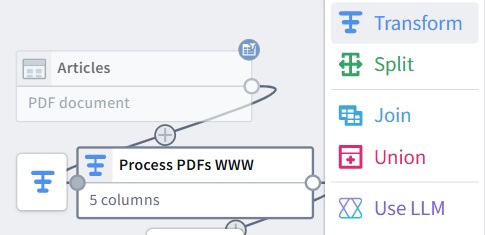
P1.1-3.1 Chunk string
Diagram: Settings for node operation “Chunk string”
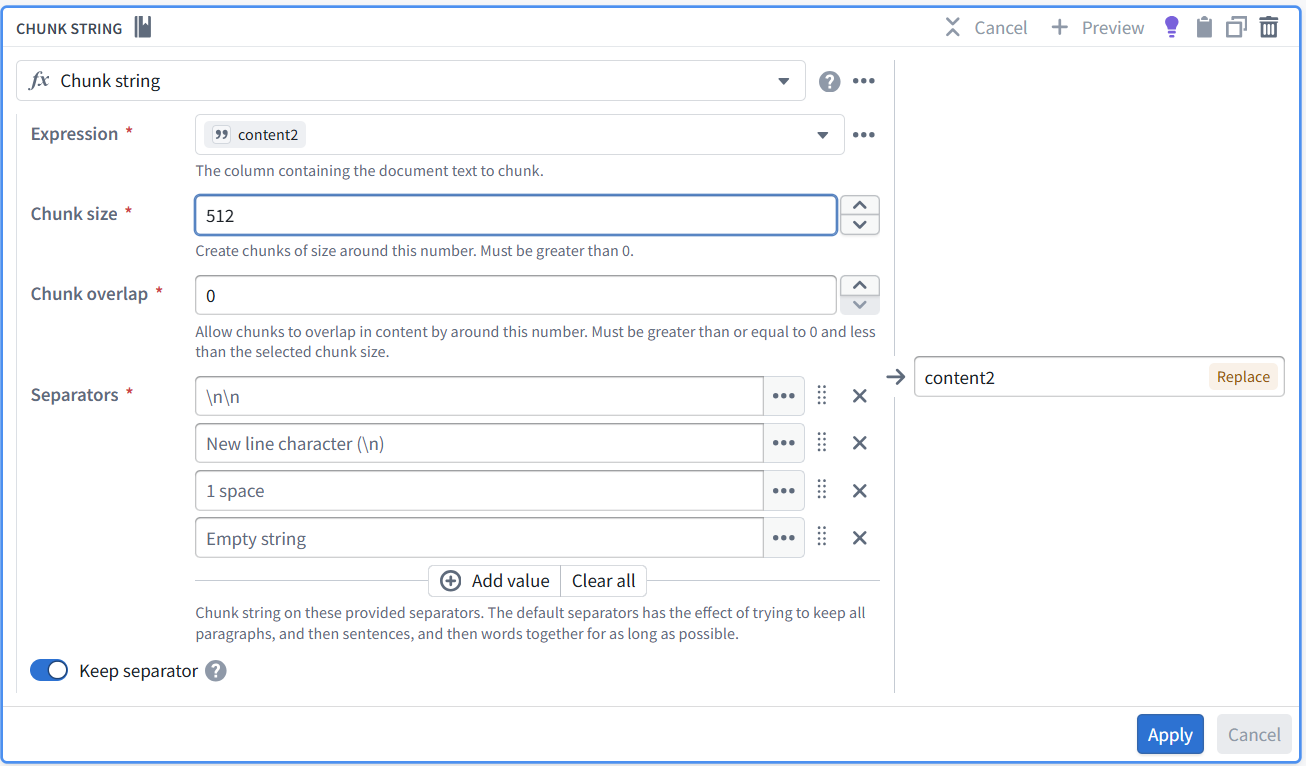
Diagram: Preview of chunked strings
P1.1-3.2 Explode array with position
Diagram: Settings for node operation
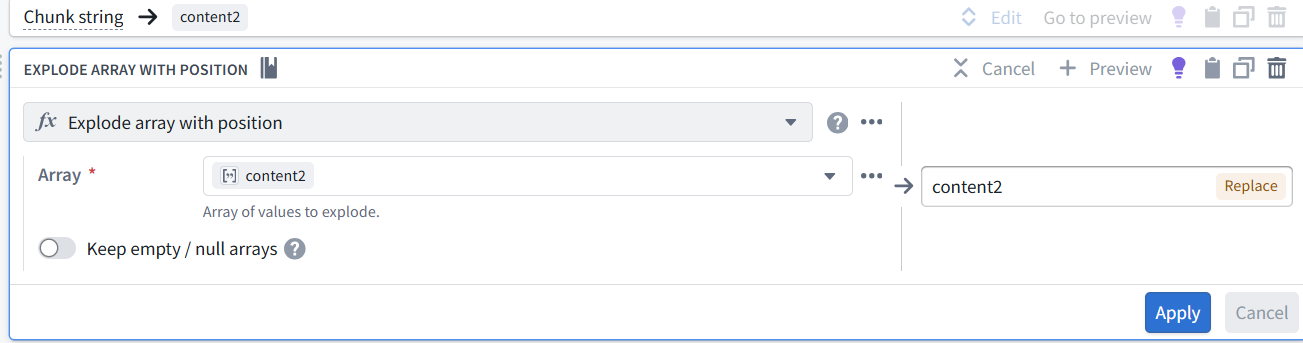
Diagram: Preview
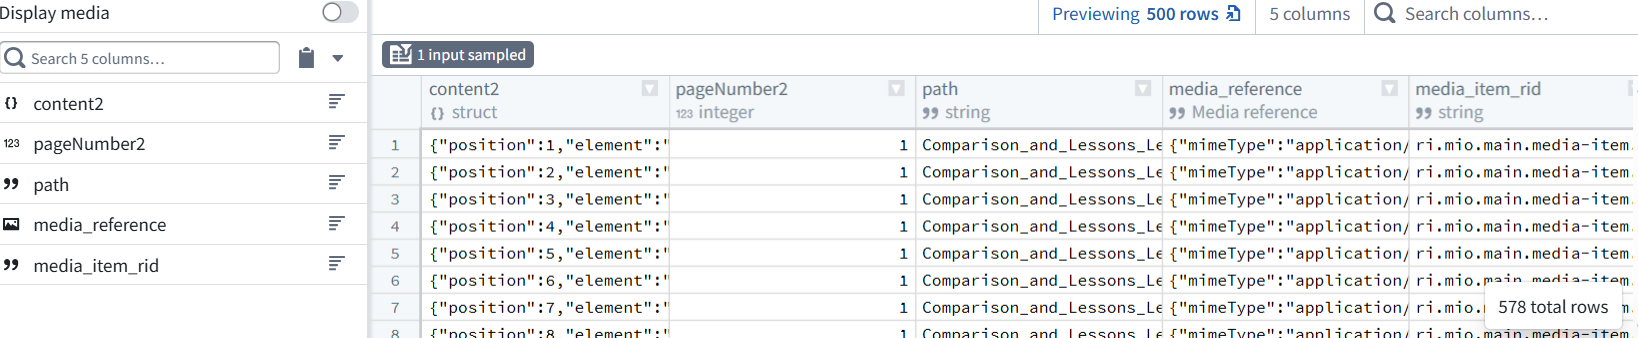
P1.1-3.3 Extract many struct fields
Diagram: Settings for node operation
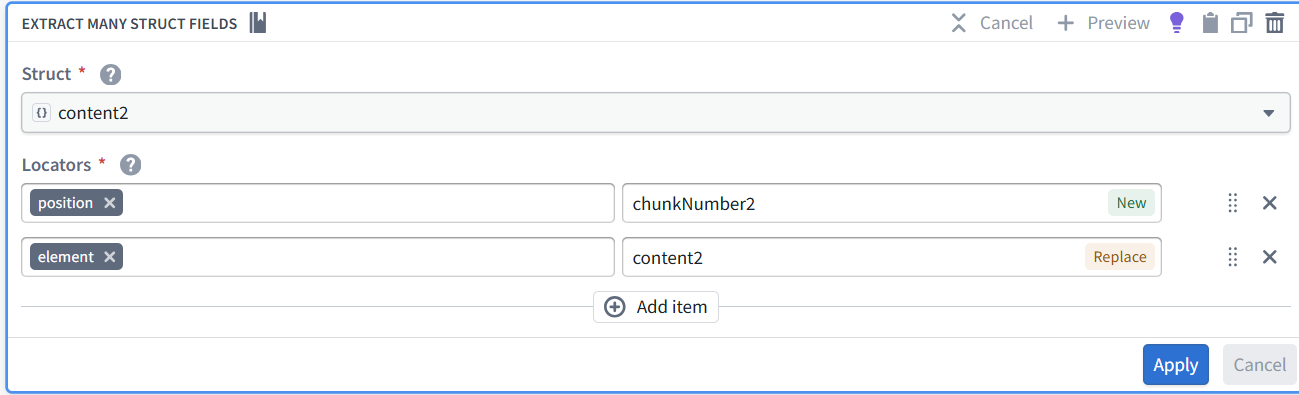
Diagram: Preview

Diagram: Resulting pipeline
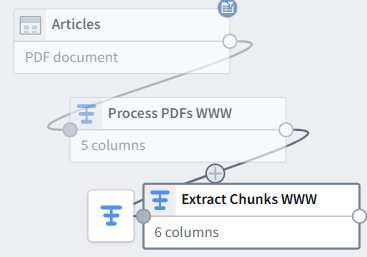
P1.1-4 Transform node “Create chunk ID” (media_item_rid + pageNumber2 + chunkNumber2) (output 578 rows)
Diagram: From node “Extract chunks”: Create Transform node “Create Chunk ID”
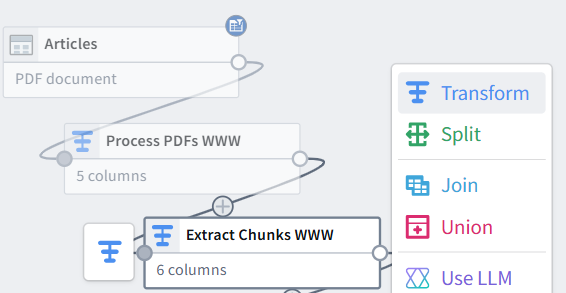
Diagram: Settings for node operation
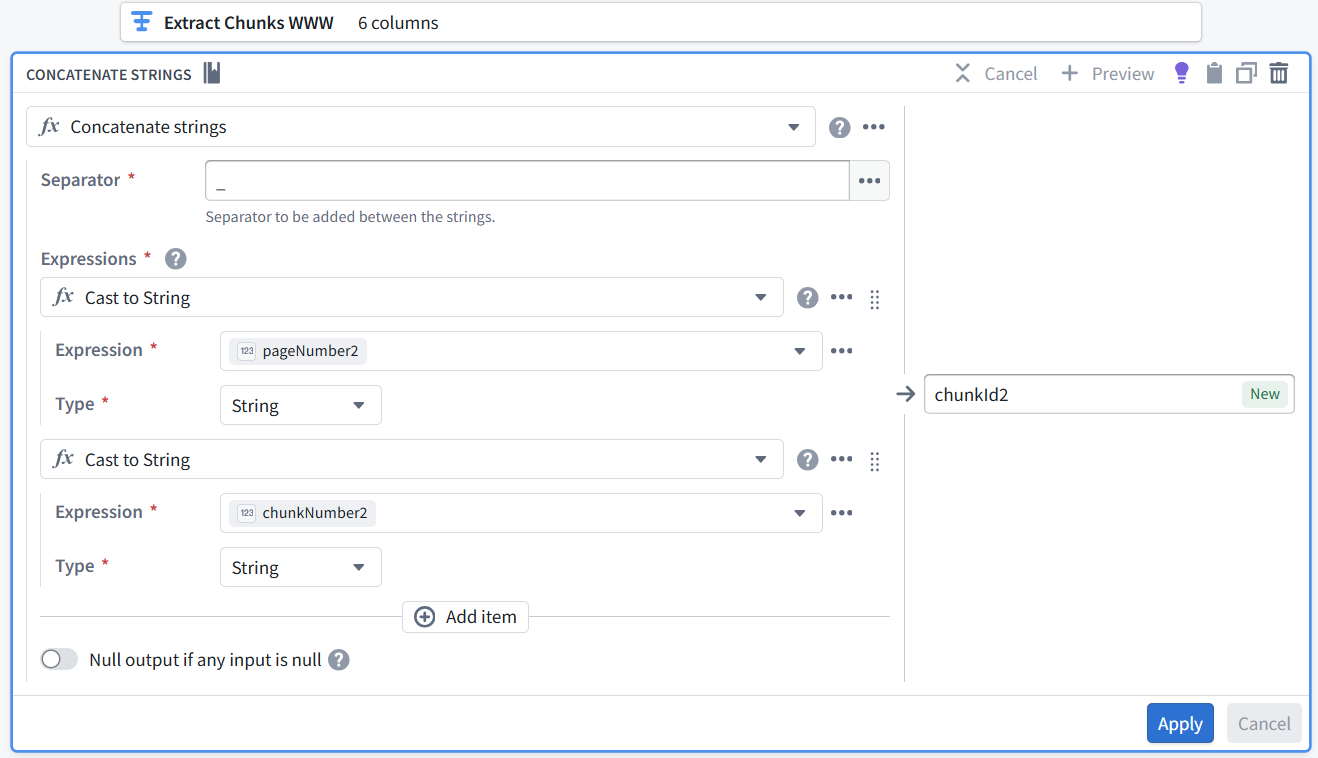
Diagram: Preview
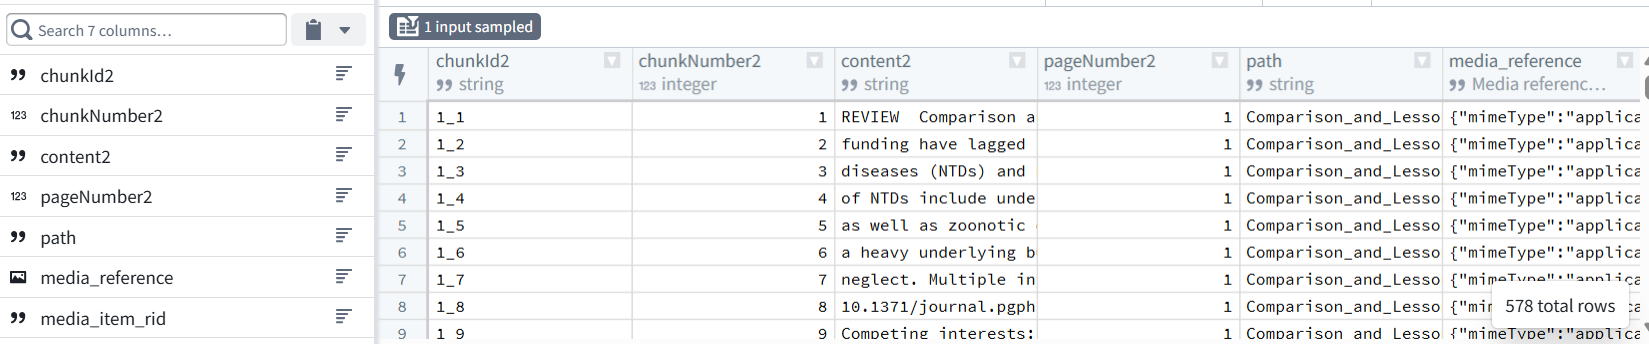
Diagram: Resulting pipeline
P1.1-5 Use_LLM node “Use LLM” (create summary2, entities2) “entities” = keywords (output 20 rows)
For each chunk, the model produces:
A short summary
Important terms or keywords
This is precomputed when the pipeline runs. It is not triggered separately every time someone uses the application.
Diagram: From node “ Create Chunk ID”: Create “Use LLM” node “Use LLM”
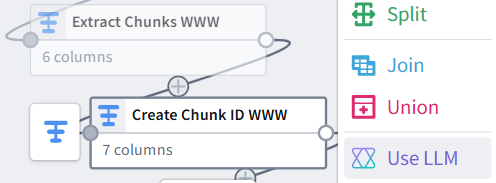
Select the “Empty prompt” template.
Diagram: Settings classification = Empty prompt
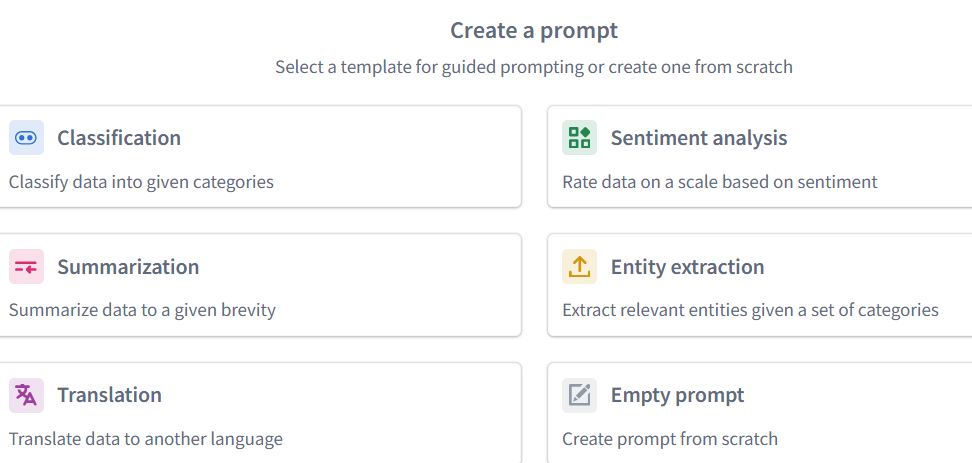
Diagram: Settings for node operation
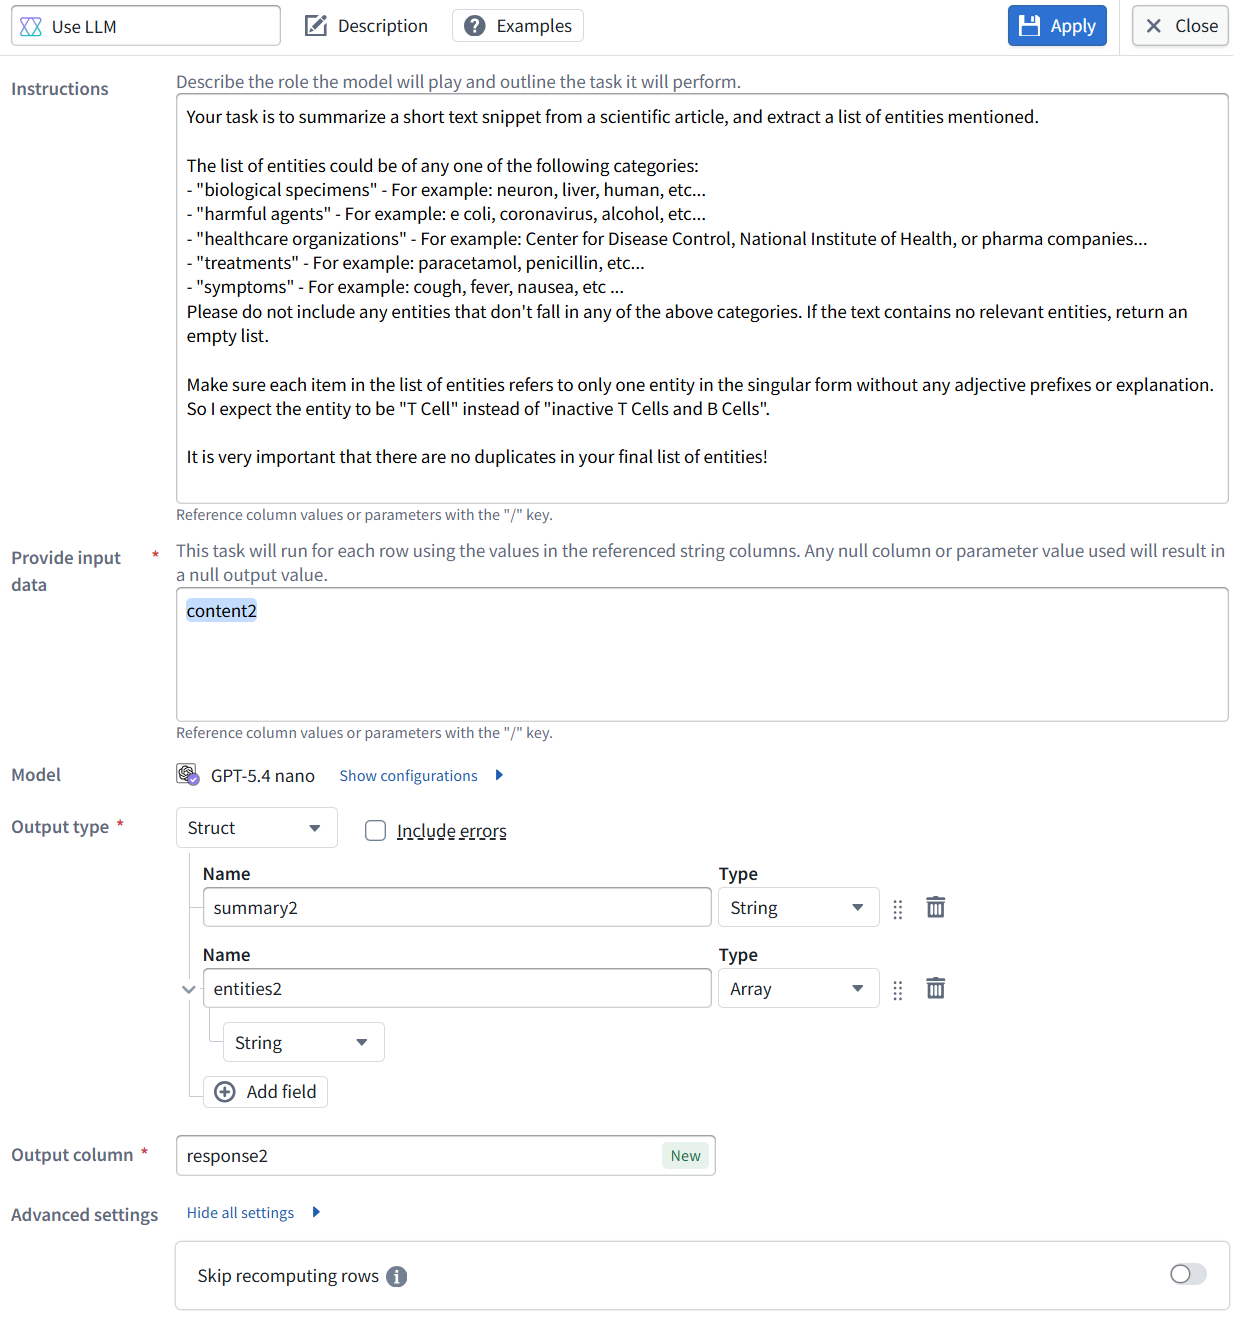
Diagram: Model settings
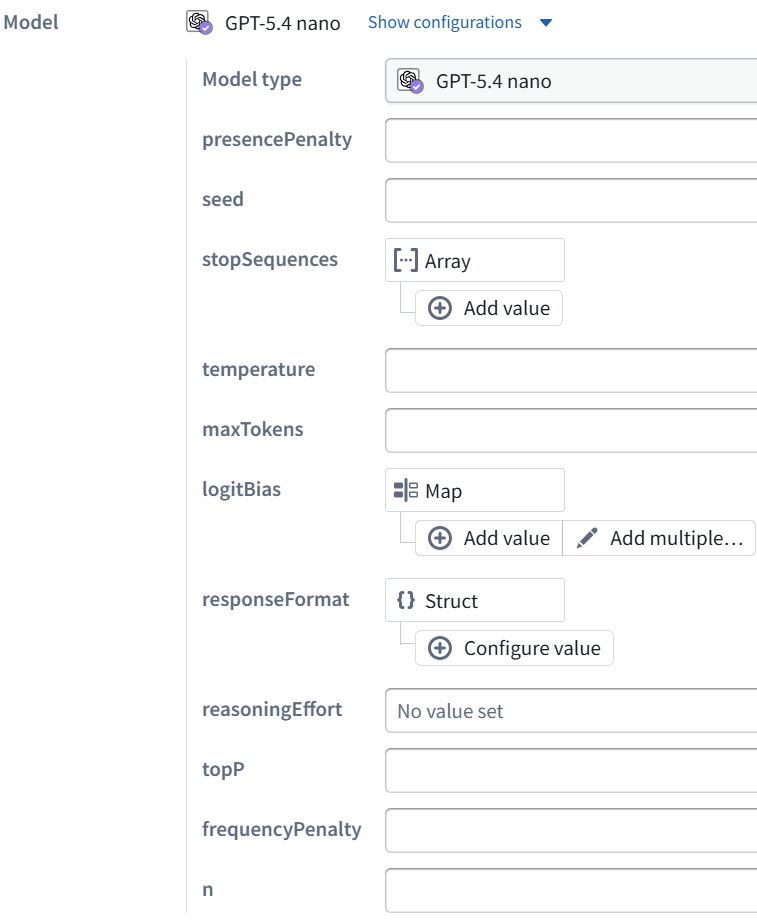
Diagram: Trial run

Diagram: Resulting pipeline
P1.1-6 Transform node “Embed chunks” (for searching; USES AI) / output = embedding2 (output 20 rows)
The embedding model converts text into a numeric vector:
Chunk text → embedding2
The vector lets Foundry find passages that are conceptually related to a question, even when they do not use identical wording.
NOTE: This is AI, but it is not text generation.
TOC
- P1.1-6.1 Get struct field
- P1.1-6.2 Text to embeddings
- P1.1-6.3 Drop columns
Diagram: From node “Use LLM”: Create Transform node “Embed chunks”
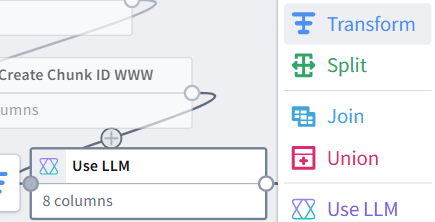
P1.1-6.1 Get struct field
Diagram: Settings for node operation
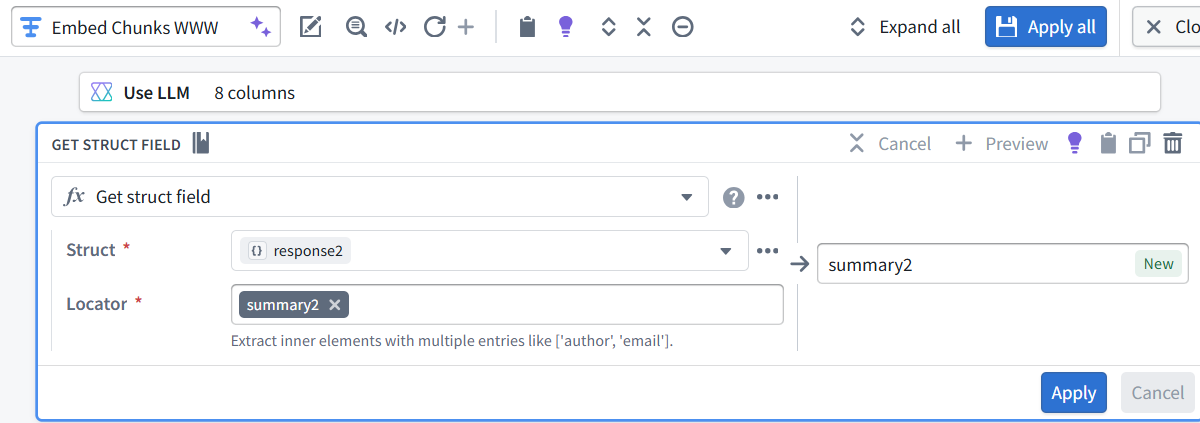
Diagram: Preview
P1.1-6.2 Text to embeddings
Diagram: Settings for node operation
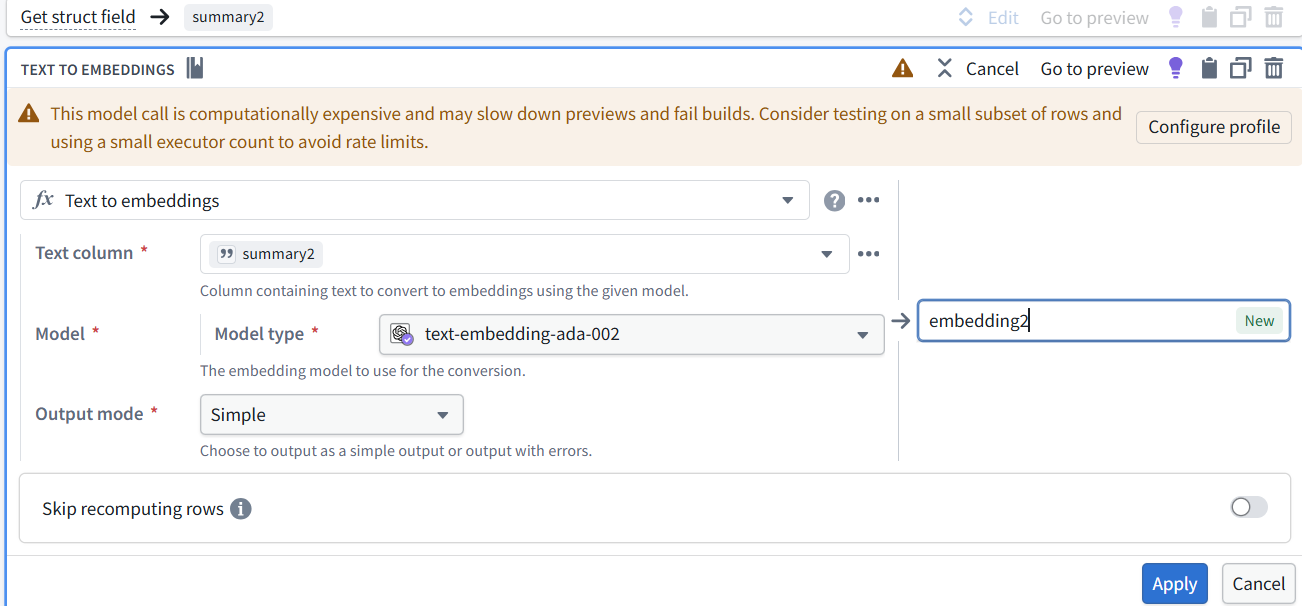
Diagram: Preview
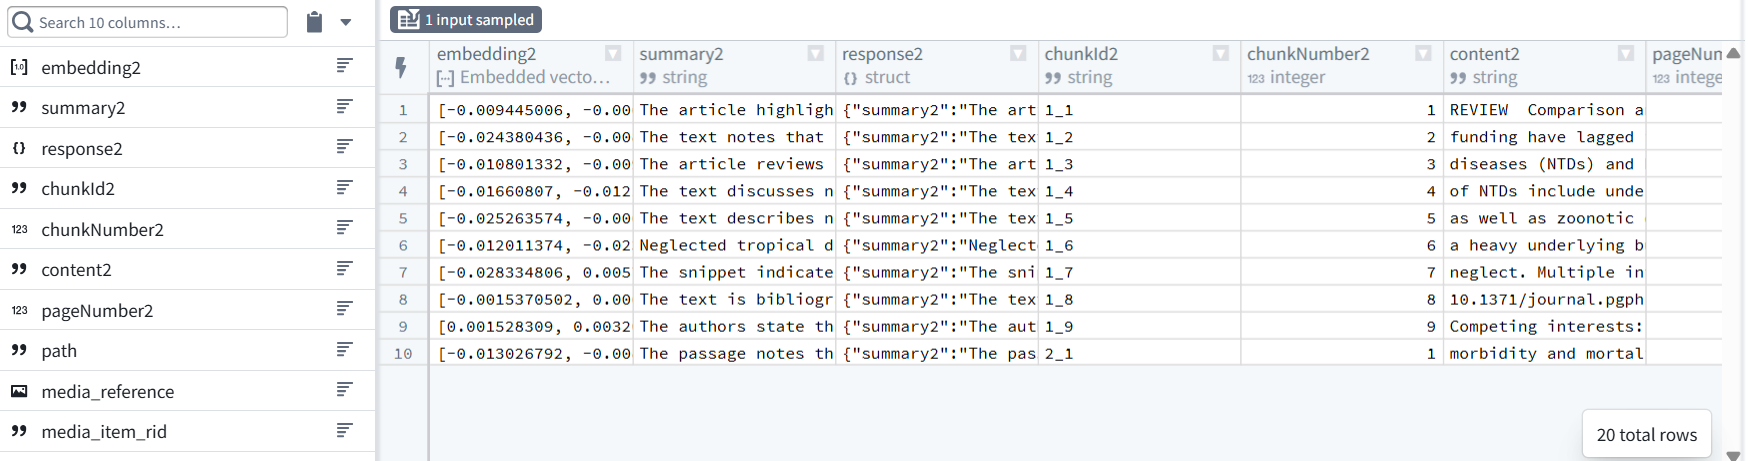
Diagram: Warning about model usage

P1.1-6.3 Drop columns
Diagram: Settings for node operation

Diagram: Select columns to drop (response)
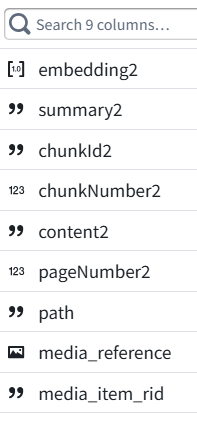
Diagram: Resulting pipeline
P1.1-7 Dataset node “Chunks”
Diagram: From node “ Embed Chunks”: Select “Add ouput” / “New dataset”
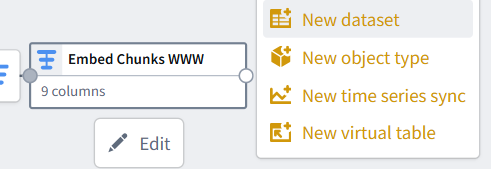
Diagram: Resulting dataset
P1.1-8 Deploy all pipeline outputs
Diagram: Save all changes

Diagram: Deploy pipeline
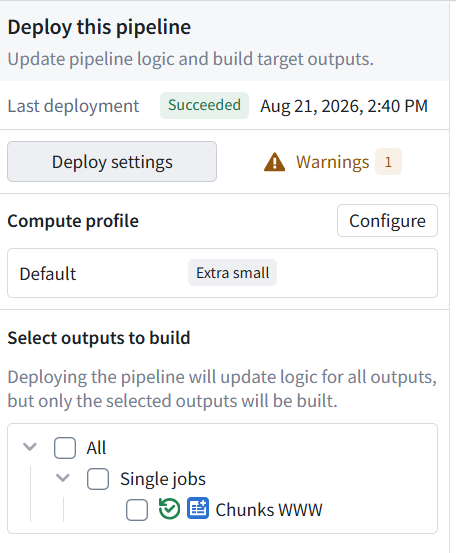
Diagram: Deploy pipeline settings
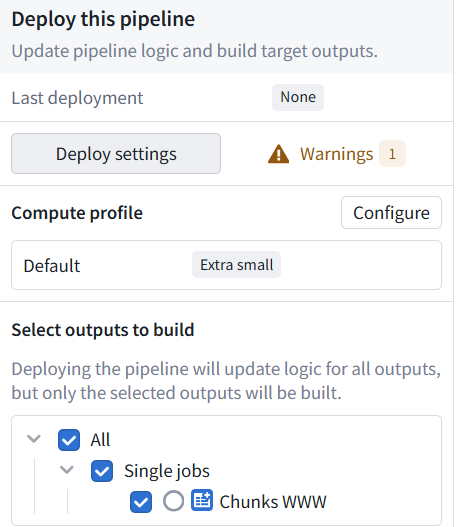
Diagram: Pipeline warnings (ignore)
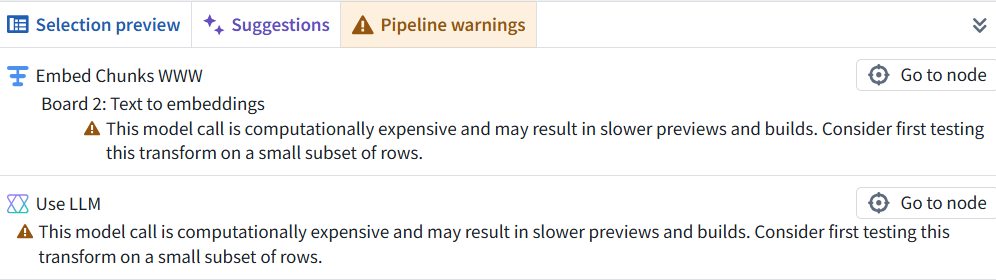
Diagram: Deployment succeeded
P1.2 Ontology (chunks only)
TOC
- P1.2-1 Create new ontology
- P1.2-2 Fix the error
- P1.2-3 Deploy pipeline
- P1.2-4 Verify with FDE
P1.2-1 Create new ontology
Diagram: P2 Create new object type in ontology manager

Diagram: Use existing datasource
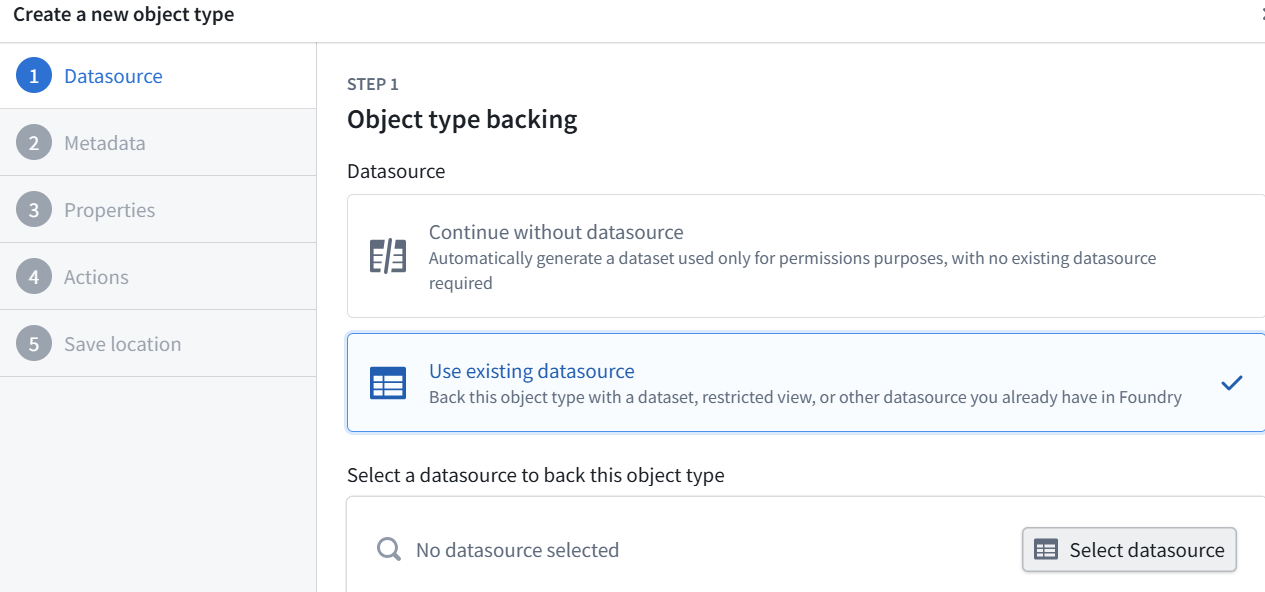
Diagram: Select Chunks
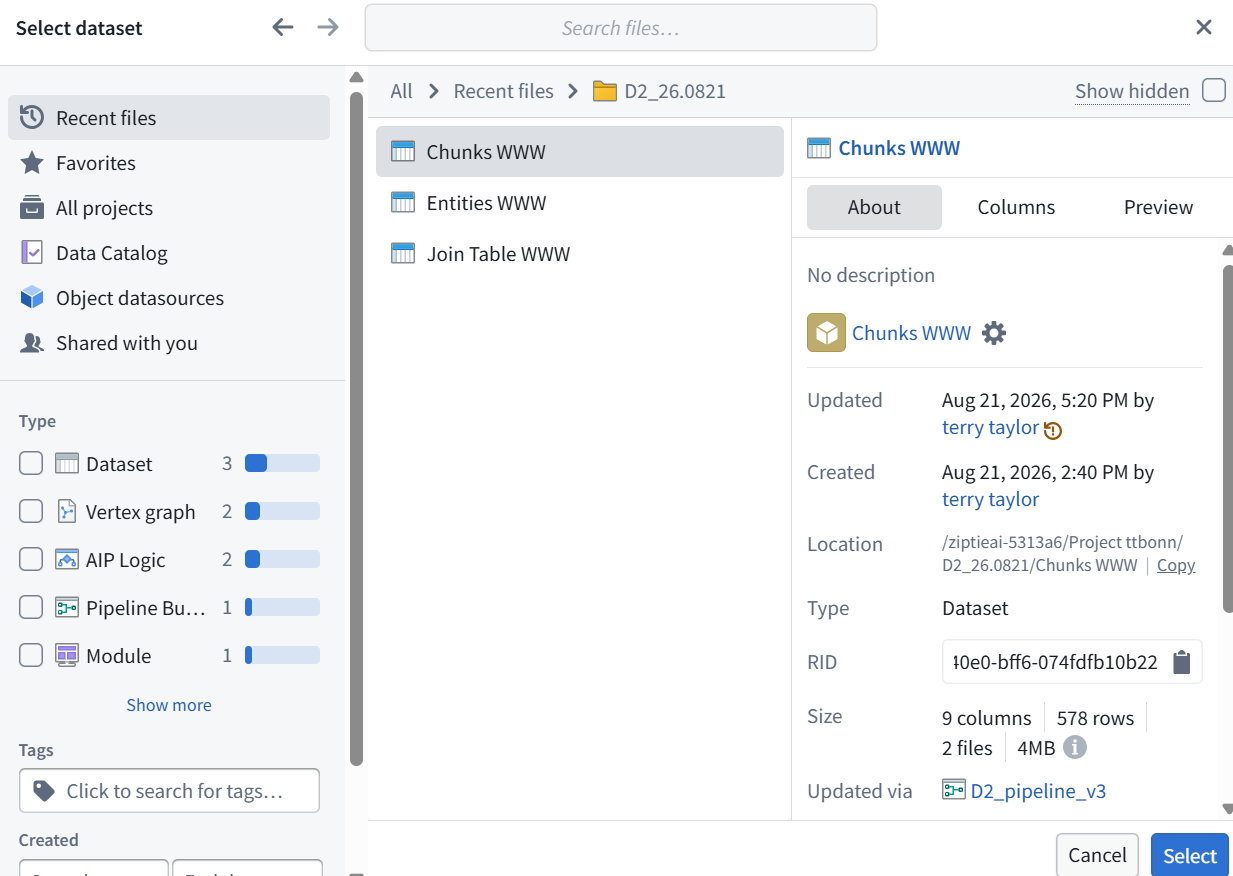
Diagram: Selected chunks
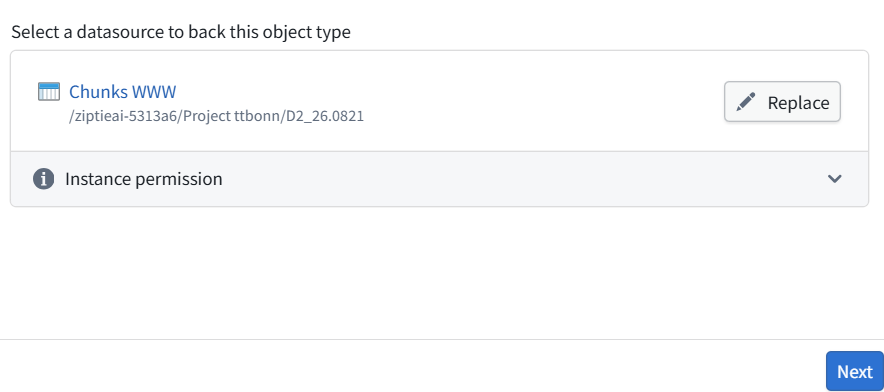
Diagram: Configure metadata
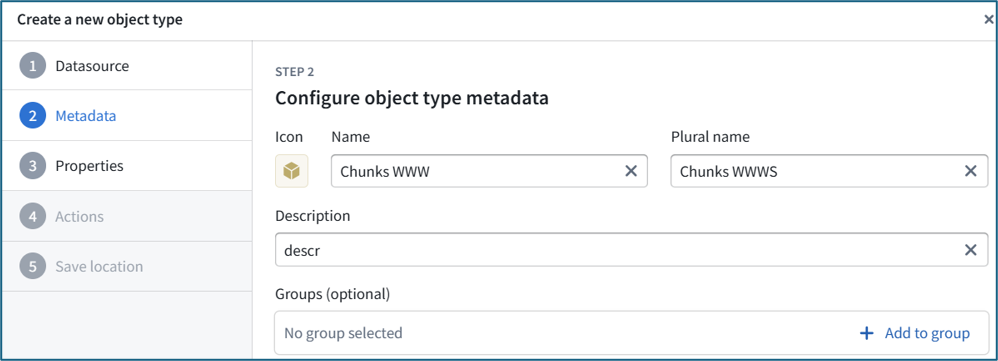
Diagram: Primary key and title
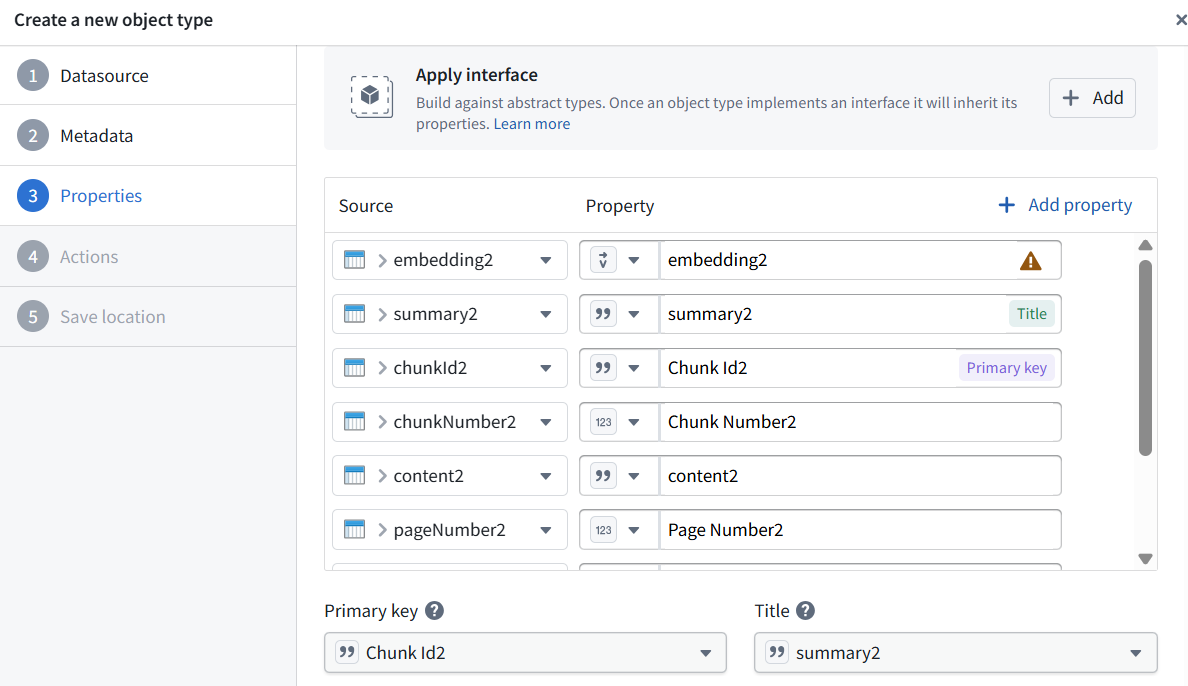
Diagram: Action types
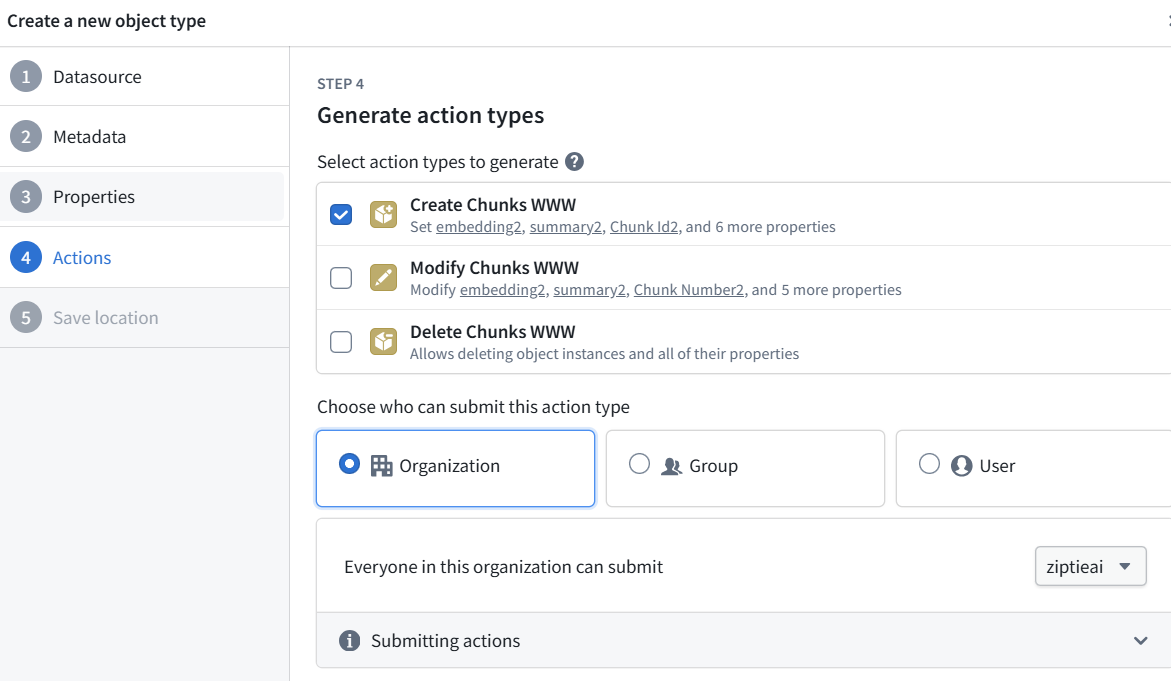
Diagram: Save location
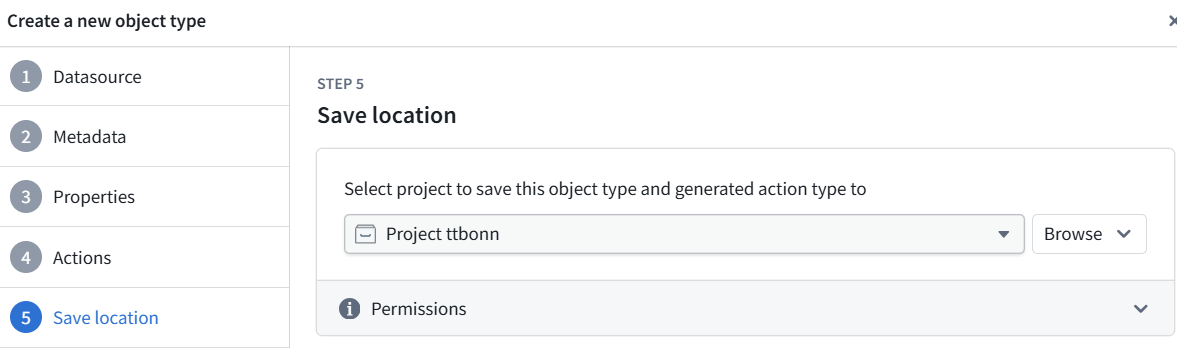
Diagram: Warning (ignore)

Diagram: Resulting object type Chunks
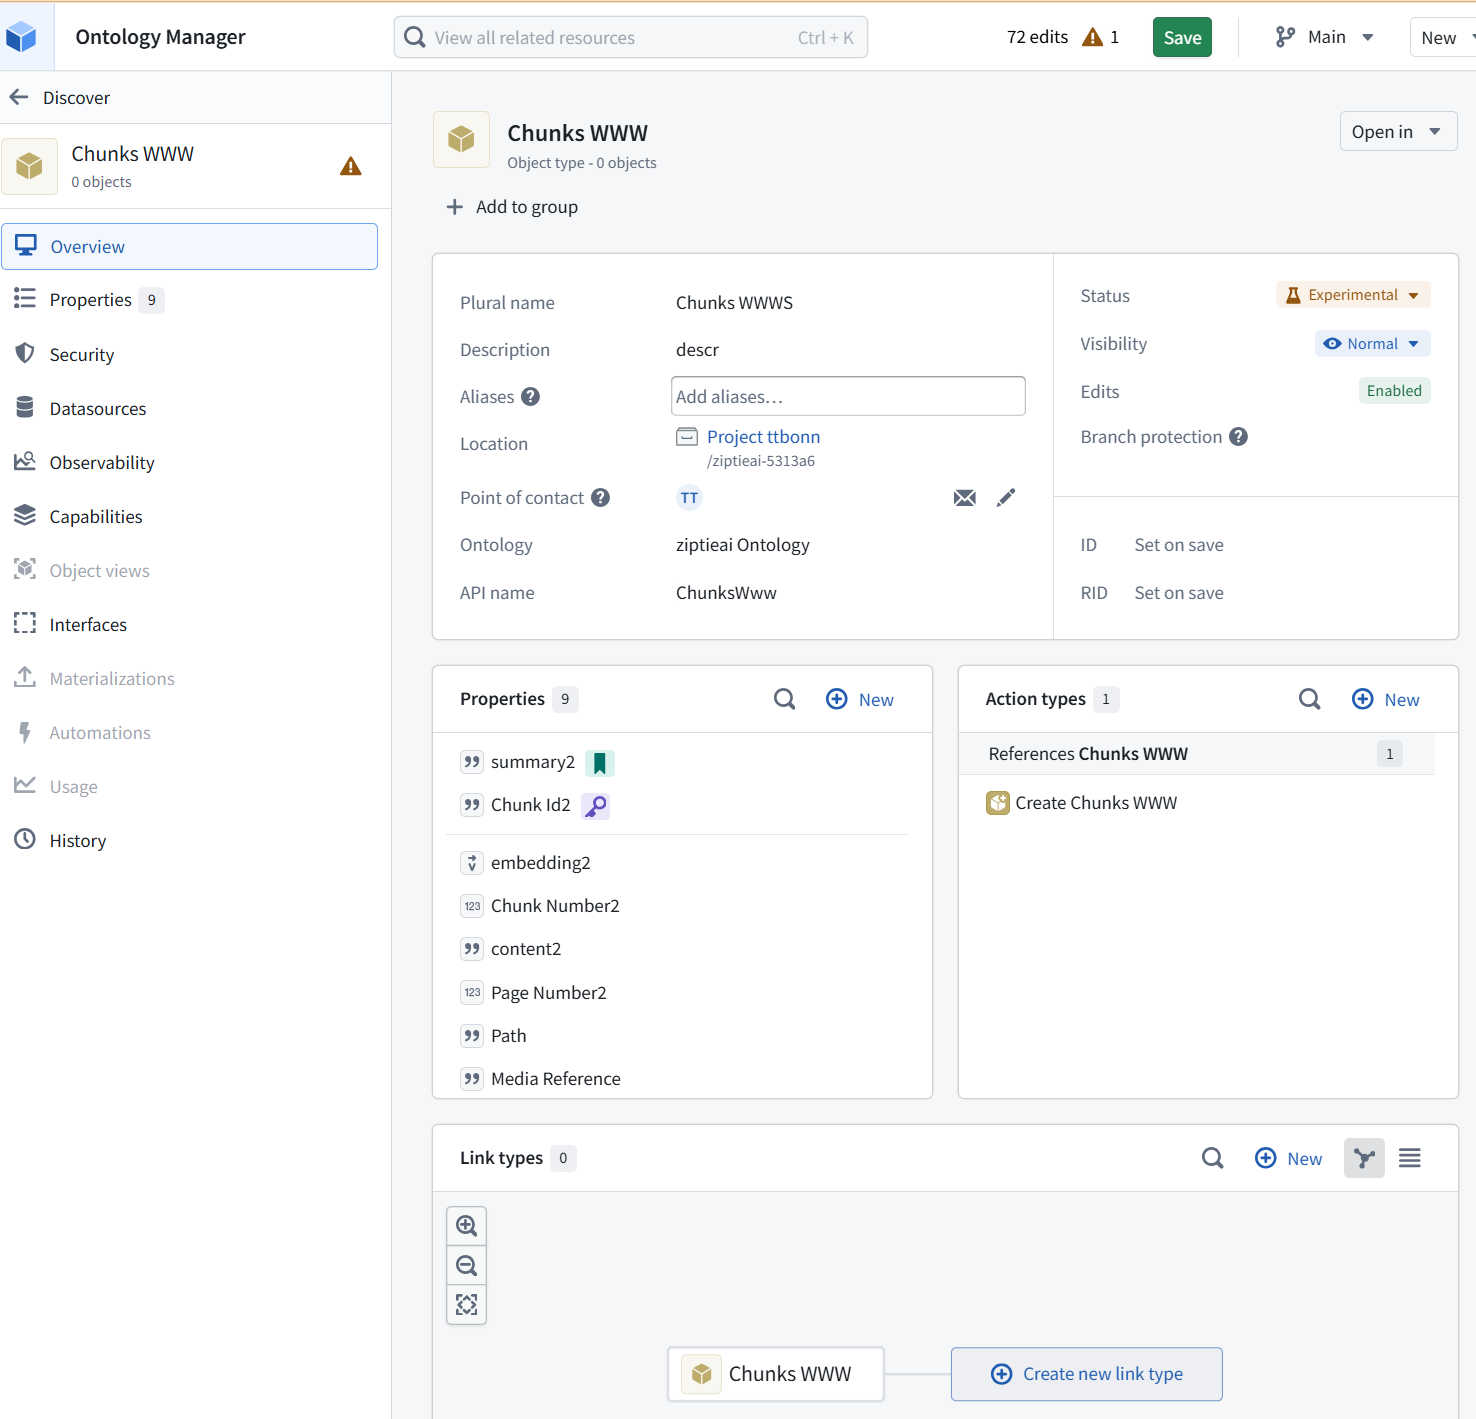
Diagram: Media reference
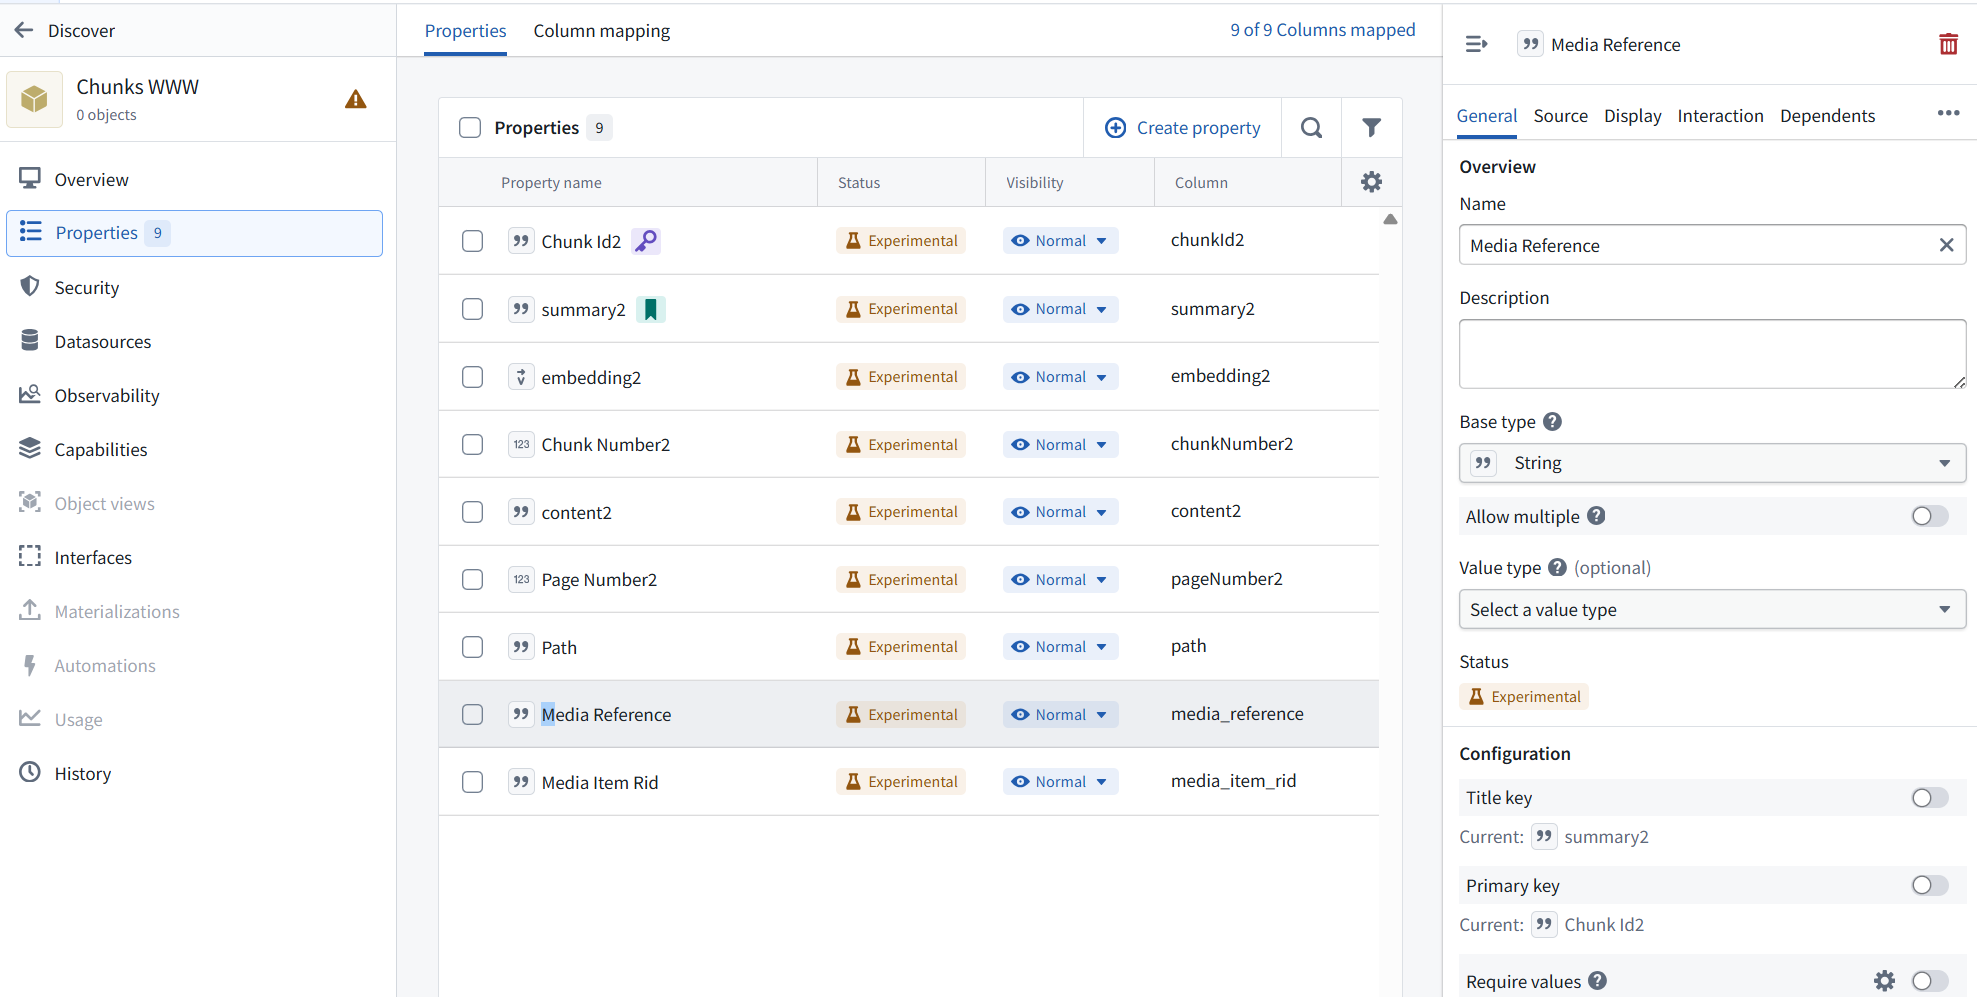
Diagram: Select media source
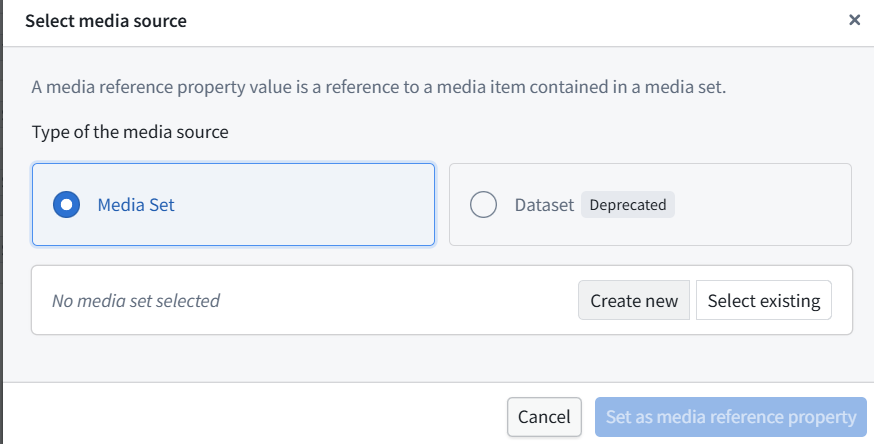
Select existing
Diagram: Select existing (Articles)
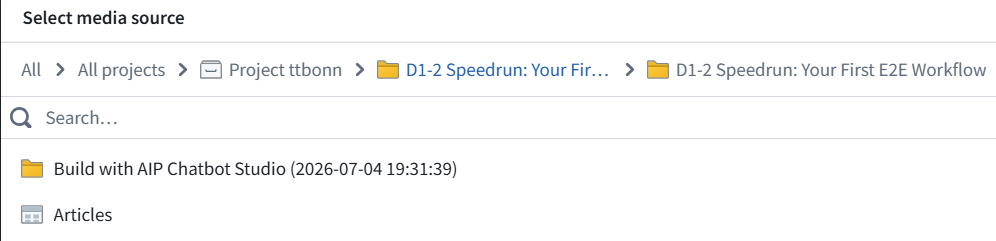
Diagram: Final settings
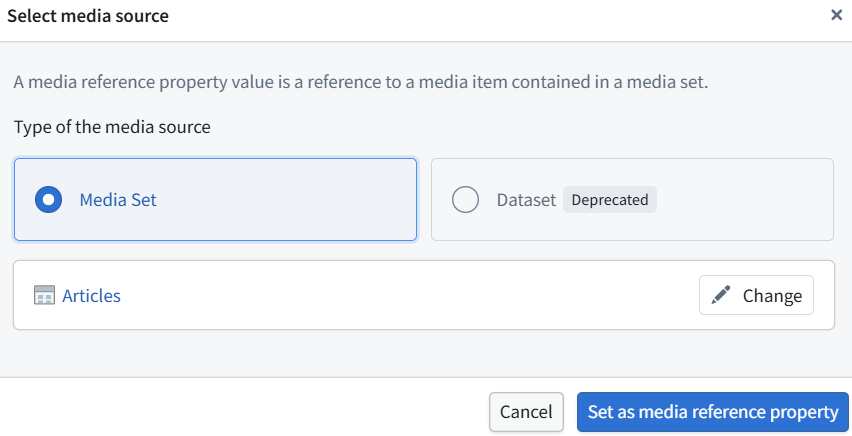
Click Set as media reference property
Diagram: Resulting settings
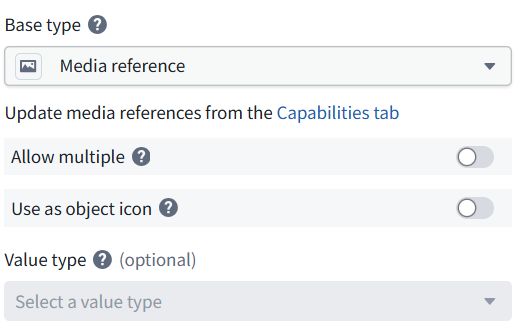
Diagram: All changes
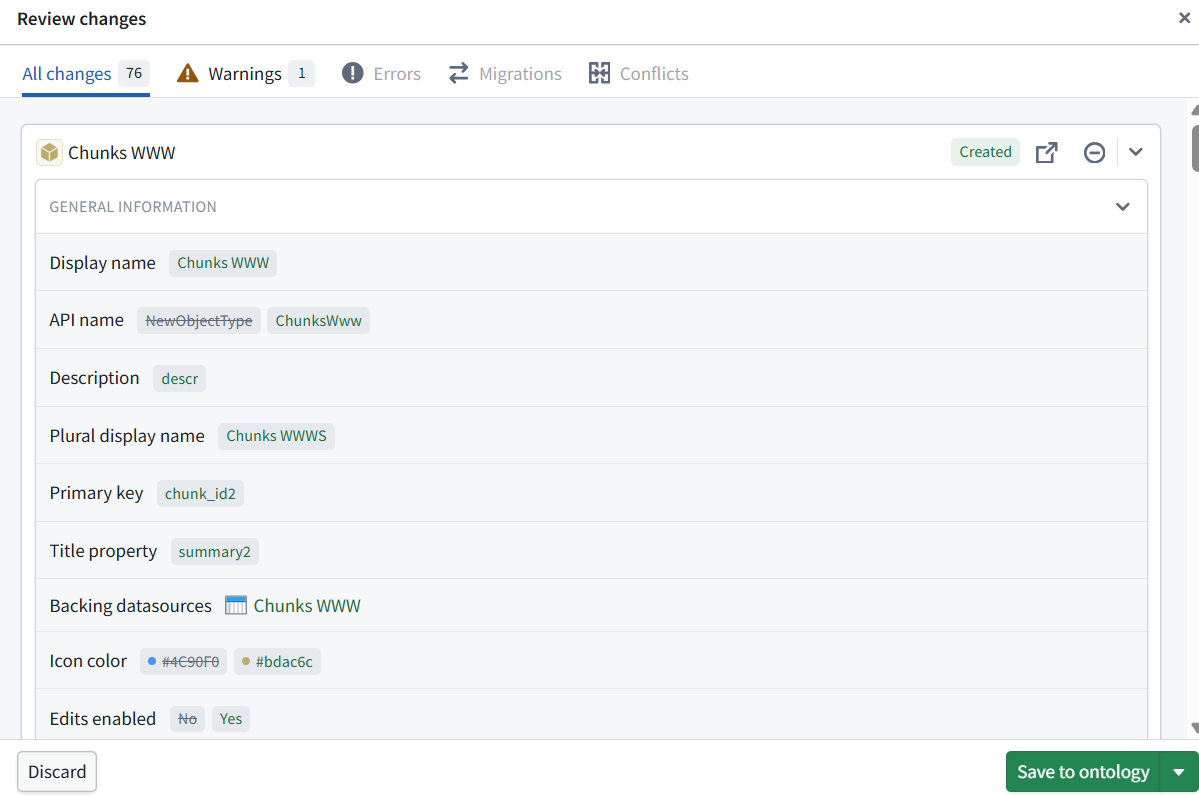
Click Save to ontology. An error occurs (see next section).
Diagram: Save to ontology error
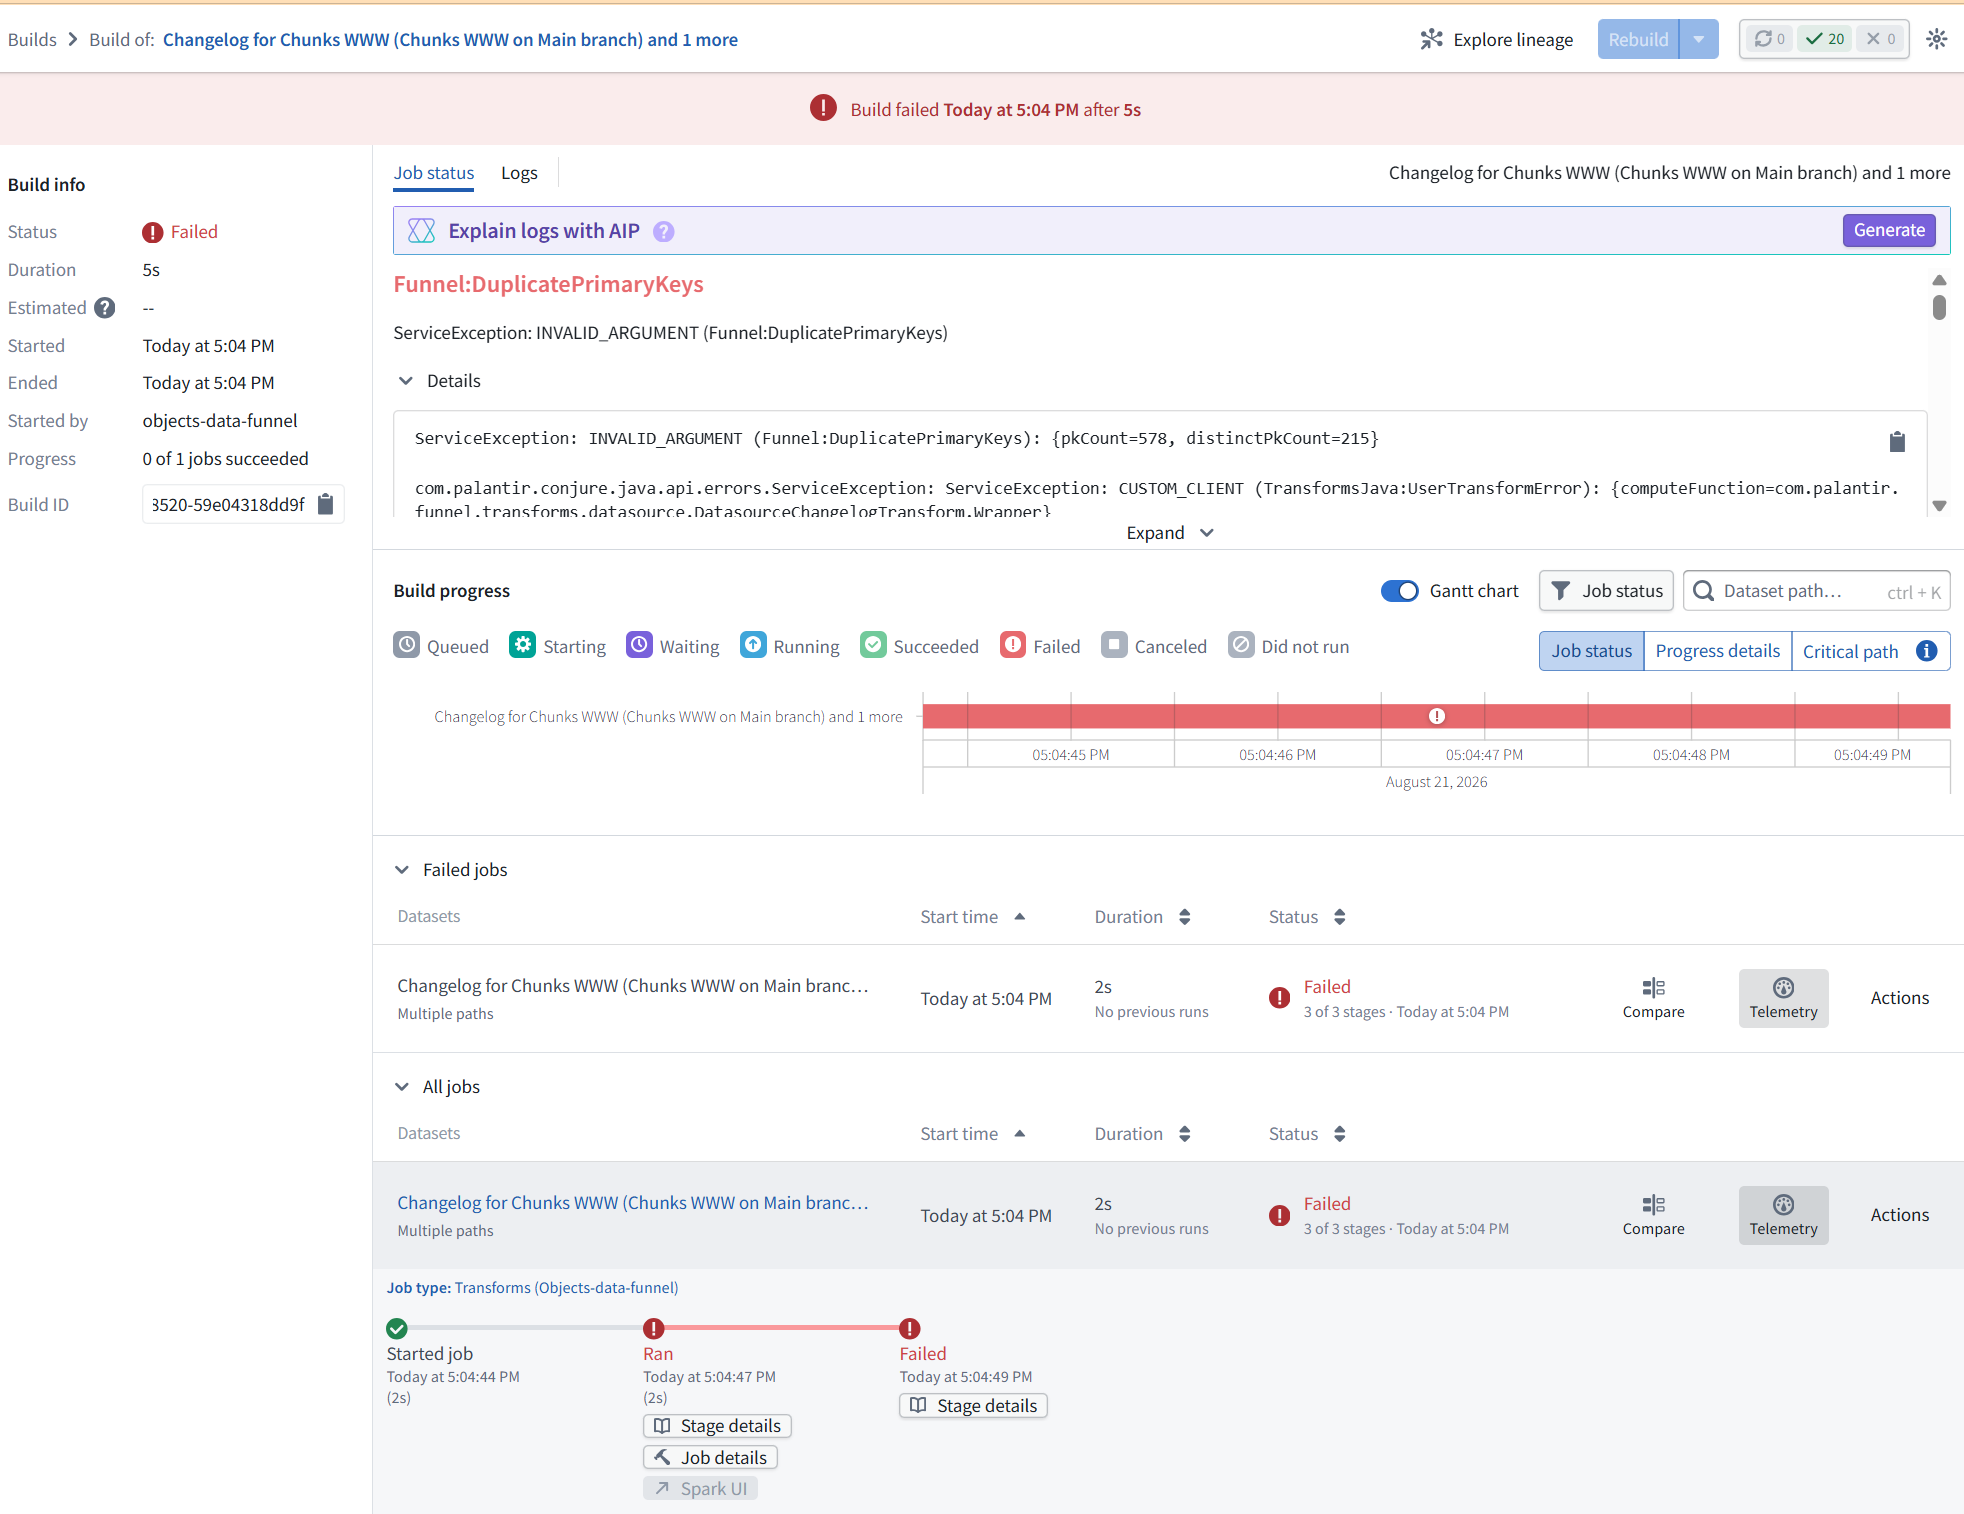
P1.2-2 Fix the error
I made an error earlier and decided to leave it in this demo in order to demo FDE usage.
Diagram: Open FDE
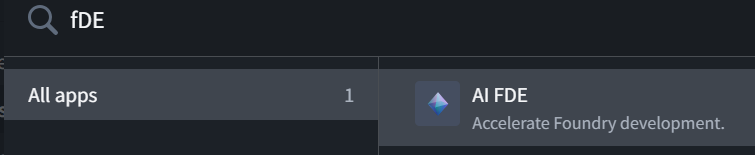
Paste a screenshot of the error into FDE.
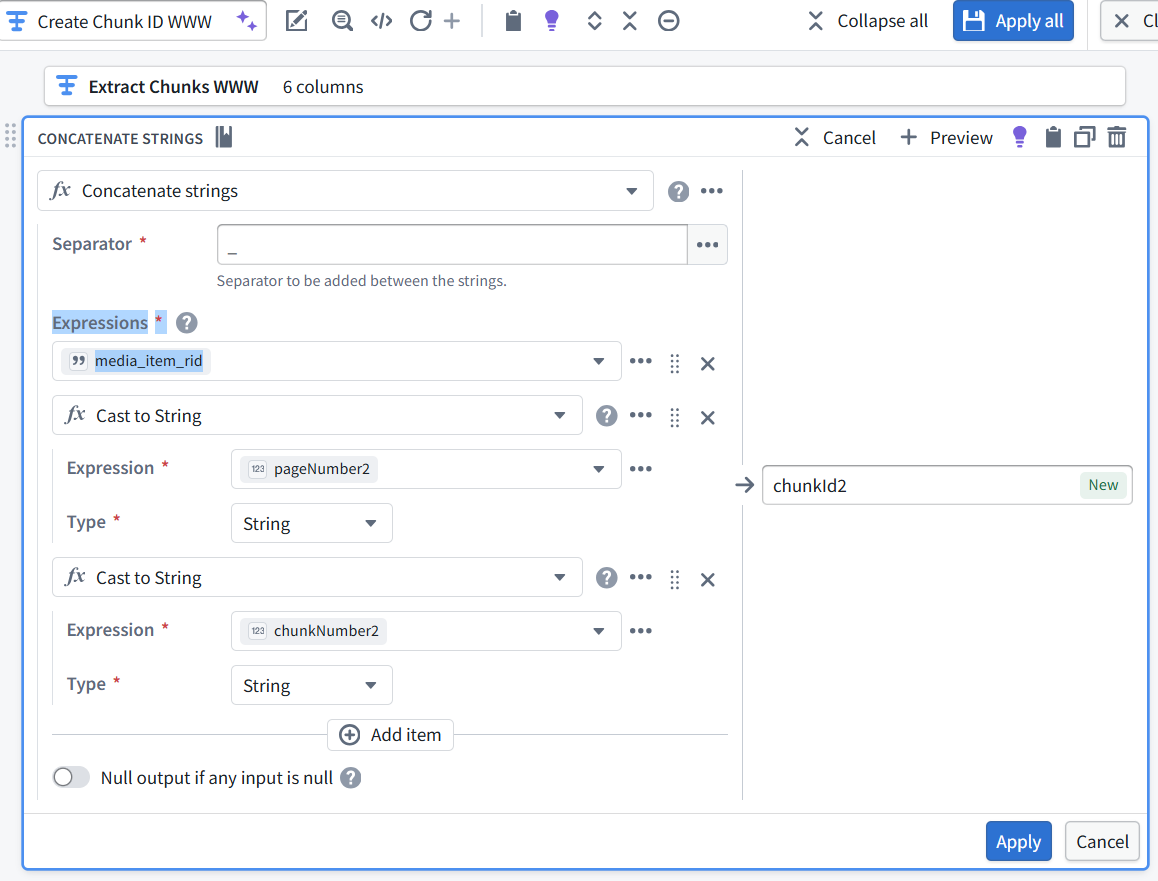
FDE should say that the error is in the “Create Chunk ID” node. Fix it (add media_item_rid).
Diagram: Add Expression = media_item_rid to pipeline node “Create Chunk Id” settings for “Concatenate strings”
P1.2-3 Deploy pipeline
Diagram: Deploy pipeline
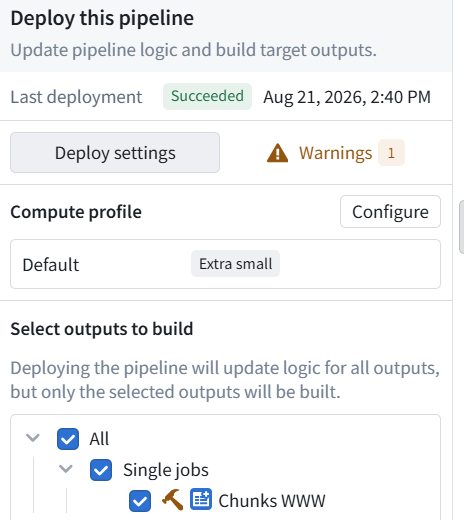
Diagram: Save to ontology (works now)
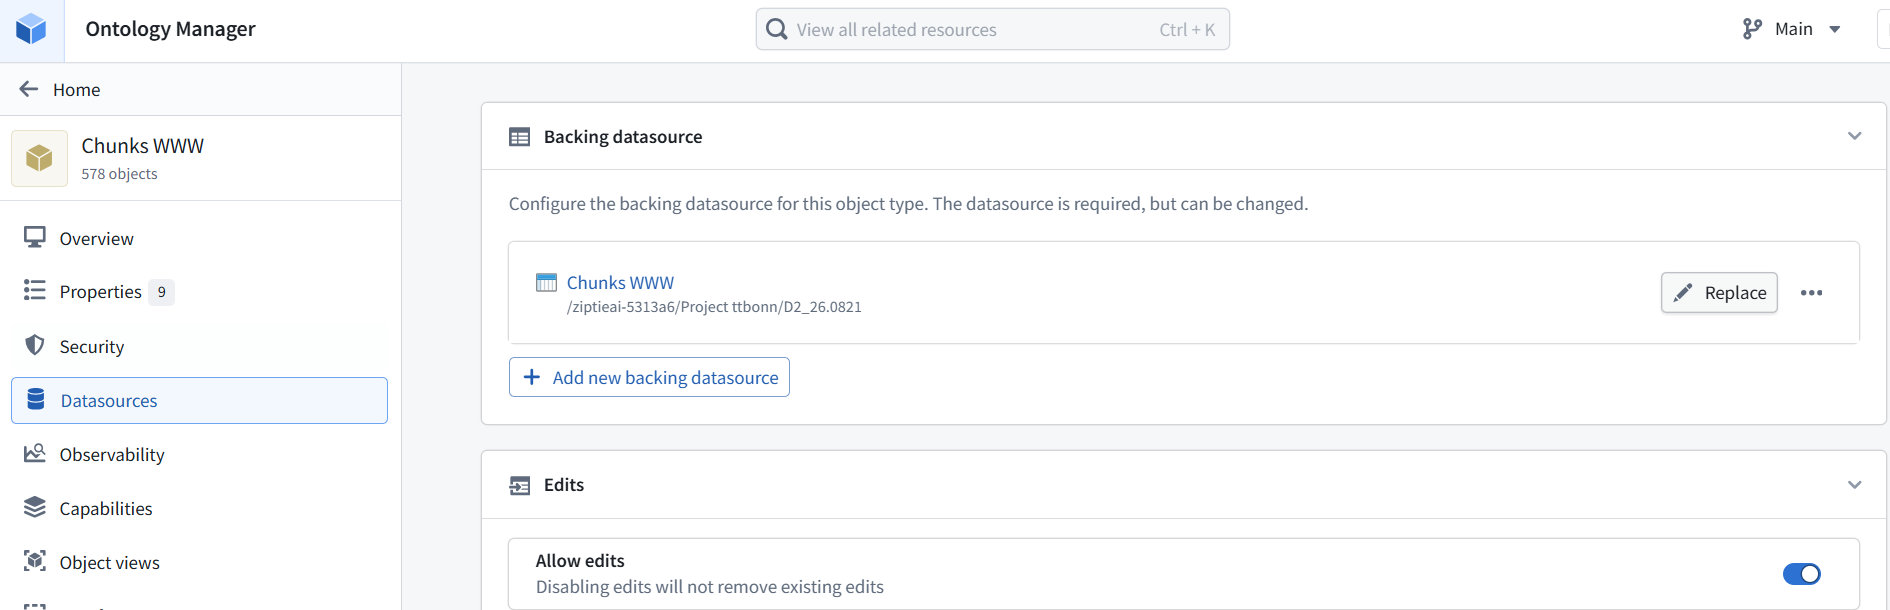
Diagram: Ontology settings
P1.2-4 Verify with FDE
ME: is it ok now?
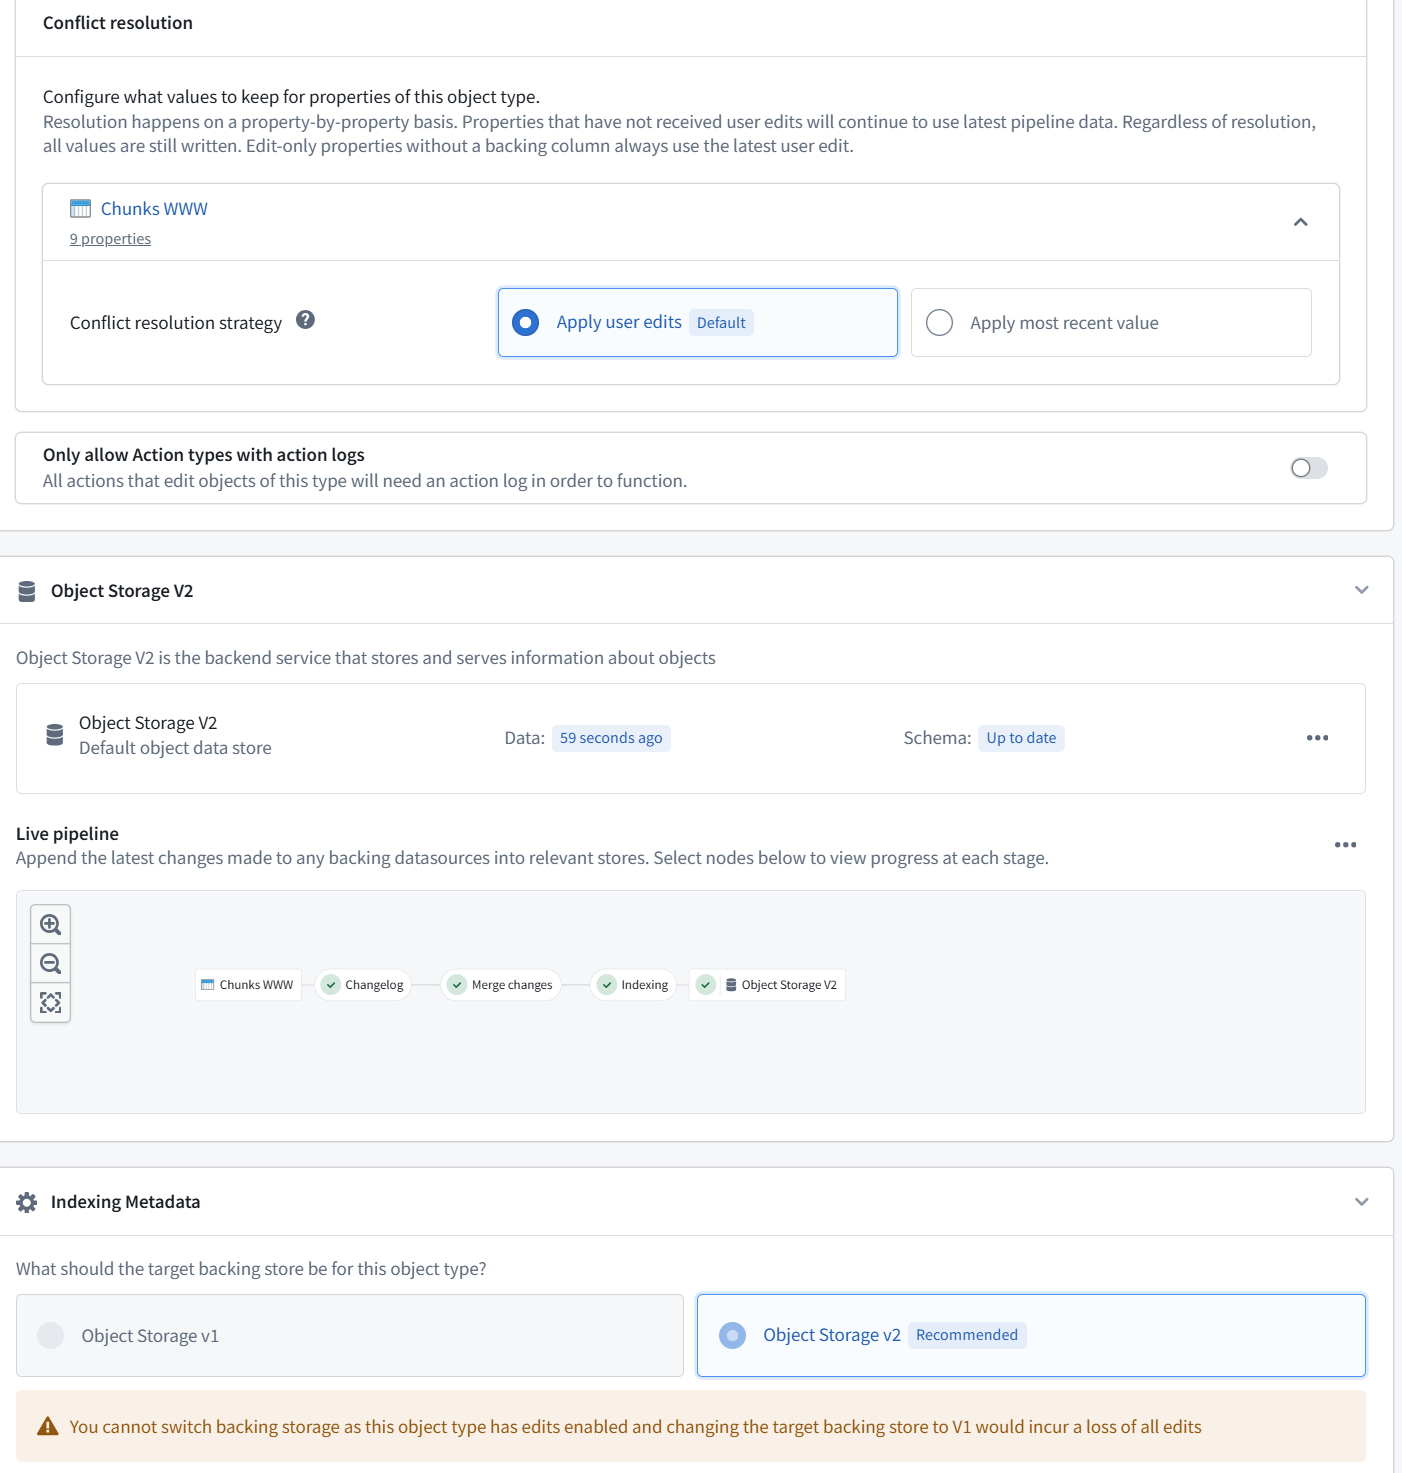
FDE: Yes—it is working correctly now.
Evidence in the screenshots:
578 Chunk objects were created.
The backing datasource is Chunks WWW.
Changelog → Merge changes → Indexing → Object Storage V2 are all green.
Data is current.
Schema is Up to date.
Object Storage V2 is selected, which is recommended.
The duplicate-primary-key problem was resolved by including media_item_rid in chunkId, making chunks from different PDFs unique.
One optional consideration: Allow edits is enabled. For a read-only RAG demo, you probably do not need object edits and could disable it. If you leave it enabled, the current Apply user edits strategy means user-edited values take priority over later pipeline values. The orange storage message is informational, not an error.
P1.3 AIP logic (core section of this demo)
In Foundry, AIP Logic is a no-code function/workflow. It defines the steps Foundry executes when the user submits a question.
For this demo, its conceptual flow is:
User question ↓
Find semantically similar chunks ↓
Place those chunks into an LLM prompt ↓
Generate a grounded answer ↓
Return the answer and relevant chunks to the UI
The Logic itself is a container for the workflow. It can include ordinary rules as well as AI operations. In this demo, it contains the runtime RAG behavior.
Everything else—chunk IDs, deduplication, join tables, Ontology objects and links, Workshop widgets, and Vertex—is primarily deterministic data transformation, modeling, or presentation.
So the simplest description is:
1 LLM enriches the chunks.
2 Embedding model makes the chunks searchable.
3 AIP Logic retrieves evidence and generates the answer.
TOC
- P1.3-1 Create new API logic
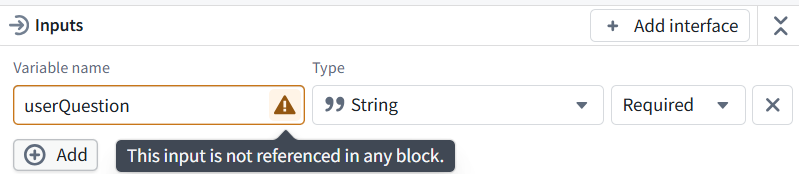
- P1.3-2 Add inputs block
- P1.3-3 Add semantic search block
- P1.3-4 Add LLM block (formatted block + “Use LLM” block)
- P1.3-5 Test (BINGO)
- P1.3-6 PUBLISH (error)
P1.3-1 Create new API logic
Diagram: Create new AIP logic
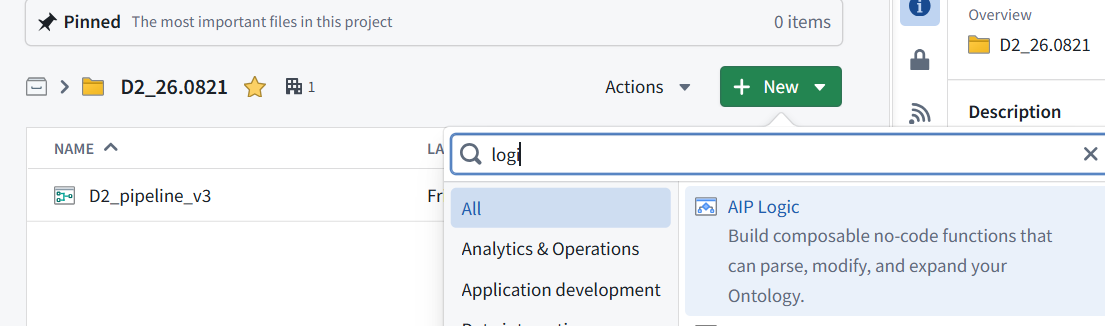
Diagram: File location
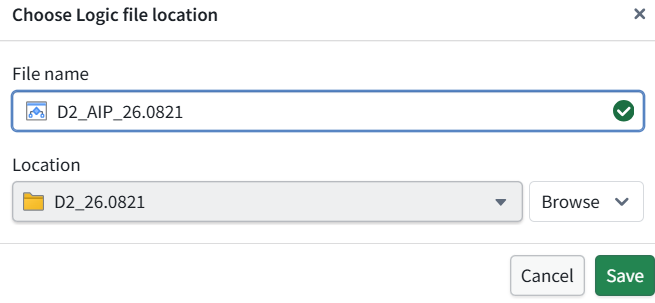
Diagram: AIP logic dialog
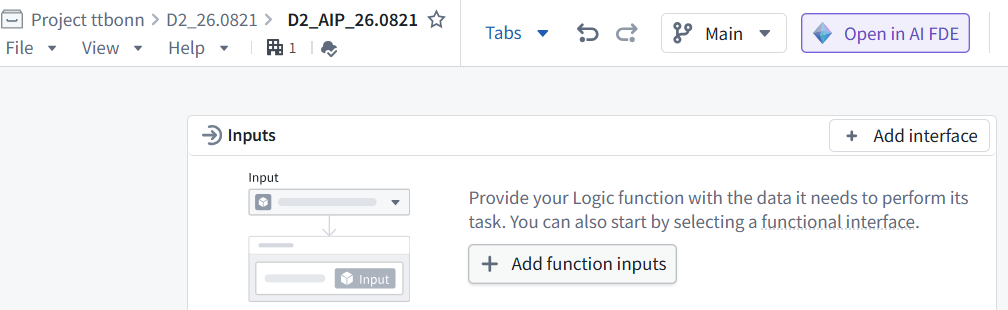
P1.3-2 Add inputs block
Diagram: Add userQuestion as input
P1.3-3 Add semantic search block
Diagram: Semantic search
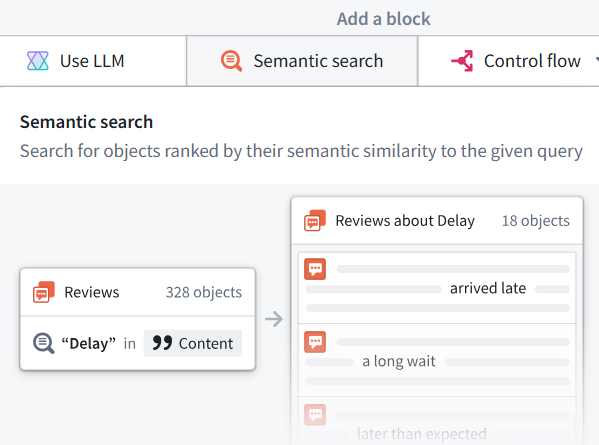
Diagram: Create new object set
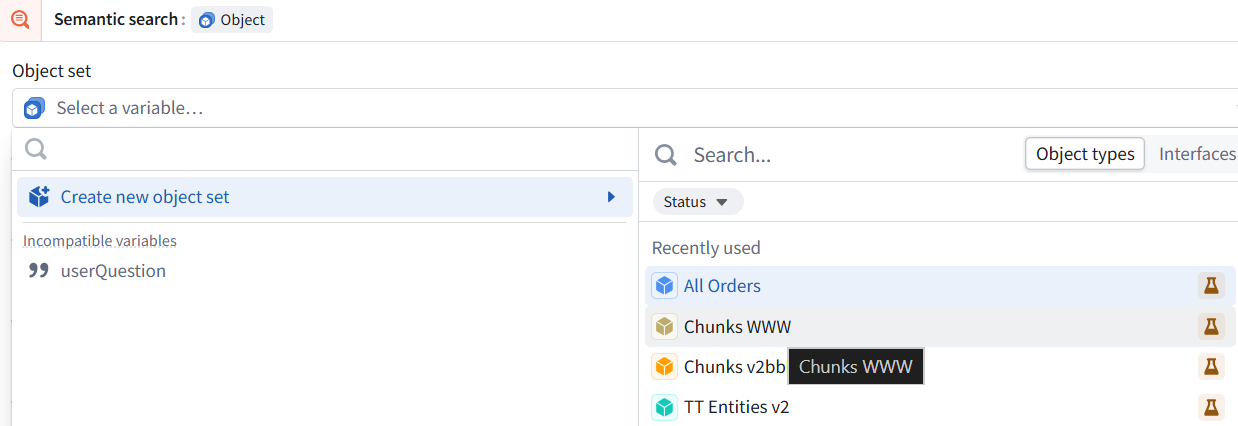
Diagram: Select the embedding of the chunks
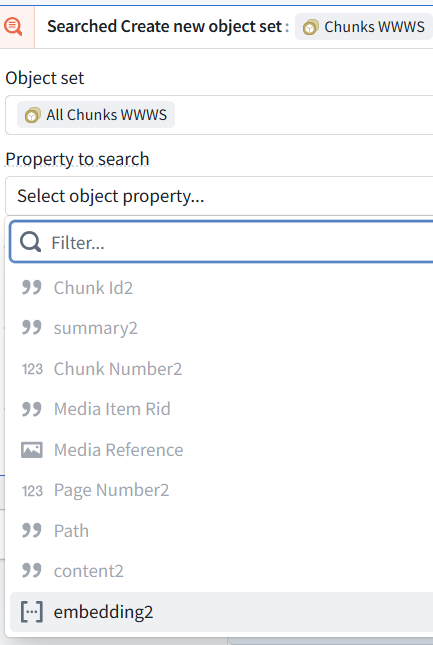
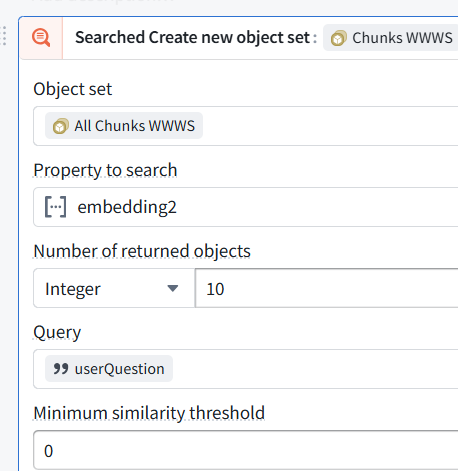
Diagram: Return 10 objects (enough for RAG)
P1.3-4 Add LLM block (formatted block + “Use LLM” block)
Diagram: Add LLM block (that will interact with external LLM)
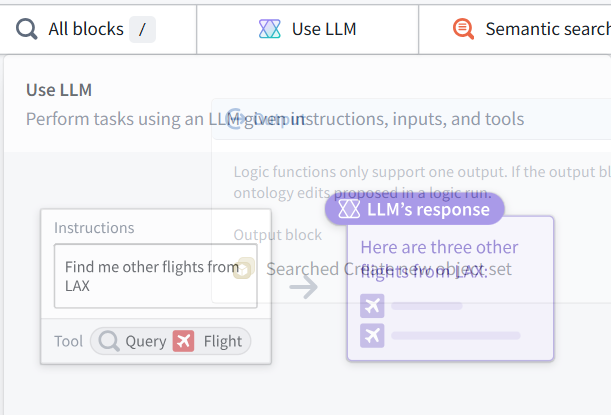
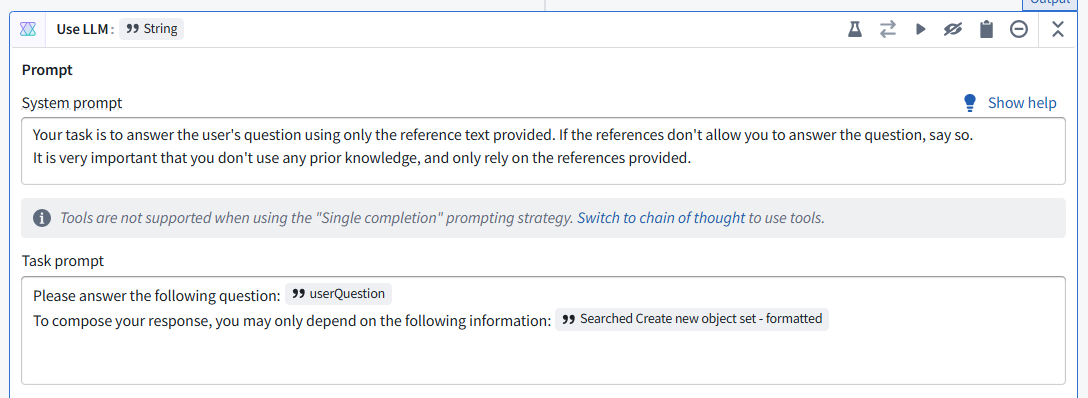
Diagram: Add the LLM prompts
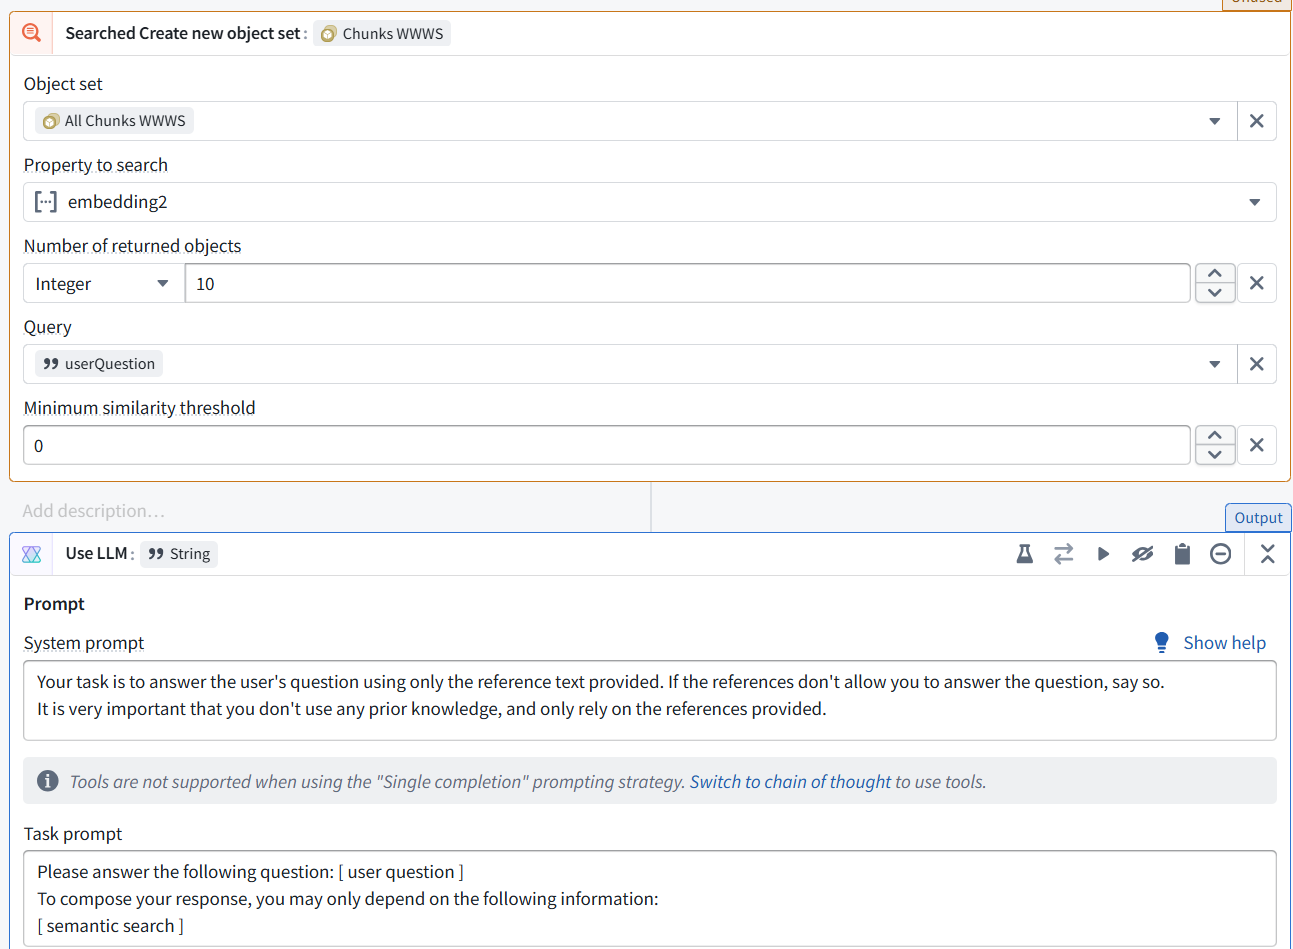
Diagram: Add the vars to the prompts
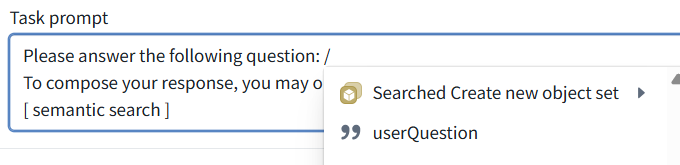
Diagram: Select content
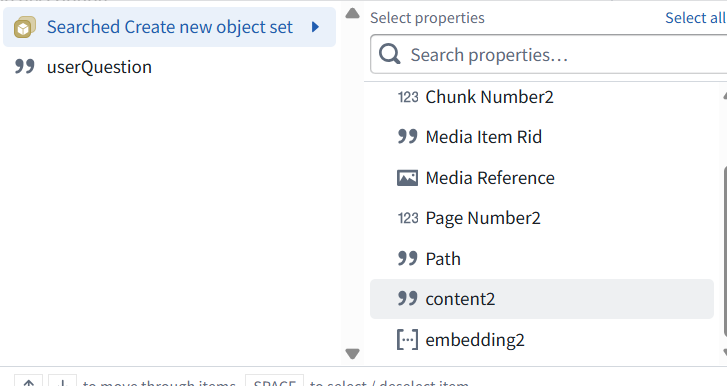
Diagram: Apply

Diagram: Prompts with vars
This auto-creates the “formatted” block (show below: requires NO configuration)
The Foundry doc does not state this and does not include a screenshot of the “formatted” dialog.
Diagram: “formatted” block (in the middle)
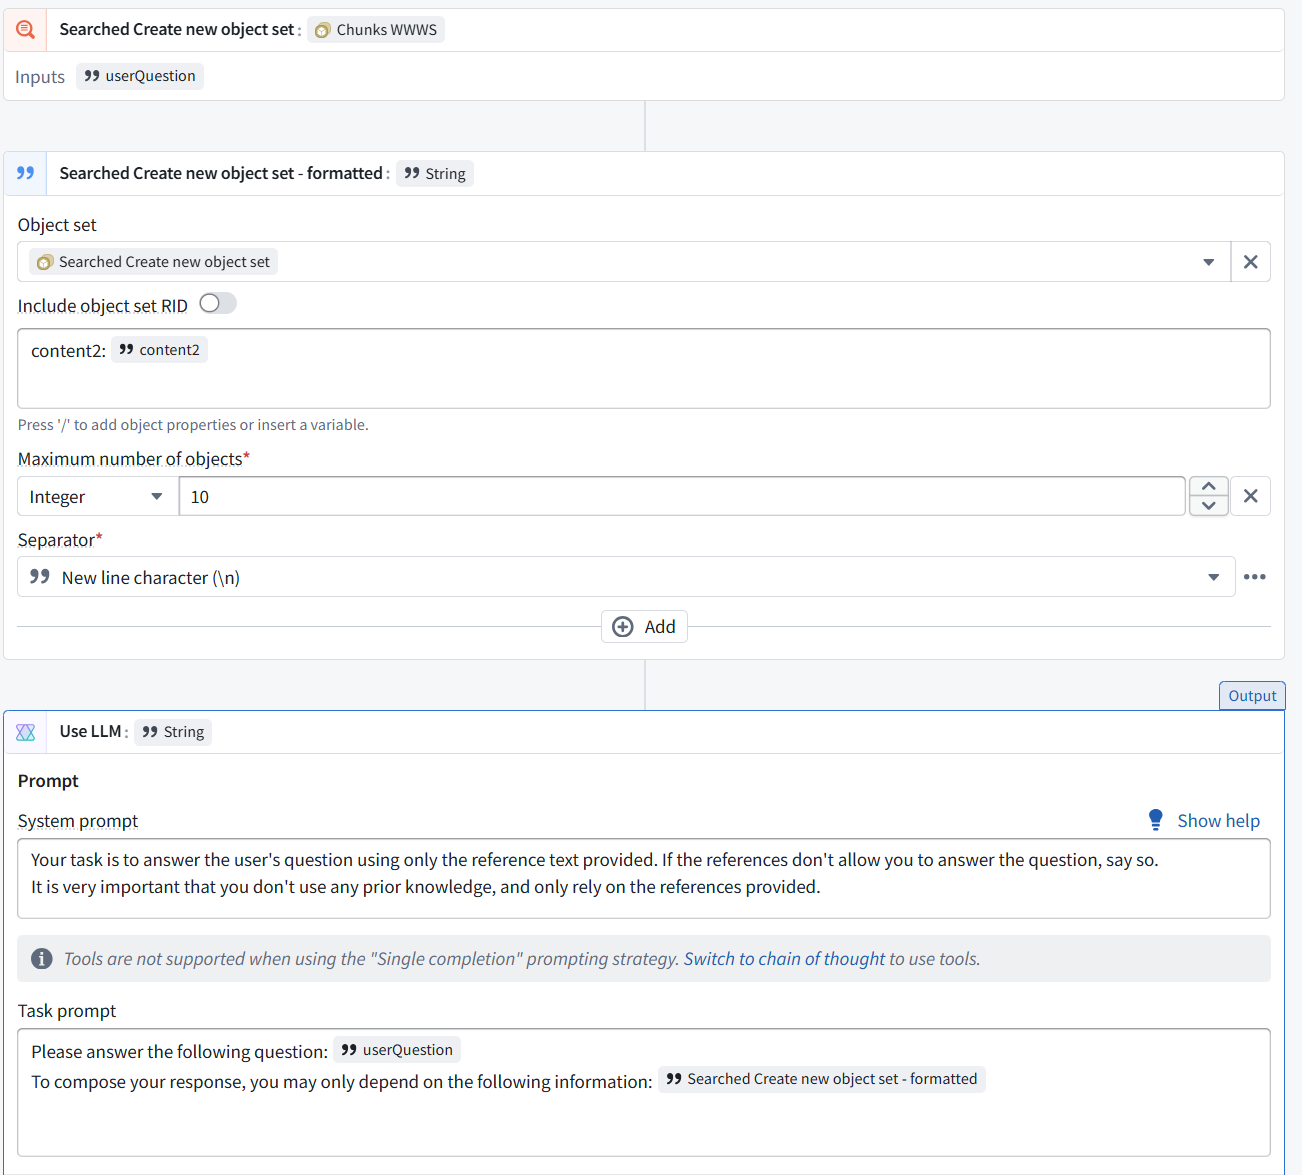
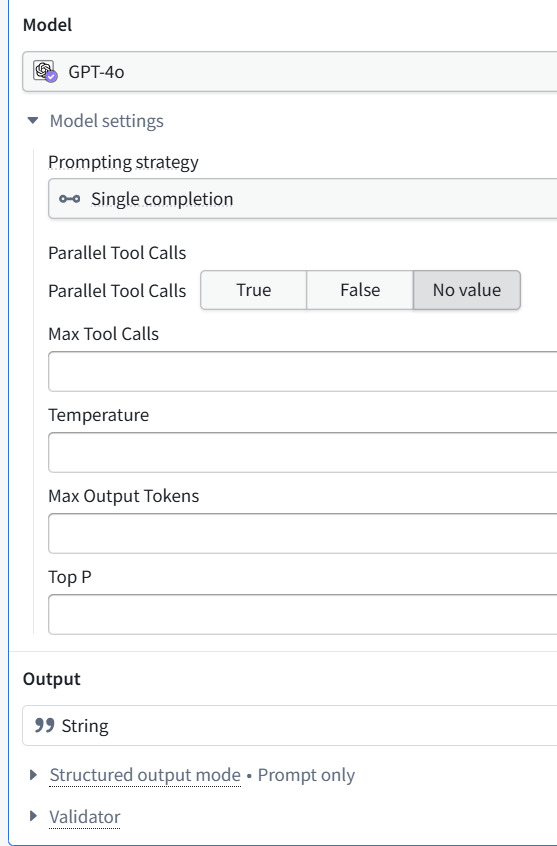
Diagram: Select GPT-40 and single completion
Save.
Diagram: Save
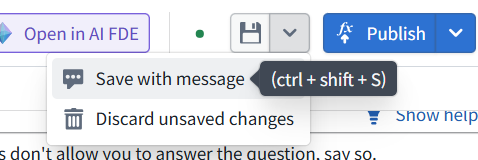
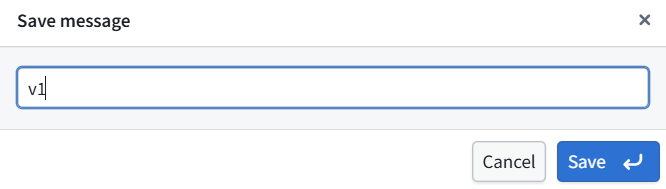
Diagram: Save message
P1.3-5 Test (BINGO)
Diagram: Preview run
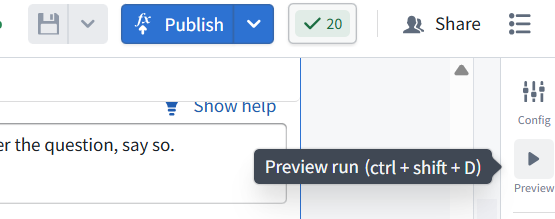
Diagram: LLM answers successfully
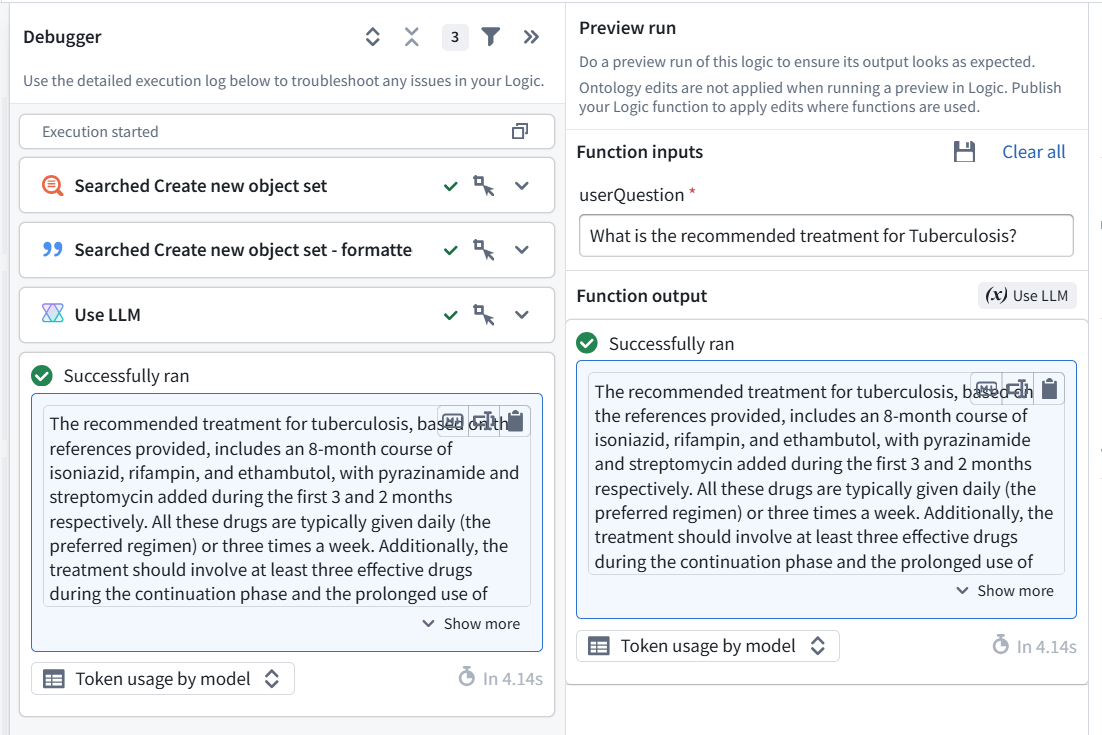
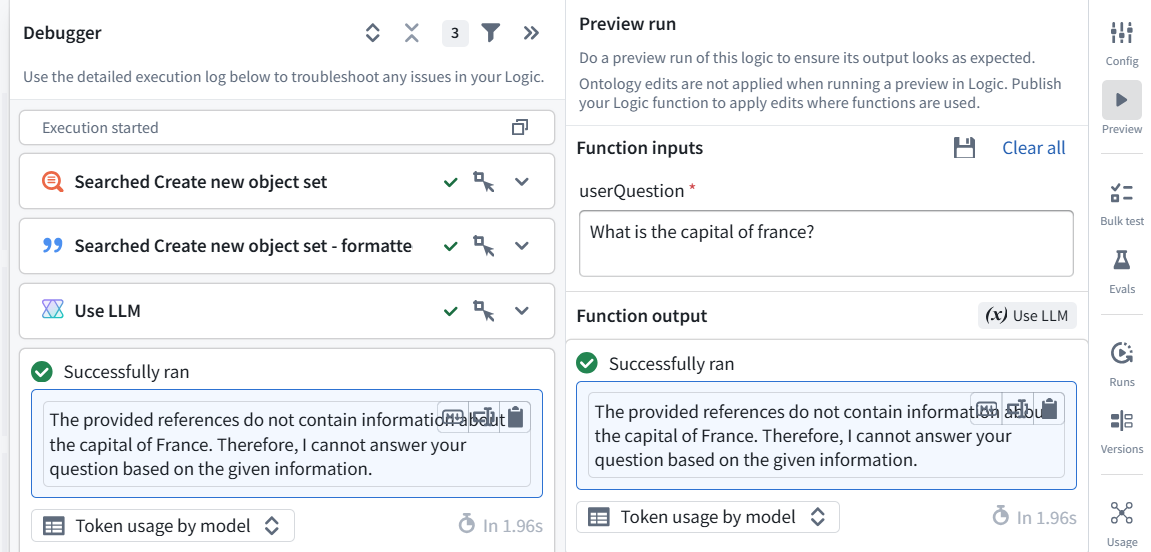
Diagram: LLM can not answer because the RAG docs do not describe the capital of France
P1.3-6 PUBLISH (error)
Diagram: Publish
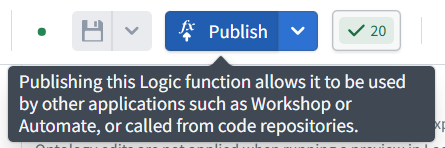
Diagram: Error (happens every time)
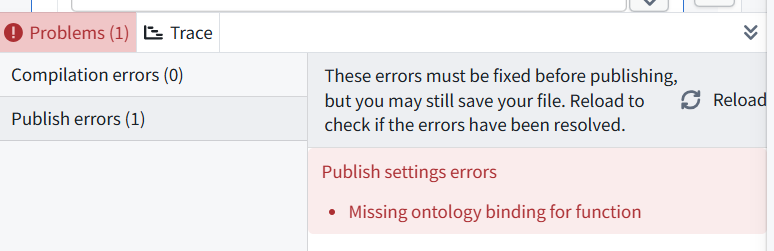
Refresh the webpage to get rid of error
Diagram: Function published
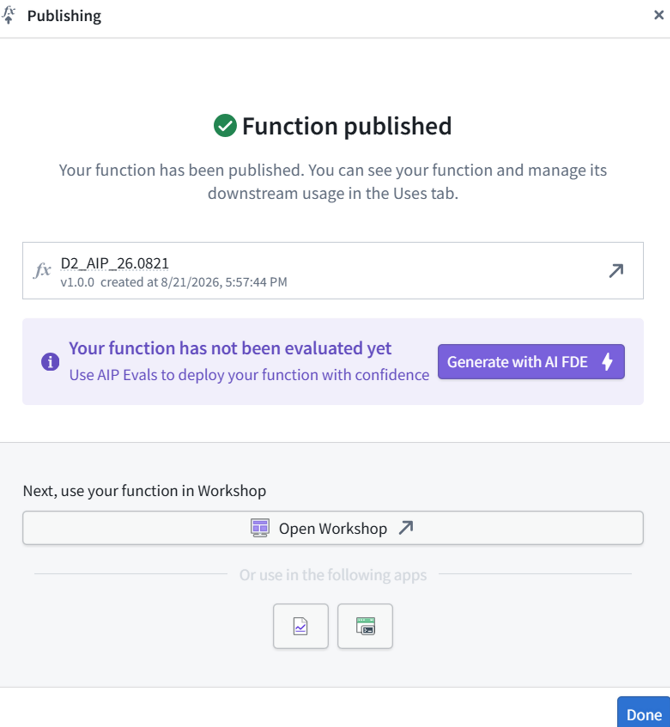
Diagram: AIP logic function in ontology manager
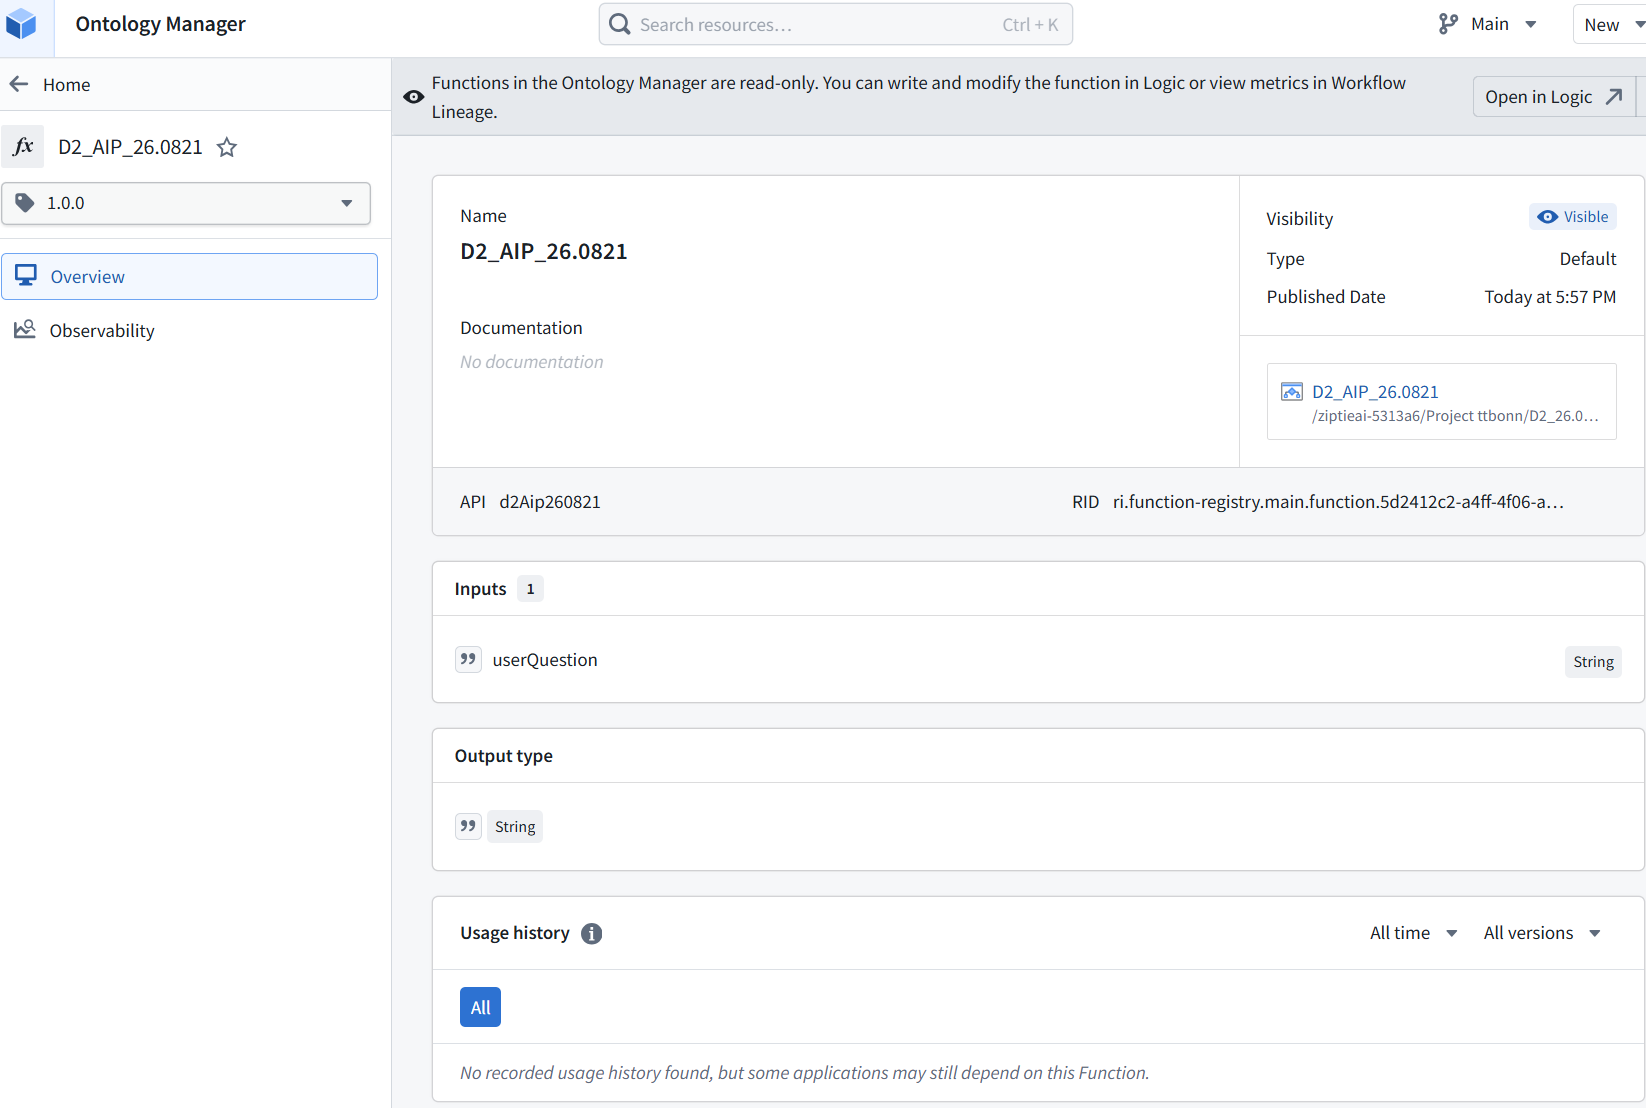
P1.4 UI TOP (input question) / BOTTOM (output LLM RAG answer) (BINGO)
TOC
- P1.4-1 Add module
- P1.4-2 Add user input widget
- P1.4-3 Add Markdown widget
P1.4-1 Add module
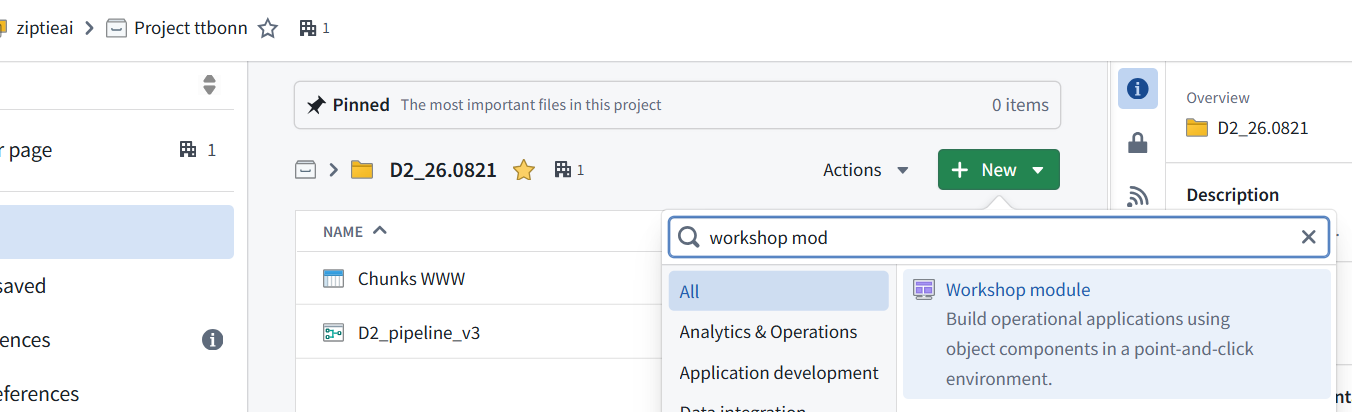
Click New / Workshop module.
Name the app (“D2_26.0821” below).
Diagram: New workshop module
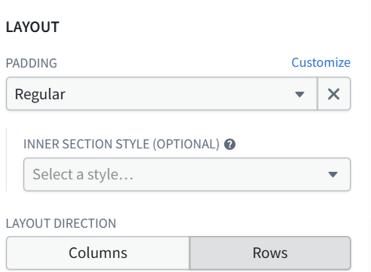
Click on the Page layer.
In the right side configuration panel, under Layout, set padding to Regular.
Change Layout direction to Rows.
Diagram: Change layout to rows
P1.4-2 Add user input widget
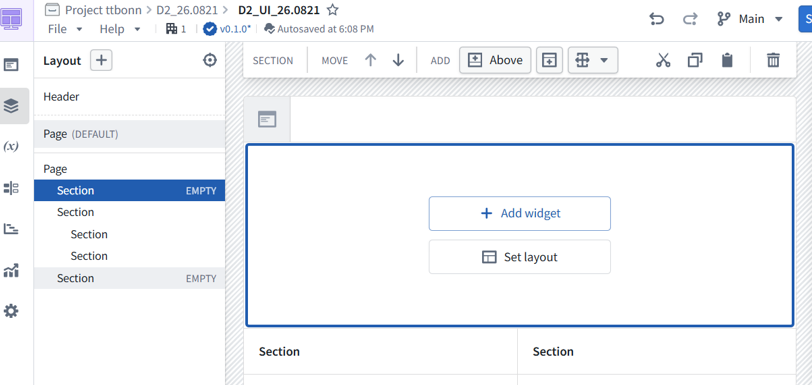
Add section at top.
Diagram: Add section at the top

Diagram: Added section
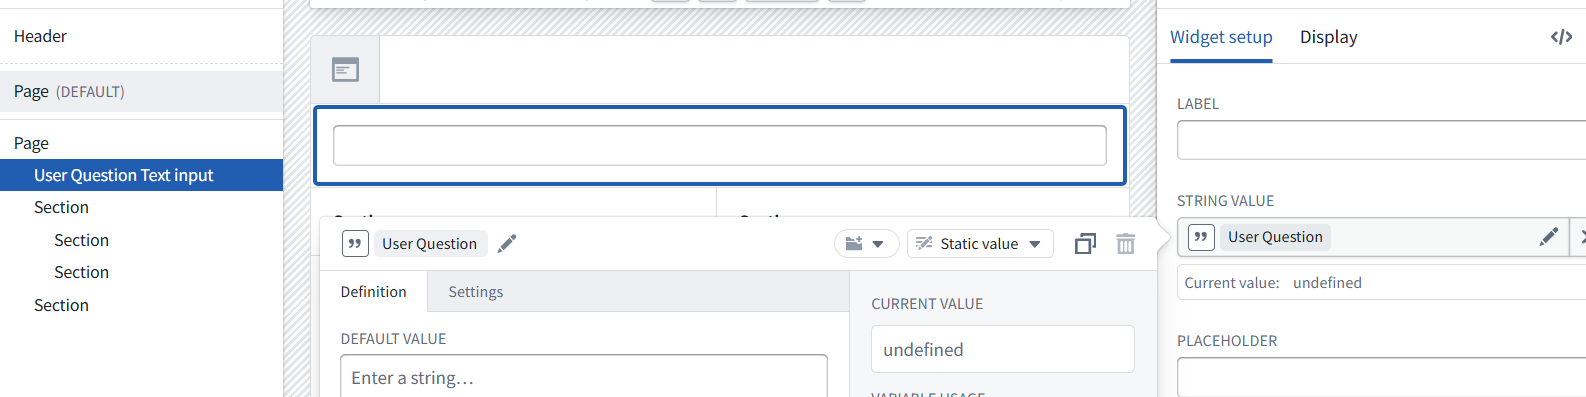
Add text input widget with STRING VALUE = User Question.
Diagram: Added text widget
P1.4-3 Add Markdown widget
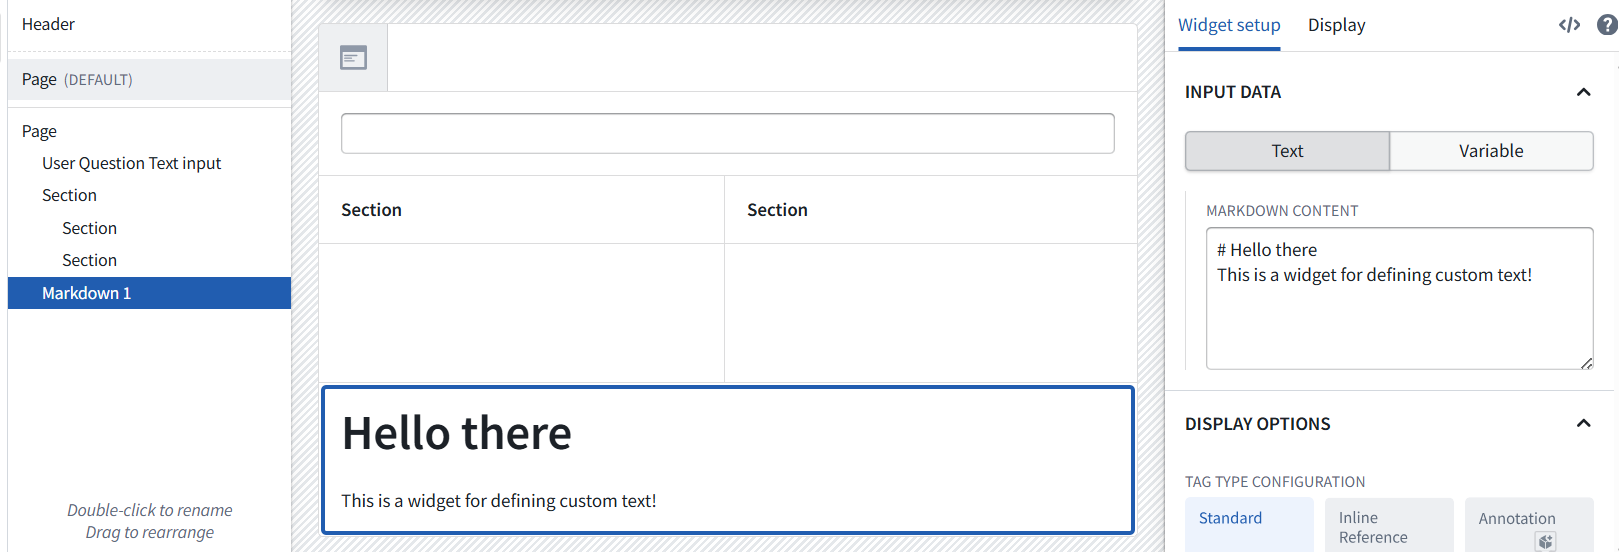
Add section at bottom.
Add a Markdown widget.
Diagram: Added markdown widget
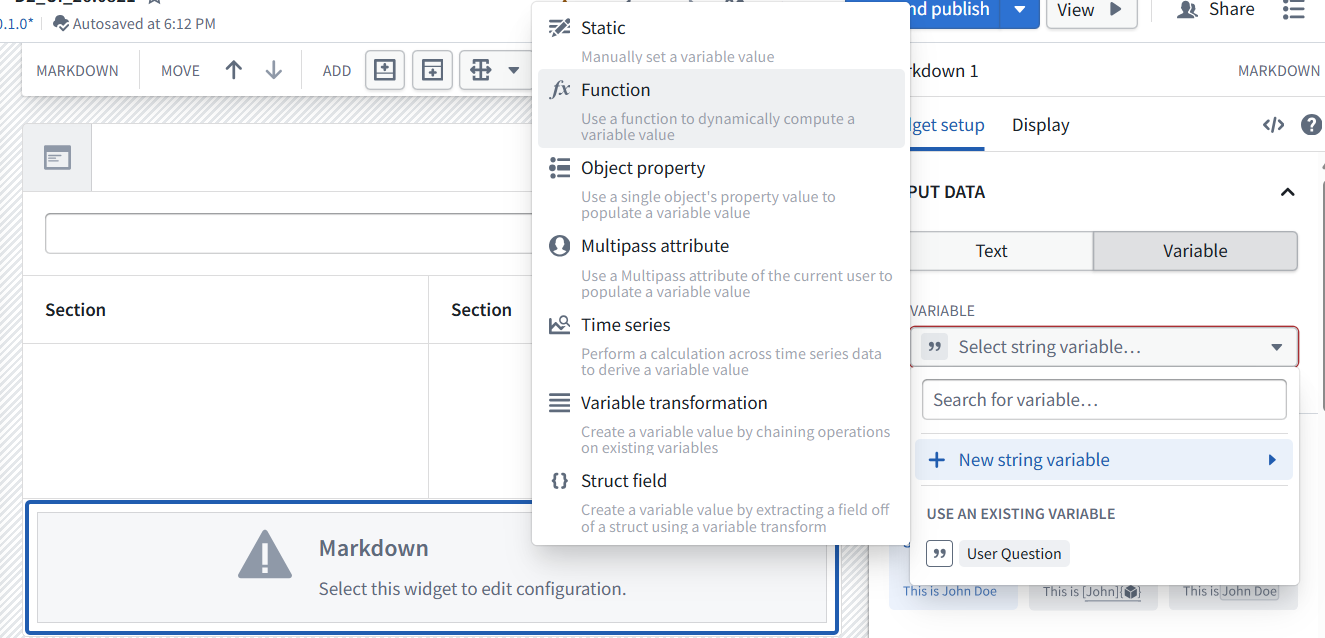
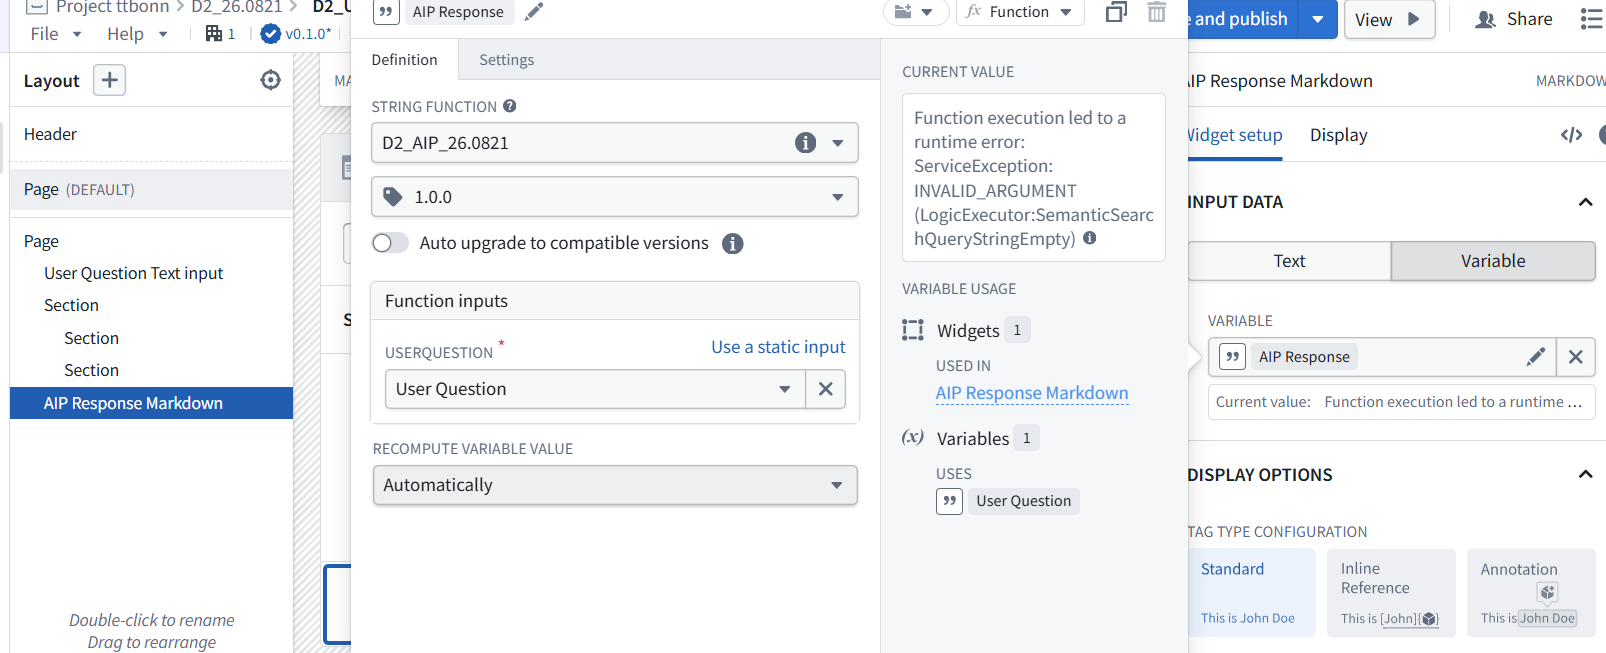
Add the AIP function as the INPUT DATA / VARIABLE / Function.
Diagram: Add a function
Add the User Question as the USERQUESTION.
Diagram: Function settings
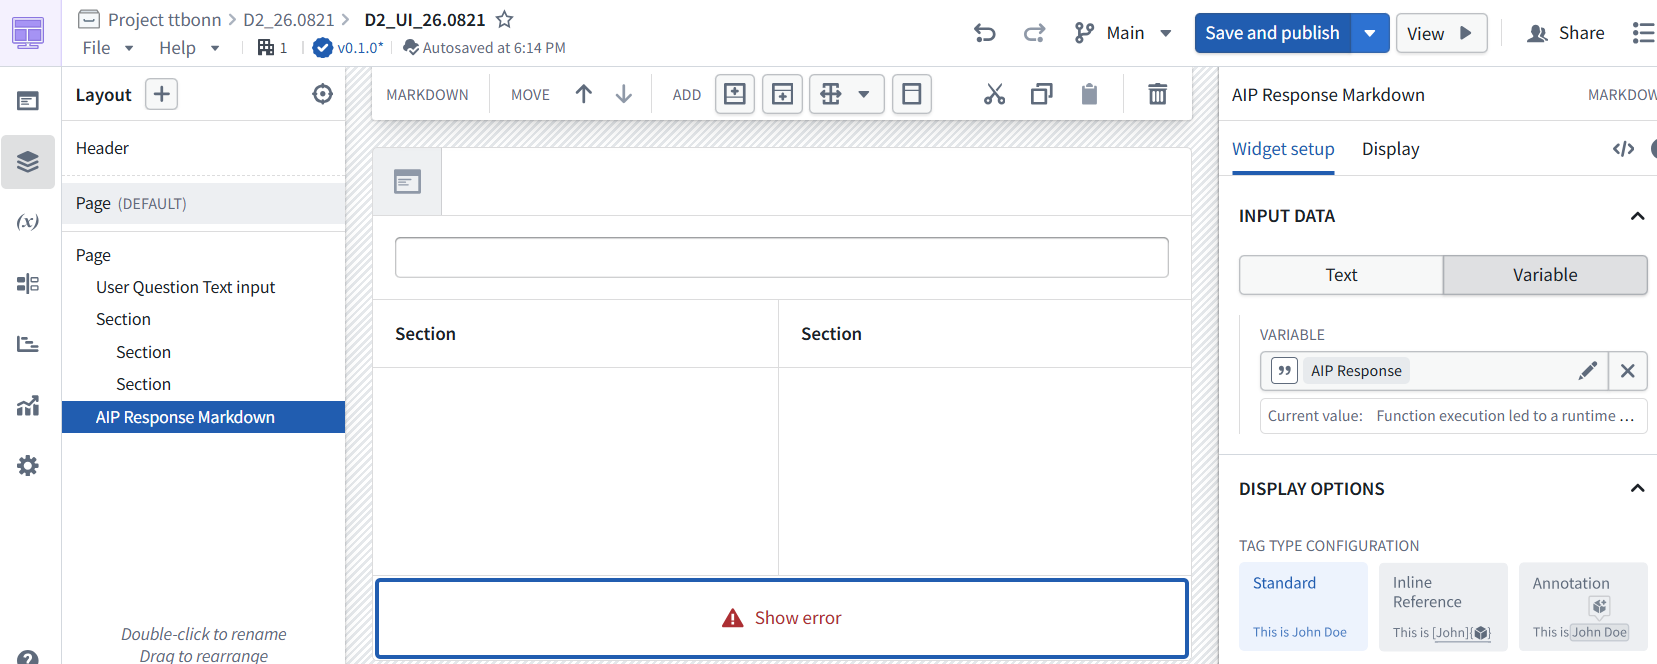
The result (the “Show error” error message is normal).
Diagram: Resulting UI
Save and publish.
Diagram: Save and publish

Diagram: UI file in the project folder
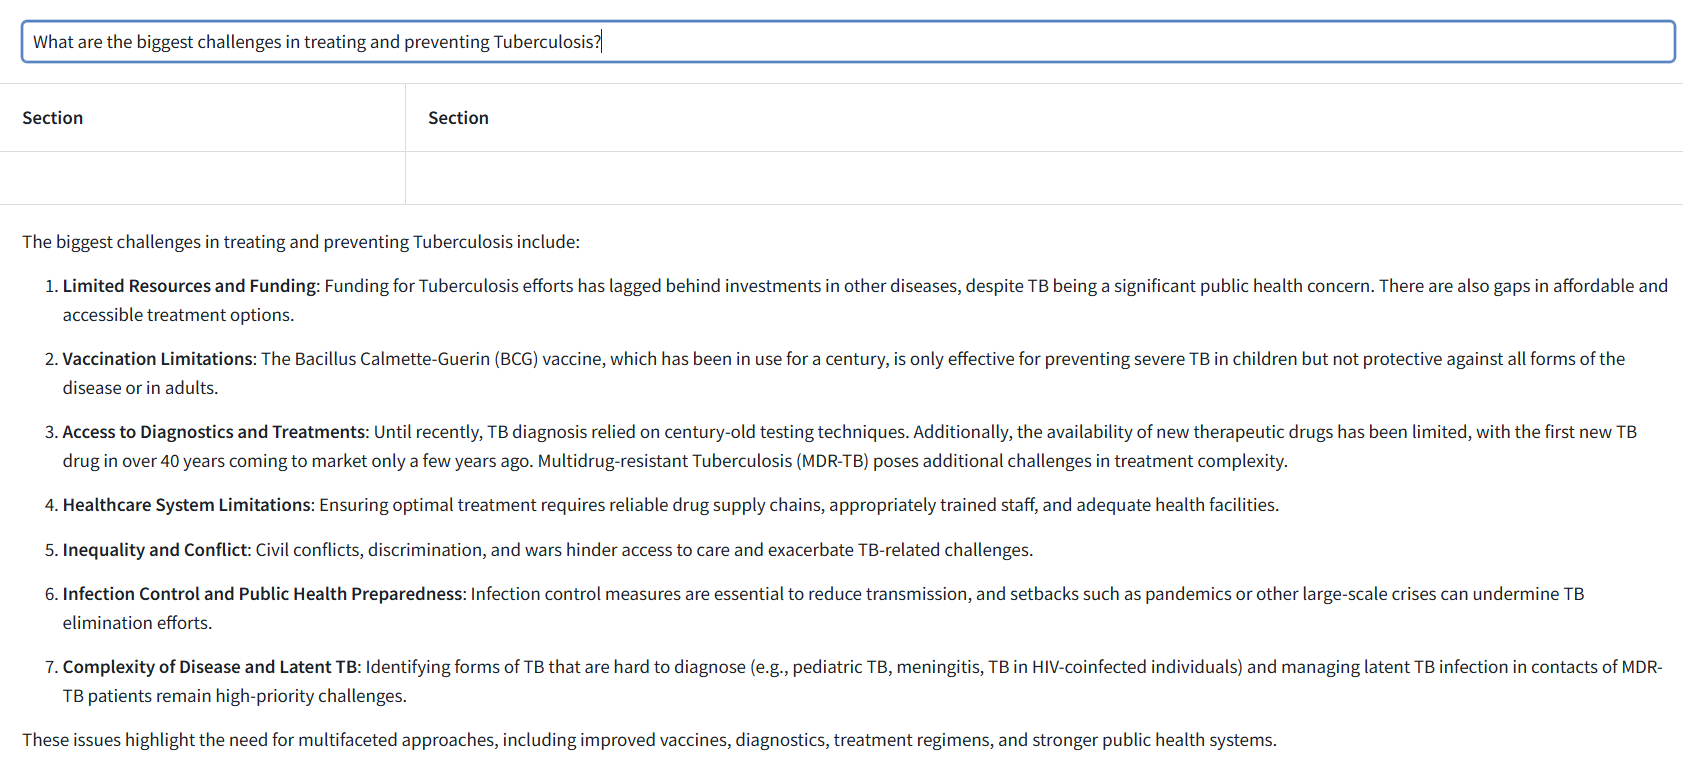
Click View.
Enter the question “What are the biggest challengers in treating and preventing Tuberculosis? The answer appears (no need to press enter).
Diagram: Enter a question about tuberculosis and the answer appearrs
26.0904 (0824, v1 26.0713)