Demo D1 ("Speedrun -- Your First End-to-End Workflow")
This page describes the ZiptieAI version of the orginal Palantir Foundry demo D1 “Speedrun: Your First End-to-End Workflow”:
- 1 Online tutorial
- 2 Demo summary
See also:
1 Demo D1 (ZiptieAI version) online tutorial
Contains all the hard info required to get the demo running ASAP.
These are the resulting 4 chapters generated (using ChatGPT) from the source file docx #610:
- (v1) Demo D1 Ch1 Concepts
- (v1) Demo D1 Ch2 Phase 1: Pipeline/ontology
- (v1) Demo D1 Ch3 Phase 2: Basic UI
- (v1) Demo D1 Ch4 Phase 3: Action UI
The tutorial text generation workflow makes it as easy as possible to constantly update the docs. 2.4 Demo documentation creation/maintenence strategy describes the doc processes in details. GPT: “This is a good example of the practical value of AI … AI does not need to replace human intelligence to be revolutionary; eliminating this kind of tedious work is already transformative”.
2 Demo summary
This simple demo introduces some of the basic Foundry building blocks used to create and govern real-world enterprise applications.
Note:
- Currently this is very bare-bones initial D1 demo documentation with minimal text.
- It is a reorganized version of the original Foundry demo.
- All screenshots are from my own demo and the major workflow diagrams are my original.
The original PAL demo version online doc is “Speedrun: Your First End-to-End Workflow”.
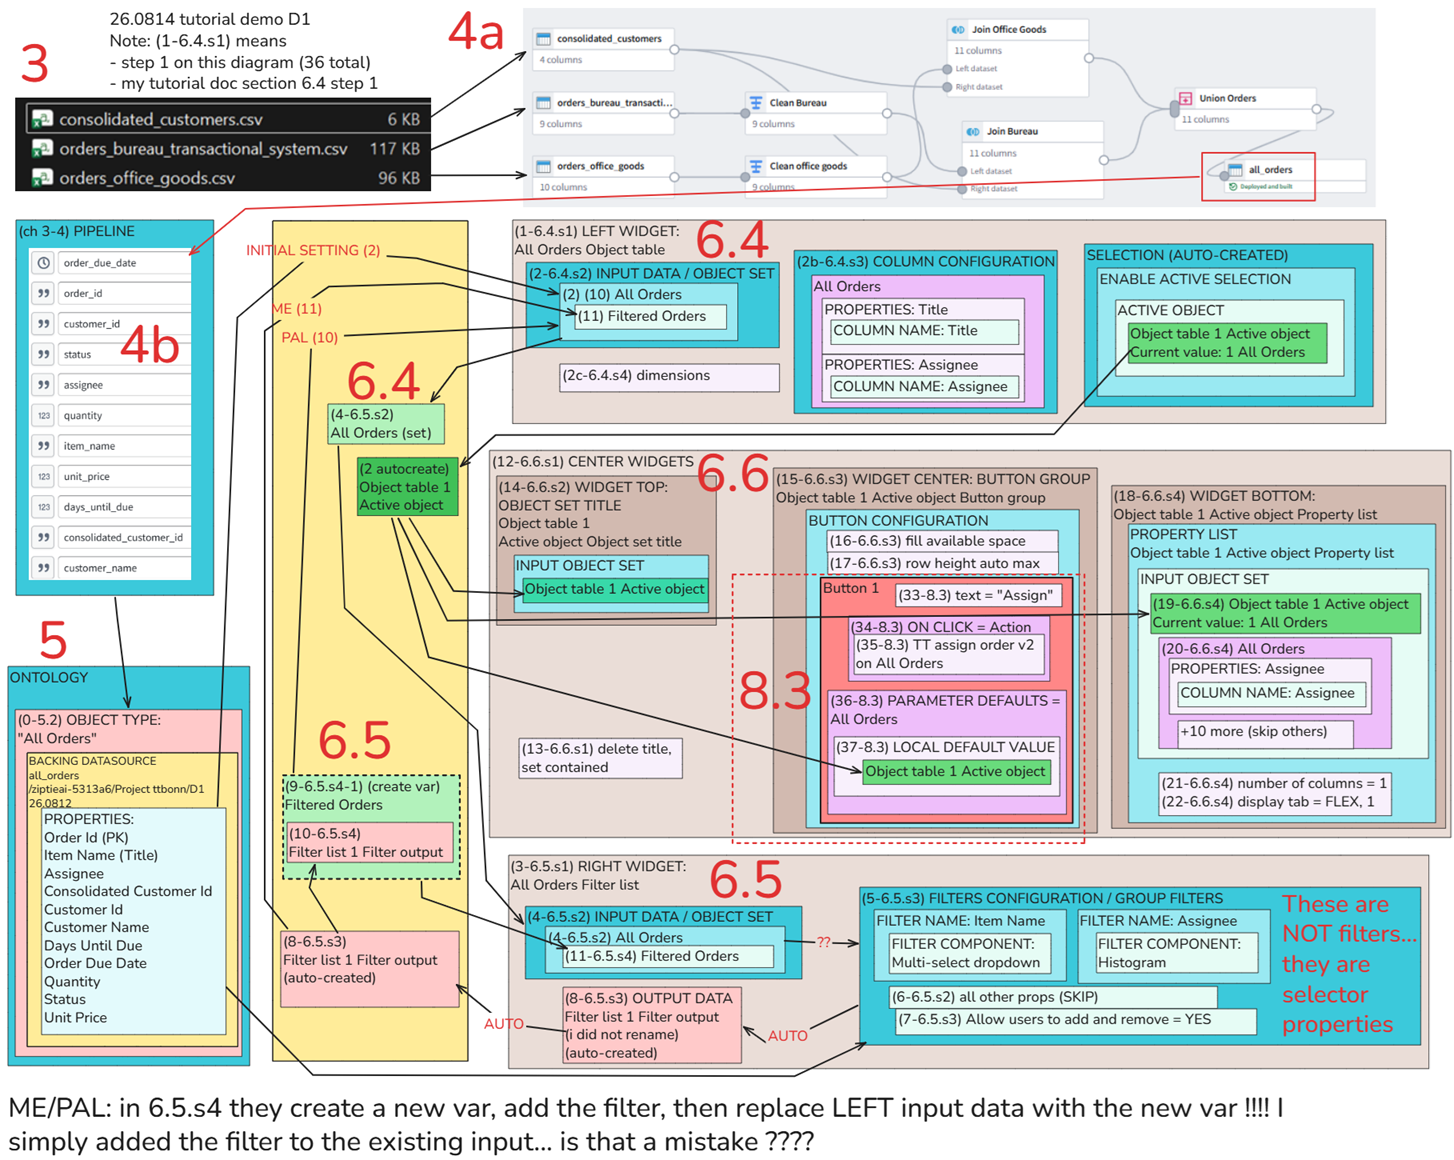
The following is the main workflow diagram (for details about this workflow see D1 workflow chats).
The following screenshots show the final result (this is a simplified version of the original PAL demo).
- RIGHT panel: The item name is set to “File Folders.” In the original demo documentation, this widget is called a “filter.” It does not filter the object list. Instead, its selection is used by the LEFT panel to create the object set that is displayed.
- LEFT panel: Displays the list of objects filtered by the item name selected in the RIGHT PANEL. Also allows you to select a single object.
- CENTER panel: The properties for the selected object are displayed.
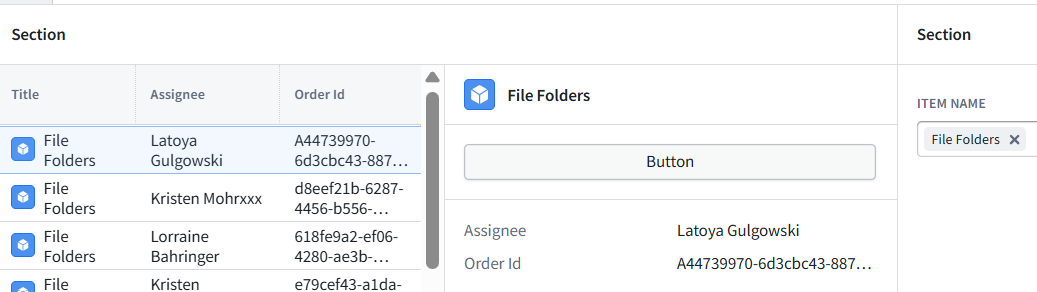
- Click the button to modify the selected object.
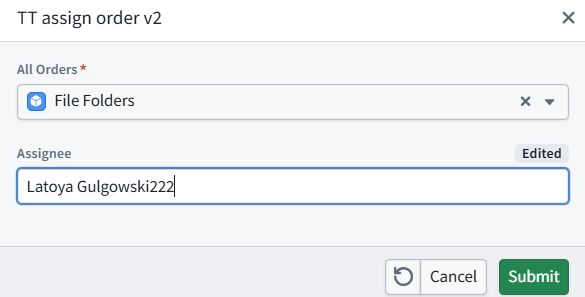
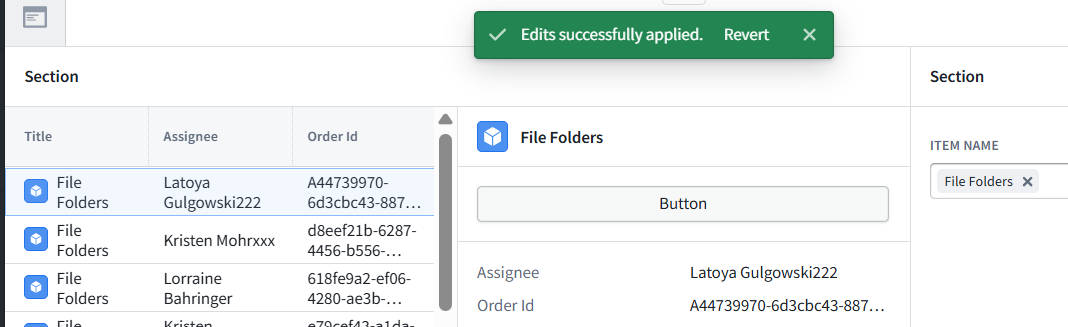
- Modify the assignee and click Submit. The action is applied and the UI displays the updated object.
This the master diagram for the entire D1 setup workflow.
26.0818 (0713, v1 26.0713)